Promotion
By clicking “Accept,” you agree to the use of cookies and similar technologies on your device as set forth in our Cookie Policy and our Privacy Policy. Please note that certain cookies are essential for this website to function properly and do not require user consent to be deployed.
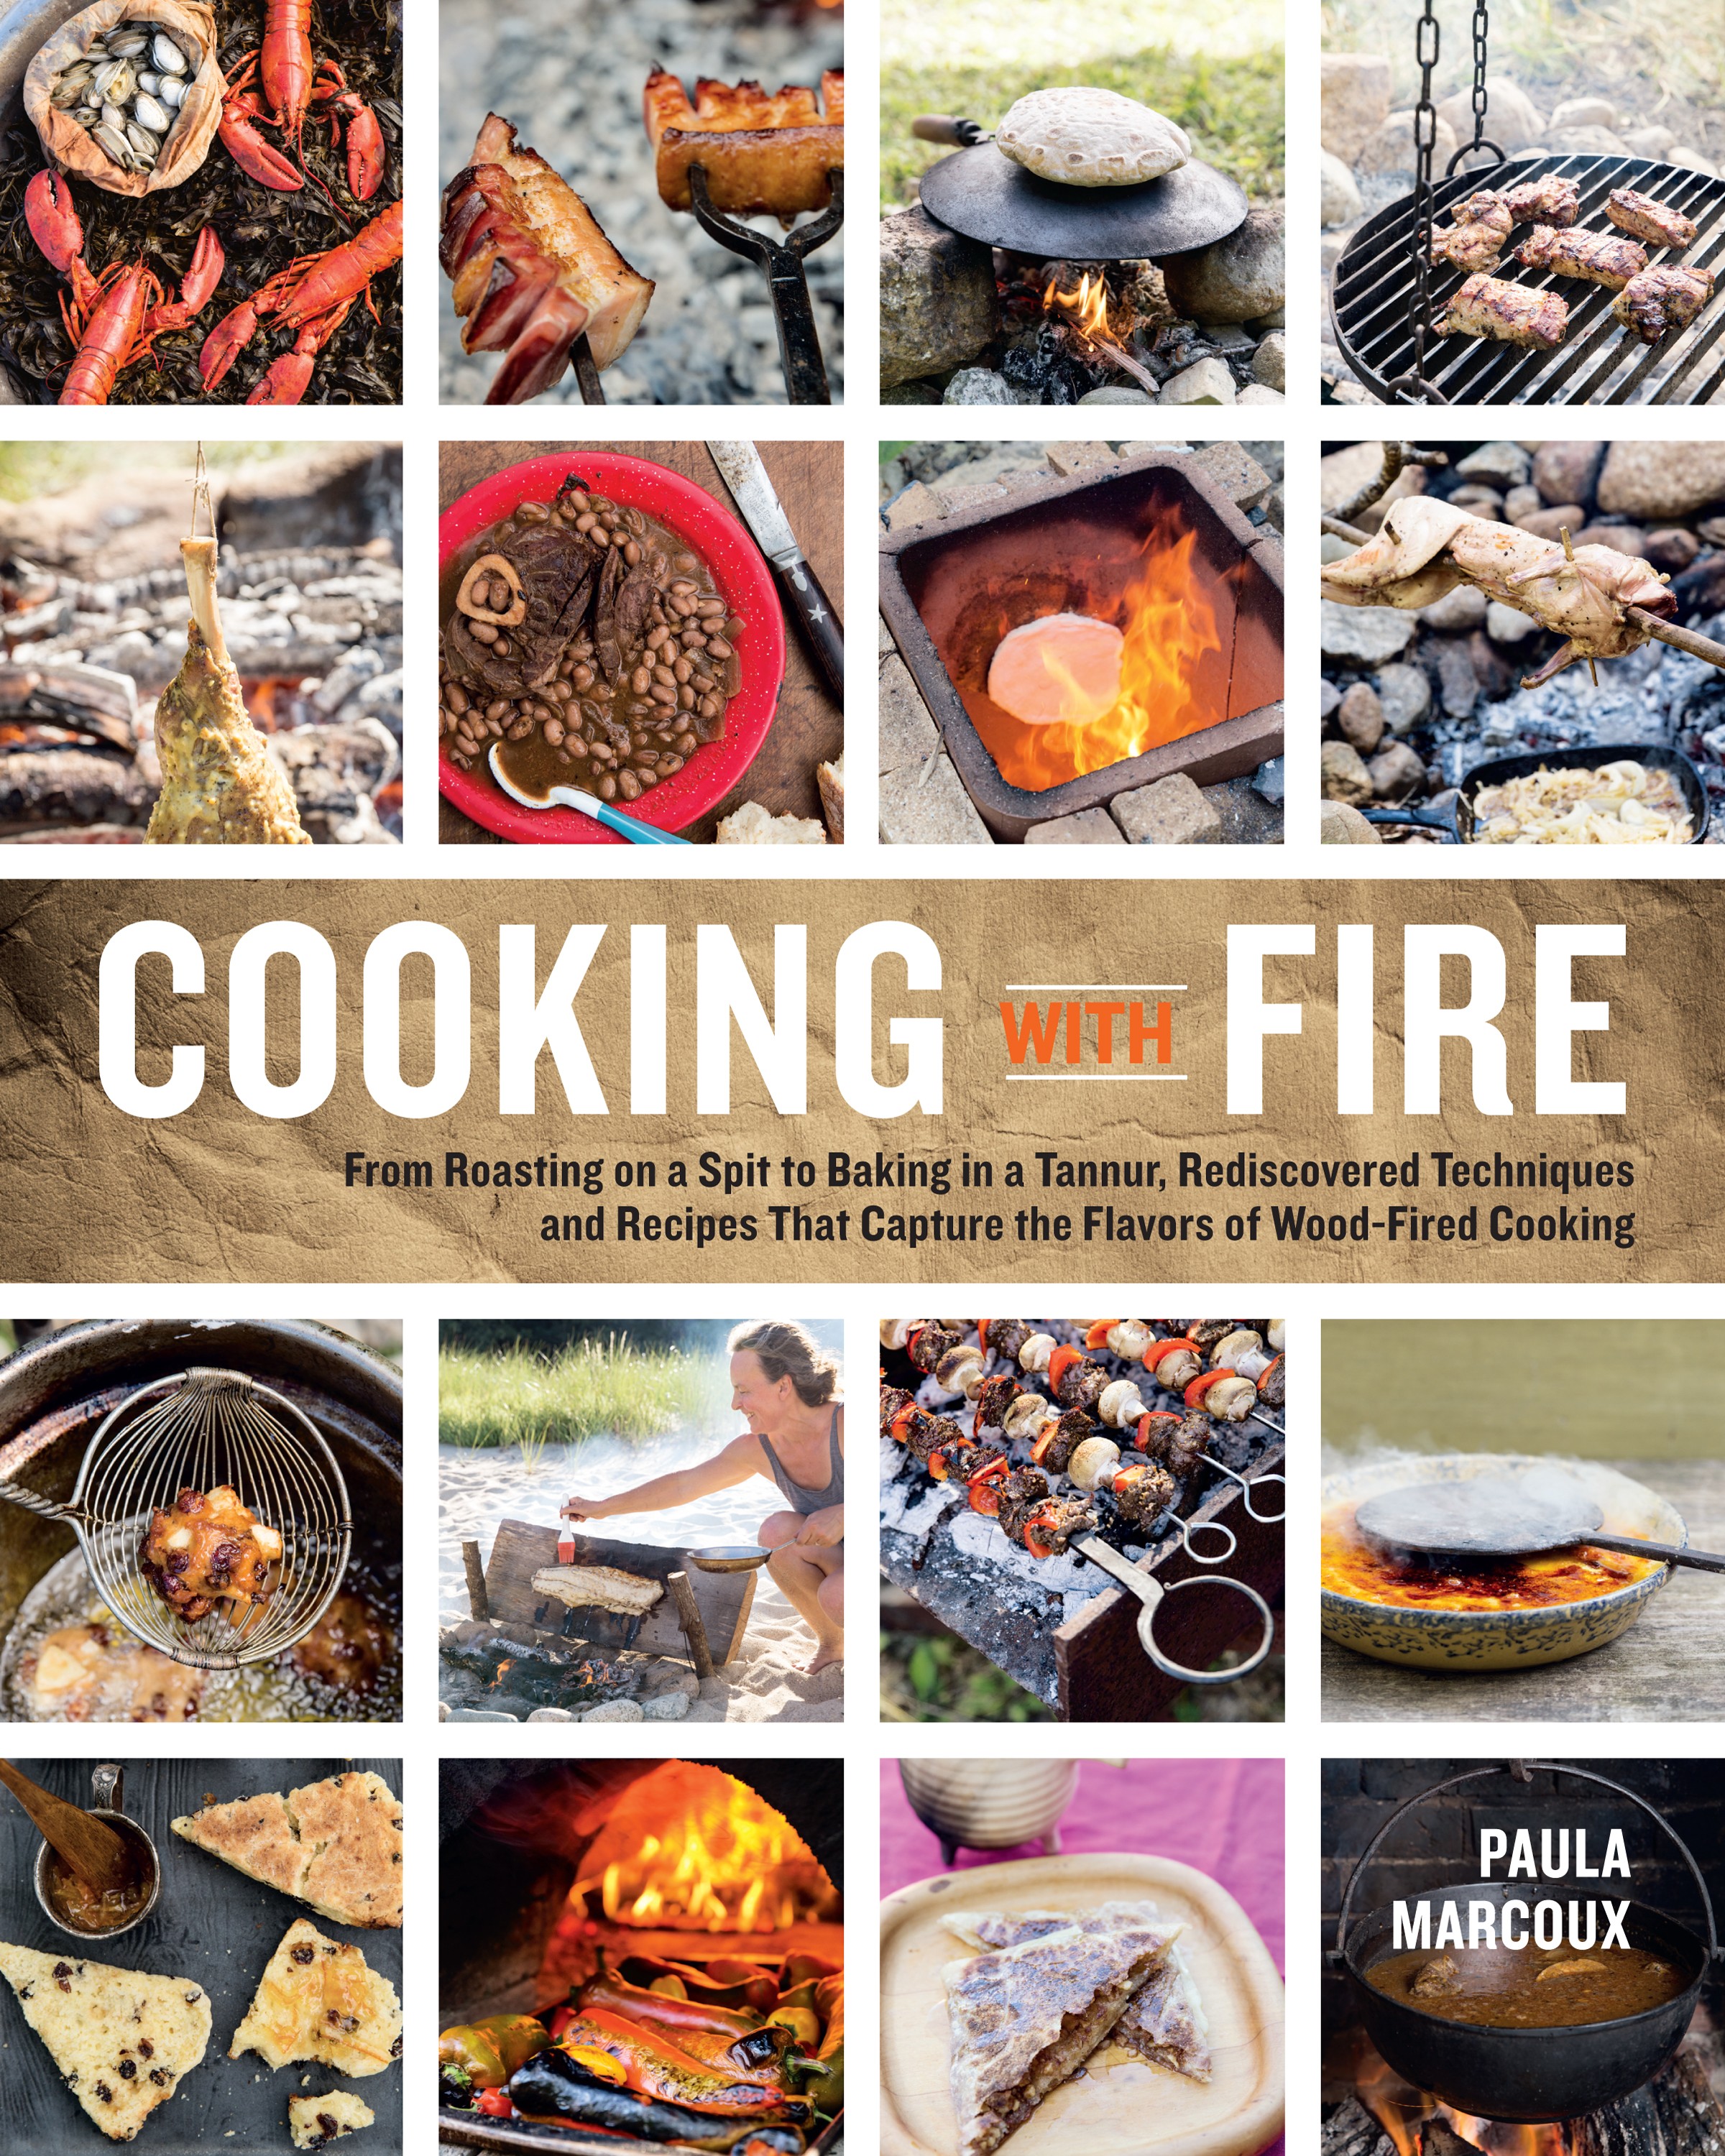
Cooking with Fire
From Roasting on a Spit to Baking in a Tannur, Rediscovered Techniques and Recipes That Capture the Flavors of Wood-Fired Cooking

Contributors
Formats and Prices
- On Sale
- May 16, 2014
- Page Count
- 320 pages
- Publisher
- Storey
- ISBN-13
- 9781603429122
Price
$11.99Price
$15.99 CADFormat
Format:
- ebook $11.99 $15.99 CAD
- Trade Paperback $22.95 $28.95 CAD
This item is a preorder. Your payment method will be charged immediately, and the product is expected to ship on or around May 16, 2014. This date is subject to change due to shipping delays beyond our control.
Buy from Other Retailers:
Revel in the fun of cooking with live fire. This hot collection from food historian and archaeologist Paula Marcoux includes more than 100 fire-cooked recipes that range from cheese on a stick to roasted rabbit and naan bread. Marcoux’s straightforward instructions and inspired musings on cooking with fire are paired with mouthwatering photographs that will have you building primitive bread ovens and turning pork on a homemade spit. Gather all your friends around a fire and start the feast.
Genre:
-
“No grill? No problem. Marcoux, a food historian, takes us back to paleo times with this outstanding book about cooking over a campground-style wood fire.”
-
“Paula Marcoux is a connoisseur of fire. She knows how to build one and how to find its sweet spot, and has deep respect for our culinary ancestors, early humans who first took to flame. Her new cookbook, "Cooking with Fire," is a refreshing departure from the pile of grilling cookbooks on the market.”
-
"As much a DIY guide to building heat-harnessing structures as it is a food history lesson with recipes.”