Promotion
Sign up for our newsletter to get 20% off sitewide!

By clicking “Accept,” you agree to the use of cookies and similar technologies on your device as set forth in our Cookie Policy and our Privacy Policy. Please note that certain cookies are essential for this website to function properly and do not require user consent to be deployed.
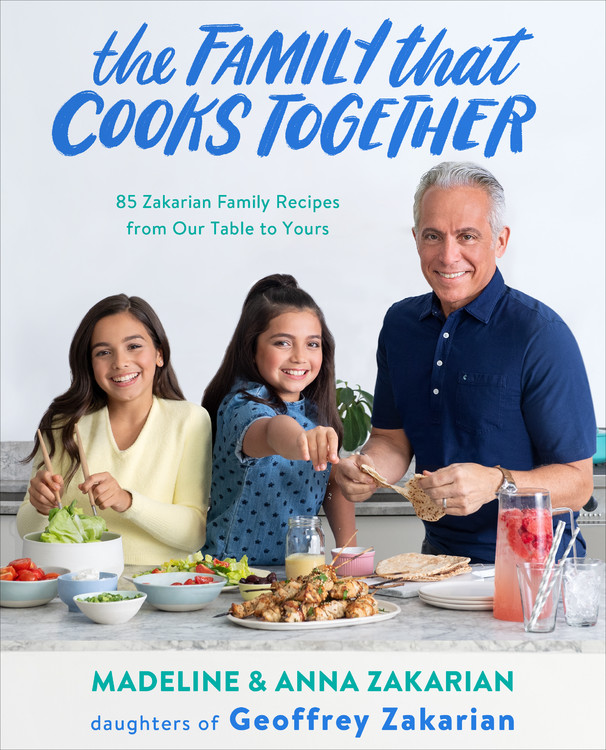
The Family That Cooks Together
85 Zakarian Family Recipes from Our Table to Yours

Contributors
Foreword by James Patterson
Formats and Prices
- On Sale
- Oct 6, 2020
- Page Count
- 192 pages
- Publisher
- Little, Brown and Company
- ISBN-13
- 9780316538381
Price
$19.99Price
$24.99 CADFormat
Format:
- Trade Paperback $19.99 $24.99 CAD
- ebook $12.99 $16.99 CAD
This item is a preorder. Your payment method will be charged immediately, and the product is expected to ship on or around October 6, 2020. This date is subject to change due to shipping delays beyond our control.
Buy from Other Retailers:
The Zakarian sisters present the #1 national bestselling and definitive cooking guide for kids and parents who want to create joy in the kitchen and at the table!
Madeline and Anna, daughters of Geoffrey Zakarian, use their experience growing up with a professional chef for a dad to bring some of their favorite recipes to the world. You don’t have to be a foodie to love good food, and you definitely don’t need to be an adult to make a great meal.
Join the Zakarian sisters as they introduce you and your family to 85 delicious dishes, drinks, and snacks for cooks of all abilities. Along with easy-to-follow instructions, Madeline and Anna share their tricks of the trade on a variety of tasty recipes, from savory breakfasts to sweet desserts—and all their go-to items in between. Mouthwatering photographs of every recipe show you how each dish will turn out in this fun cookbook for the whole family!