Top Ten Dirt-Cheap Gardening Tips
I learned to garden from my grandmothers, both of whom were rural, Depression-era brides with four children to feed. They couldn’t afford to make too many mistakes, so they did what worked and did it with what they had on hand. Poor ancestors are the surest route to resourcefulness.
I wish I could tell you there were lots of spiffy, easy, new ways to save money in the garden, but not much has changed since my grandmothers’ day. There are, however, some new pitfalls to avoid.
People are always asking me if I’m sure it’s cheaper to raise my own food than to just buy it at the store. This skepticism is our first pitfall, which leads us to our first tip:
1. Spend more than money. We expect to spend time and effort on our gardens, while cutting the cost in dollars. But consider the other real costs of the alternative — buying mass-produced, mass-stored, mass-shipped, and mass-marketed food. From pesticides and other pollutants, to bacterial breakouts, to labor conditions in the countries of origin, to the carbon footprint of transport, to the severely restricted number of varieties and types of fruits and vegetables offered in stores (based on how well the produce holds its color and shape, not how good it tastes or how nutritious it is), there are far more costs to buying food in a grocery store than just the price per pound. So the answer is, yes, I’m sure. The rest of these tips are far from new; they have withstood the tests of time and grandmas. But as you go forth with shovel in hand and these in mind, they are sure to inspire you to ever cheaper and more creative ways to implement them.
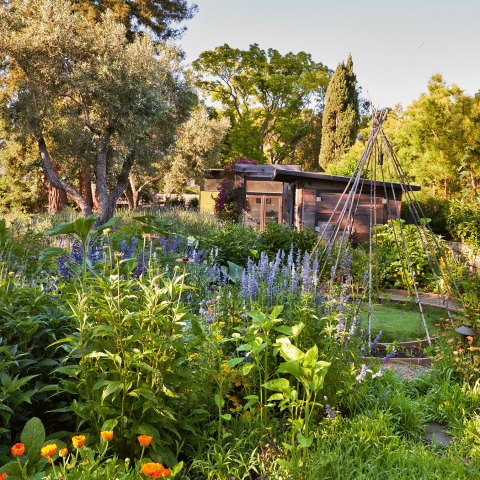
2. Plan and plot. Most years we have six months of winter here, so I love to draw plans for my garden. Not a lot else you can do after the harvest is in and before the snow melts on Mt. Spokane. But planning what goes where is more than just dawdling doodling; it’s critical to healthy crops. Crop rotation is one of the simplest (and cheapest!) ways to cut down on soilborne pests and diseases. The rule of thumb is never plant the same, or closely related, crops in the same garden area two years in a row and, if possible, rotate plantings so that related plants don’t grow in the same spot again for three to four years.
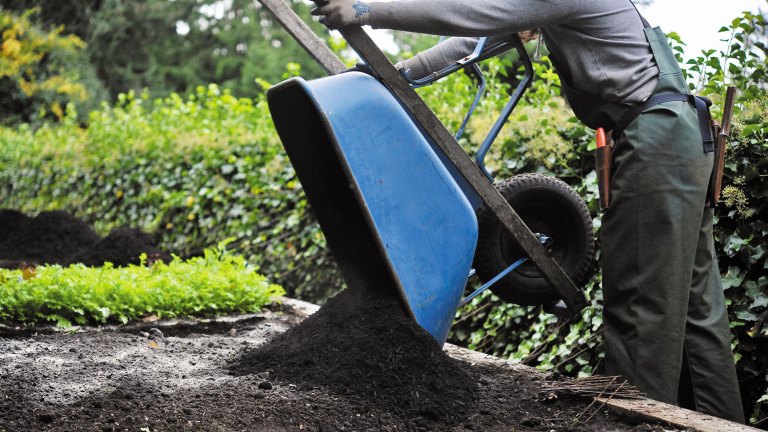
3. Prepare. Few things will reward you more generously than deeply prepared, generously amended soil. Plants will grow robustly, which wards off insect and disease damage, and will produce early and abundantly. The best time to amend the soil is in the fall. Pile unfinished compost or semiraw animal manures (bedding from a stable, animal farm, chicken house, and so on, but no dog, cat, or pig feces) on the beds and allow it to “mellow” throughout the winter. Come spring, the soil beneath the compost will be soft and ready for you to spade in the amendments.
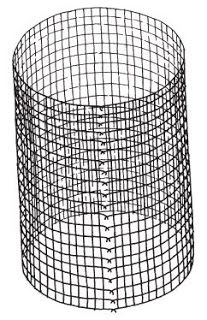
4. Compost. You don’t need a fancy bin — a 12-foot section of 2-by-4-inch welded wire rolled into a cylinder works well to keep composting components in place, or just build a freestanding pile, roughly 4 feet square. (The minimum recommended size is 3 feet square, but without something to hold it all together, a little extra accounts for what gets lost around the edges.) The cheapest way is to pile weeds and barnyard animal manure if you can get it (there are people who will pay you to haul it away) in alternating layers. The ideal mix is 25 parts “green” or nitrogen-rich parts (fresh weeds, fresh manures) to 1 part “brown” or carbon parts (dried weeds, dried manures). Sprinkle with water as you build the pile, and turn it occasionally. While some methods and measurements work faster than others, if you pile it, water it, and turn it even just a few times over the course of a decade, the pile will rot, and eventually, you will have compost. This is a great example of choosing what you want to spend. Time? Sweat? Muscle?
5. Mulch. Old straw is often discarded by farmers or farm stores. It won’t be the bright, golden, sweet-smelling stuff that inspired legends about spinning it into gold; it will more likely be half rotted, grey, and maybe even a little slimy. Great! Already on the road to becoming compost. Spread it a few inches deep around seedlings or larger plants to conserve moisture and keep roots cool (with a few exceptions: around strawberries, for example, straw mulch is an open invitation to $#$%! underground yellow jacket nests and marauding slugs).
Alternatives include shredded newsprint (avoid those with colored inks, however, as they may contain heavy metals), rice hulls, grass clippings, or leaves. Don’t use hay; it’s full of grass seeds, not a welcome addition to the garden. As for new pitfalls, avoid cocoa husks; they are toxic to dogs. Be sure any grass clippings or leaves used have not been sprayed with pesticides or long-lasting broadleaf weed killers; they can kill your garden.
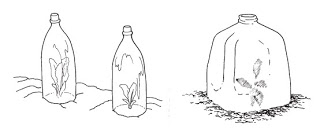
6. Reuse and recycle. Remember those 2-liter Coke bottles? Cut out the bottoms to make individual cloches for small, tender plants, or cut out the tops and poke a few holes in the bottoms to make planters. Using straw for mulch? At the end of the season, dig it directly into the beds to boost the soil’s organic matter content, or rake it into the paths to smother weeds, or incorporate it into the compost pile. Clean plastic planters with a little soapy bleach water, and reuse for years.
Last year’s garden hat is this year’s scarecrow head. Old boards can be used to build garden beds. Old sections of pipe driven into the corners of the beds make dandy hose guides for when you’re lugging the hose around the garden. An old wheelbarrow is just begging to be used as a planter. Cut opaque plastic jugs into strips, and use a permanent marker to create plant tags or stakes.
7. Water just enough. Water is fast becoming a scarce commodity. Though hand watering takes time, it is the surest way to deliver water where you want it (that is, at root level). A great alternative that is cheap in terms of water use but requires a small outlay of money up front for materials is installing a drip watering system. Don’t let garden plants go thirsty, as water stress will cut productivity and increase the risk of plant diseases or pests.
8. Eliminate the competition. I have only one good thing to say about weeds: some of them — dandelion leaves, lamb’s-quarter, or purslane — are nutritious. Talk about cheap eats! Best of all, they are always the first to sprout, so for a few brief weeks, you might even allow a few to grow in the garden, “harvesting” rather than merely weeding. But once your crop seeds or seedlings begin to grow, the weeds must go! (Remember, they make great cheap compost components.) Otherwise, they will steal water, sunlight, and nutrients from your intended harvest.
Likewise, keep a vigilant eye out for garden pests, and hand pick, spray, or fence out whenever necessary. There is no acceptable loss in the garden. Once bugs or beasts find your feast, they will consider it all theirs! My favorite bug and critter deterrent is a chicken moat, a 7-foot-wide fenced chicken run all around the garden. The chickens keep weeds down around the garden perimeter (a prime source of bugs and some diseases), stop everything from deer (yes, deer!) to insects (especially grasshoppers) from invading the garden from the outside, and make short work of any culled plants or hand-picked bugs I toss their way, all while providing free fertilizer and eggs.
9. Harvest on time. After all you go through to grow your own select varieties, don’t blow it with bad timing. No more green tomatoes! (Unless you like them that way. . . .) No more overripe fruit. Learn when fruits and veggies are at their peak, and pick then. For example, you can start to harvest leafy greens as soon as the leaves are large enough to pluck; pick young leaves, early in the day for the most tender, tasty salads of your life. Waiting too long will allow them to get large, gritty, tough, and bitter. Another cheap (free!) bonus: for many crops picking early and often enhances production.
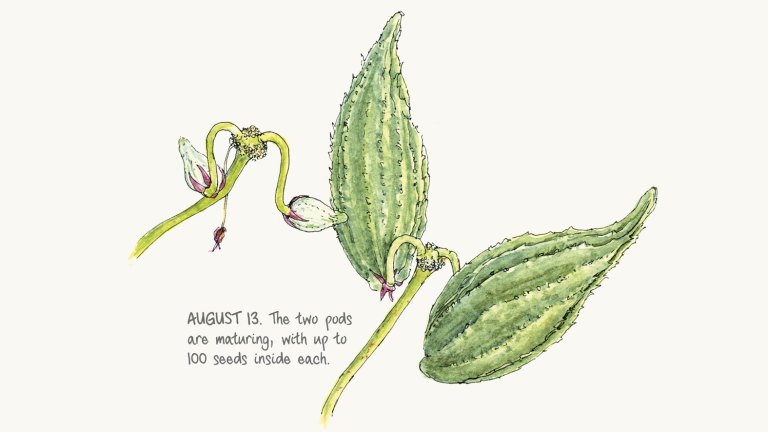
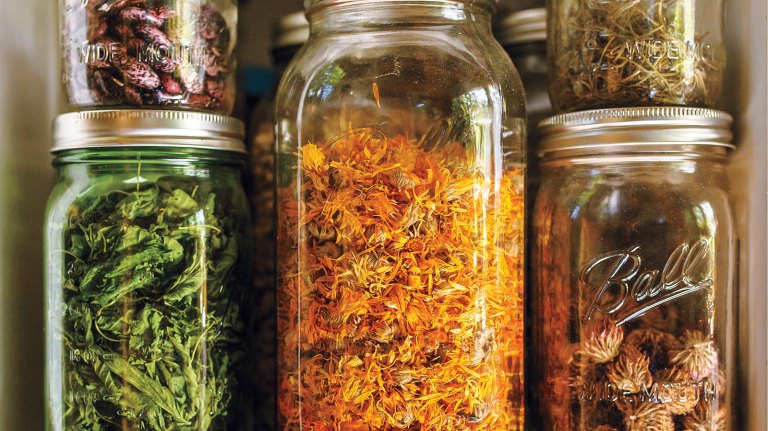
10. Save seeds. To do this, you must plant open-pollinated (often called heritage or heirloom) varieties. There are some downsides to this, as many excellent developments in productivity, taste, disease, and pest resistance have been made in hybrid plant breeding, but hybrids do not (reliably) set seed. And when they do, there is no guarantee that their seeds will produce anything you’ll want to eat. Seed saving also allows you to perfect the best strain for your garden — in your soil and your microclimate — and to your taste. And best of all, it’s free.
Learn More

Related Books
-
Gardening with Less Water
-
Groundbreaking Food Gardens
-

The Complete Compost Gardening Guide
-
Saving Seeds