By clicking “Accept,” you agree to the use of cookies and similar technologies on your device as set forth in our Cookie Policy and our Privacy Policy. Please note that certain cookies are essential for this website to function properly and do not require user consent to be deployed.
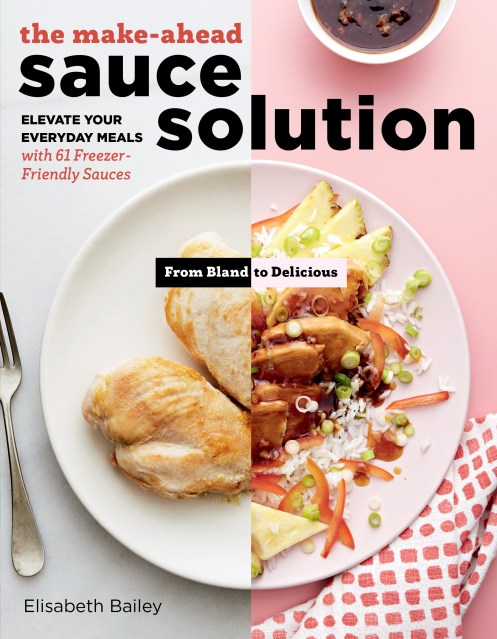
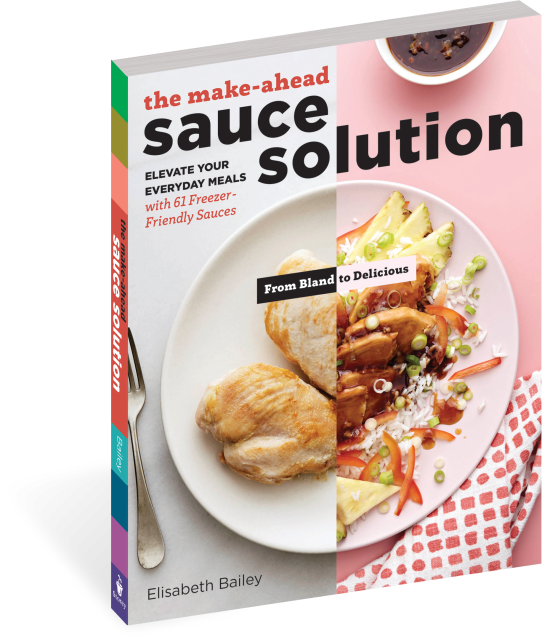
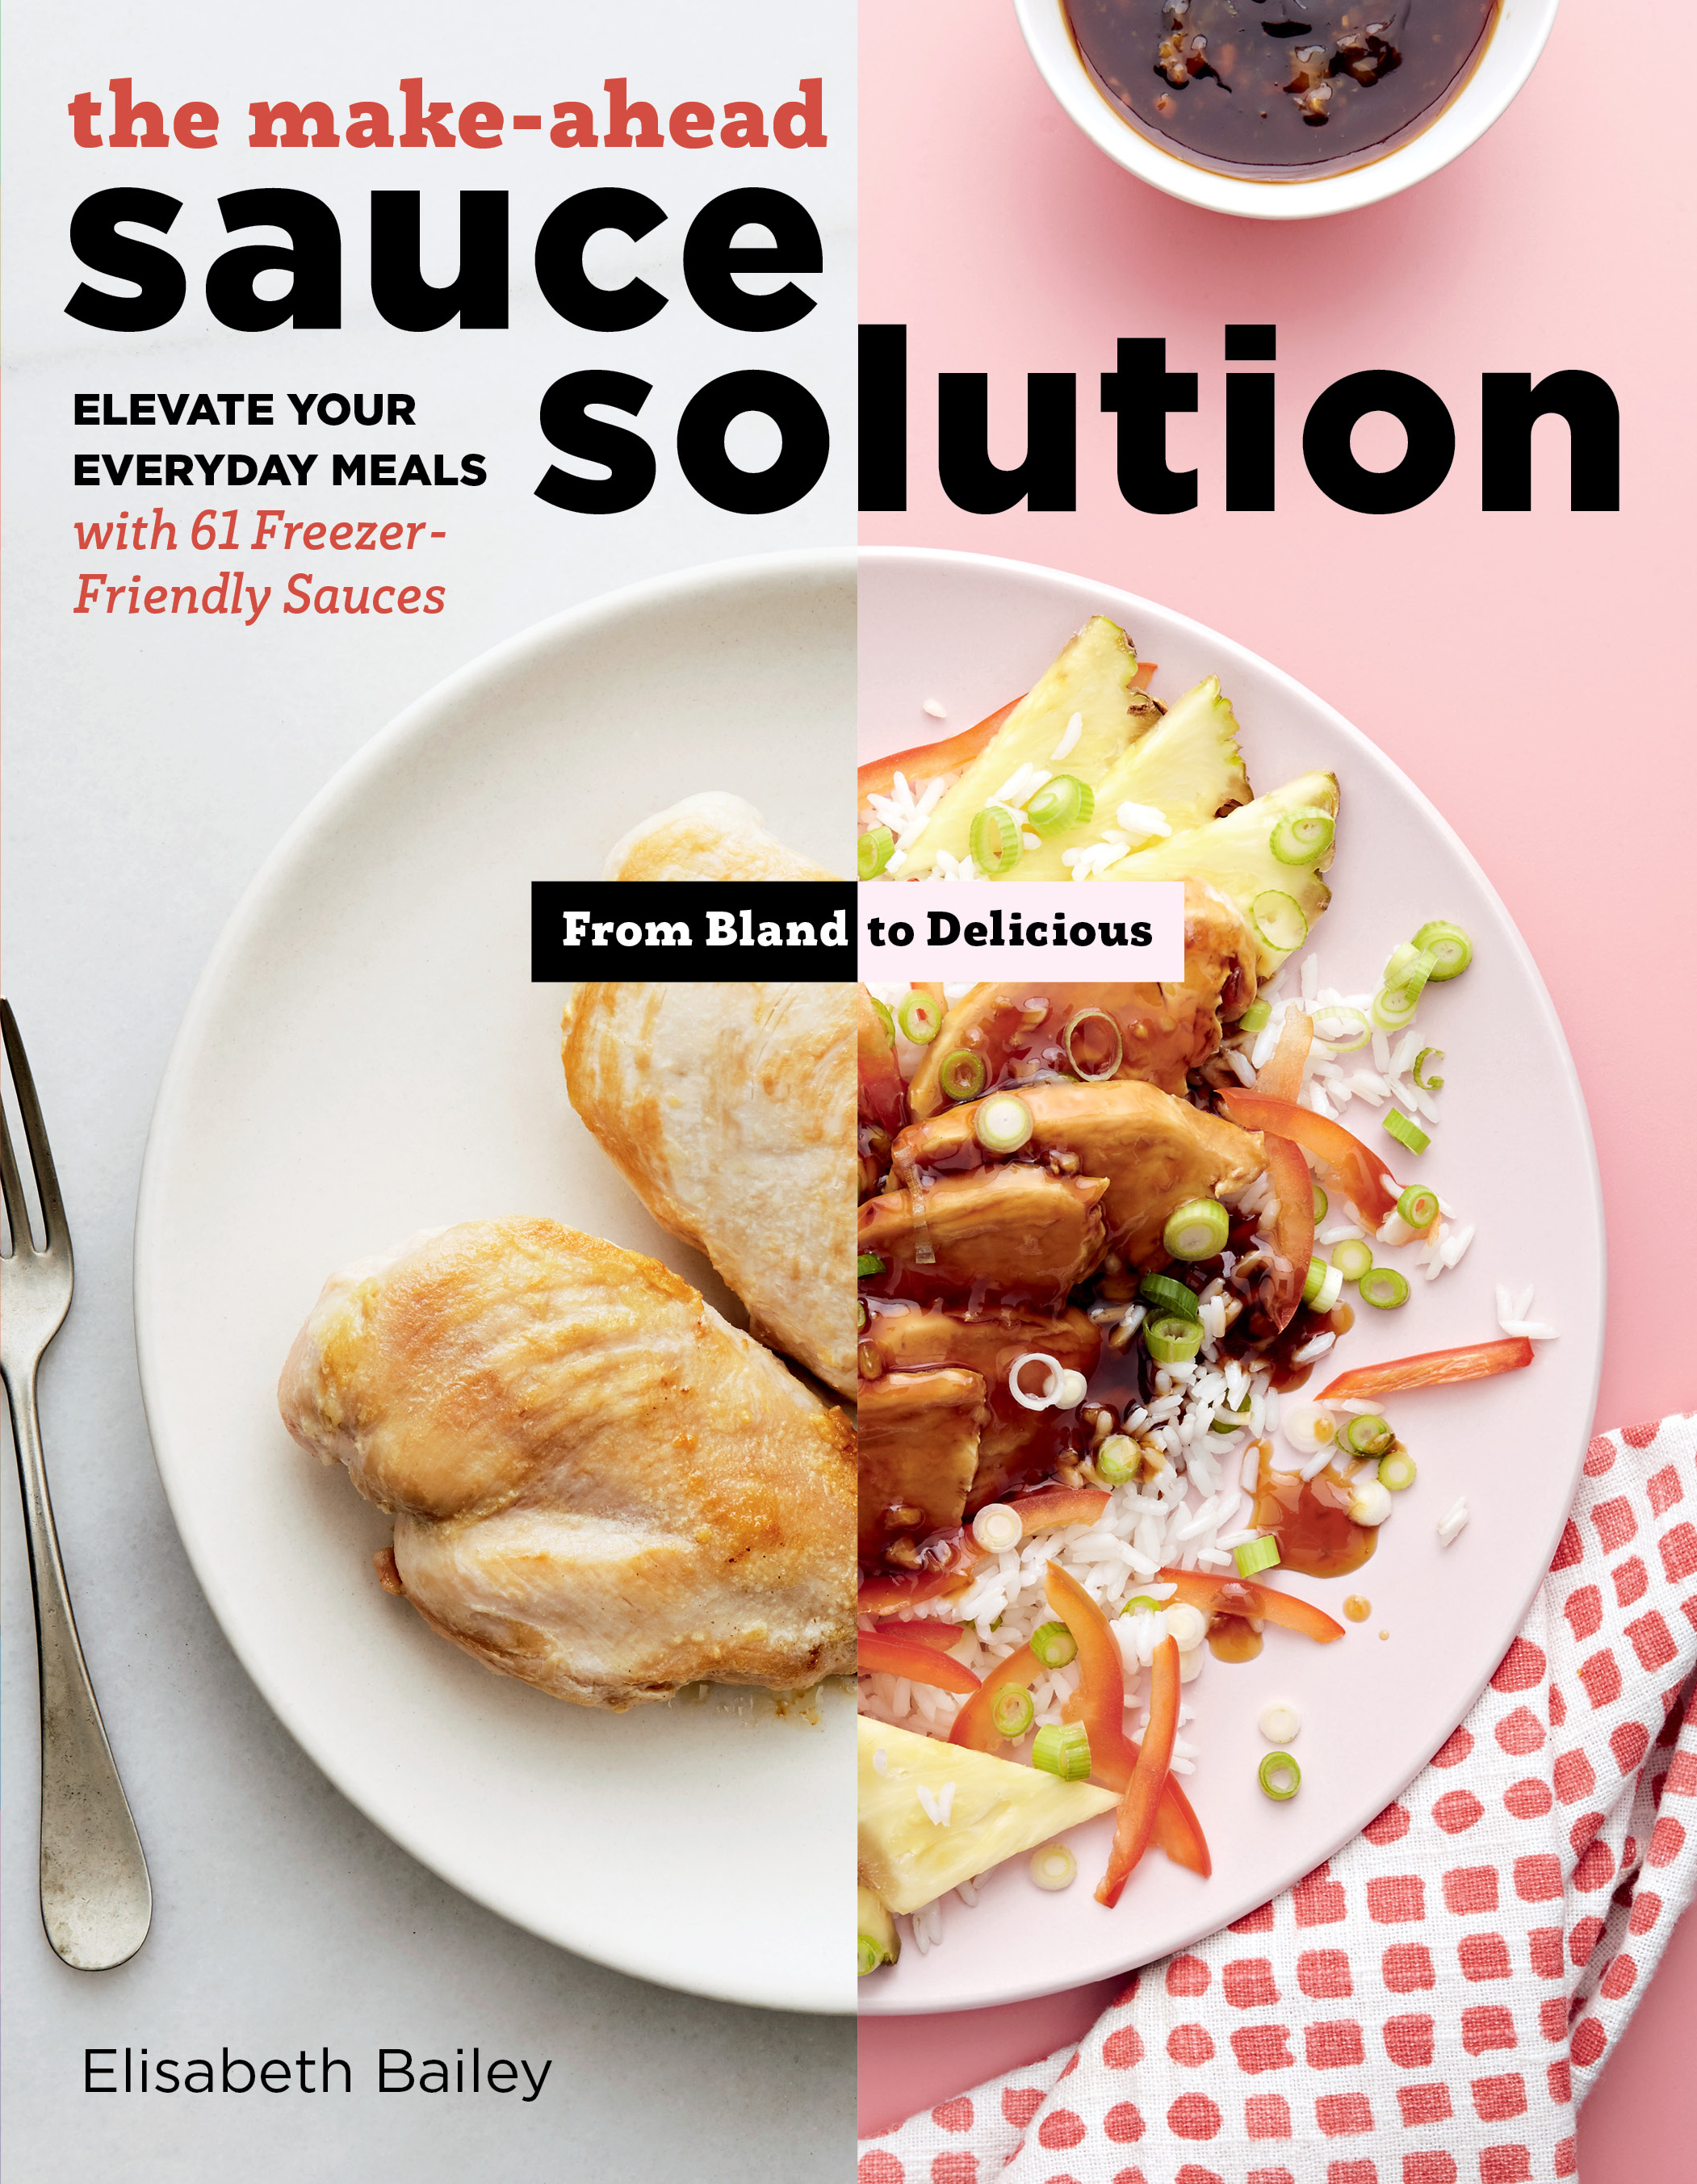
The Make-Ahead Sauce Solution
Elevate Your Everyday Meals with 61 Freezer-Friendly Sauces


Contributors
Formats and Prices
Price
$16.95Price
$22.95 CADFormat
Format:
- Trade Paperback $16.95 $22.95 CAD
- ebook $11.99 $15.99 CAD
This item is a preorder. Your payment method will be charged immediately, and the product is expected to ship on or around October 14, 2018. This date is subject to change due to shipping delays beyond our control.
Also available from:
From chimichurri to teriyaki, sauces make our mouths water — and our meals shine! Bland chicken breasts, plain pasta, or simple baked potatoes are transformed into memorable dishes with the addition of sauce.
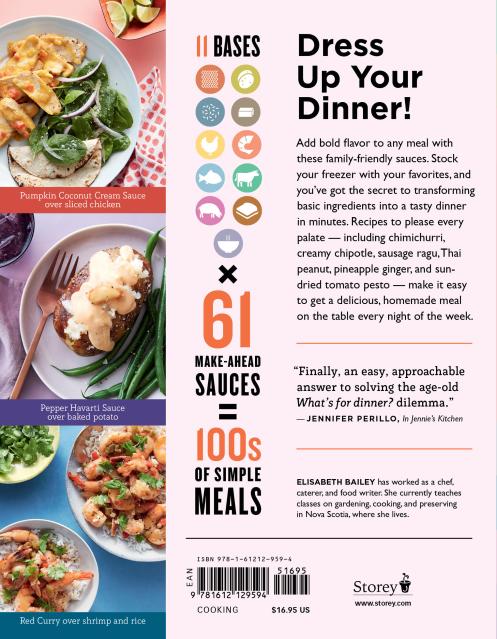
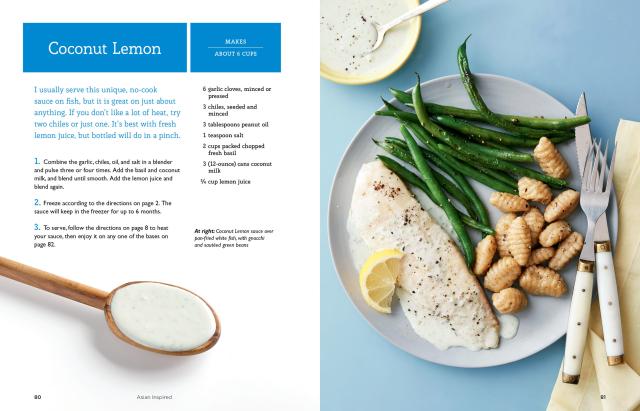
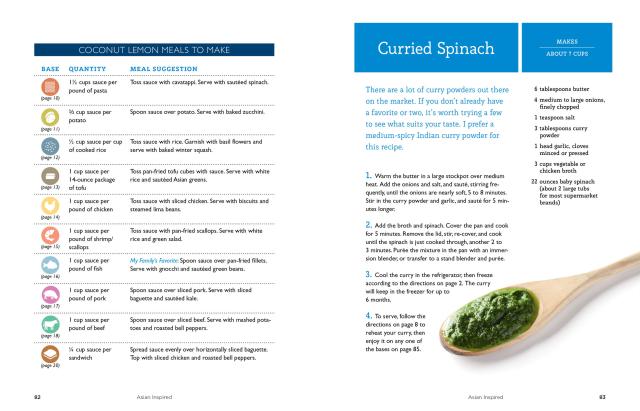
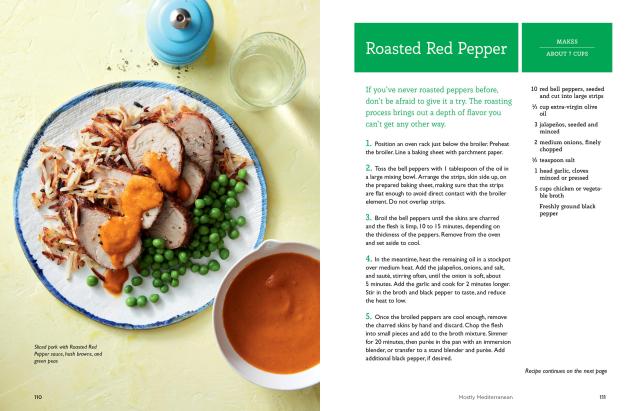
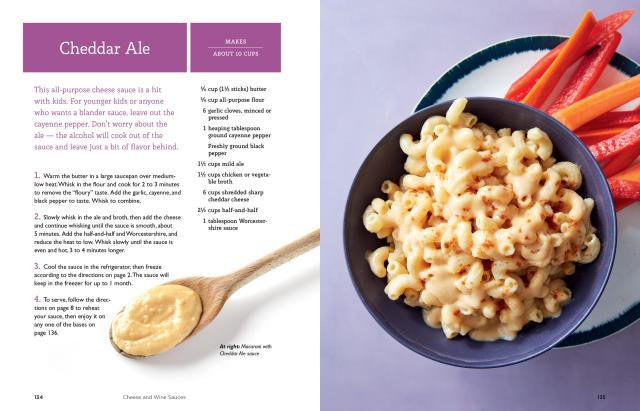
The Make-Ahead Sauce Solution features 61 flavor-packed recipes for sauces that freeze beautifully and make home cooking easy. They run the gamut from traditional sausage ragu to Thai peanut, Gorgonzola chive butter, all-American barbecue, coconut lemon, Parmesan leek, cheesy cashew garlic, and Meyer lemon spinach. Every recipe is accompanied by a quick-reference chart showing the best base combinations of proteins and vegetables. The struggle to make imaginative, flavorful weeknight meals is over. With a few of these sauces stashed away in the freezer, a great meal can be topped off in minutes.
The Make-Ahead Sauce Solution features 61 flavor-packed recipes for sauces that freeze beautifully and make home cooking easy. They run the gamut from traditional sausage ragu to Thai peanut, Gorgonzola chive butter, all-American barbecue, coconut lemon, Parmesan leek, cheesy cashew garlic, and Meyer lemon spinach. Every recipe is accompanied by a quick-reference chart showing the best base combinations of proteins and vegetables. The struggle to make imaginative, flavorful weeknight meals is over. With a few of these sauces stashed away in the freezer, a great meal can be topped off in minutes.
-
“A useful resource on preparing sauces to enhance otherwise routine dinners. This well-organized guide should be helpful to home cooks looking for time-saving ideas.” — Library Journal
“Finally, an easy, approachable answer to solving the age-old “what’s for dinner?” dilemma. No need to spend precious weekend hours prepping meals. Elisabeth offers creative, adaptable recipes to dress up a myriad of vegetables and proteins, making home cooking attainable even on busy weekdays.” — Jennifer Perillo, In Jennie’s Kitchen
“Brilliant! Elisabeth’s system of pre-made sauces to jazz up a simple last-minute family meal is a weeknight game-changer!” — Wendy McCallum, RHN and author of No More Junk Food and The Real Food Solution
- On Sale
- Oct 14, 2018
- Page Count
- 200 pages
- Publisher
- Storey
- ISBN-13
- 9781612129594
You May Also Like

Newsletter Signup
By clicking ‘Sign Up,’ I acknowledge that I have read and agree to Hachette Book Group’s Privacy Policy and Terms of Use