Promotion
Use code SIZZLE26 for 25% off sitewide!

By clicking “Accept,” you agree to the use of cookies and similar technologies on your device as set forth in our Cookie Policy and our Privacy Policy. Please note that certain cookies are essential for this website to function properly and do not require user consent to be deployed.
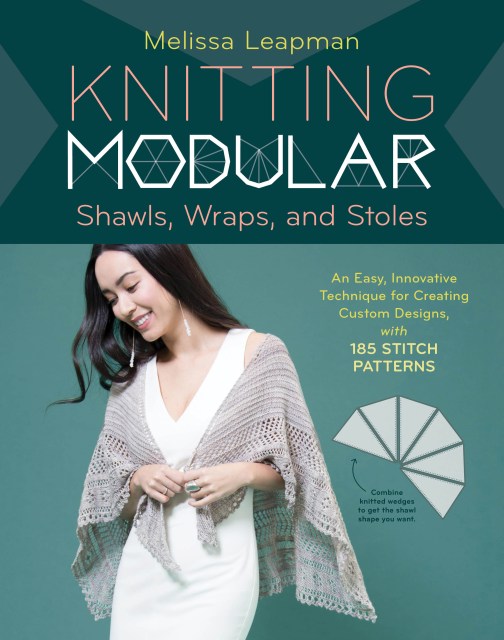
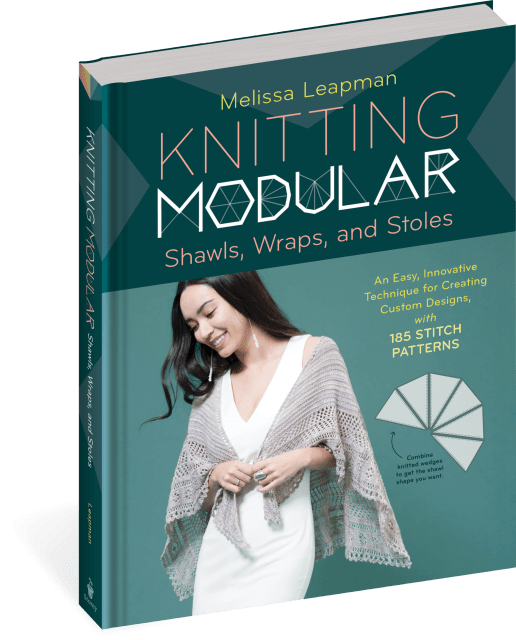
Knitting Modular Shawls, Wraps, and Stoles
An Easy, Innovative Technique for Creating Custom Designs, with 185 Stitch Patterns


Contributors
Formats and Prices
- On Sale
- Dec 25, 2018
- Page Count
- 288 pages
- Publisher
- Storey Publishing, LLC
- ISBN-13
- 9781612129969
Price
$32.00Price
$43.00 CADFormat
Format:
- Hardcover $32.00 $43.00 CAD
- ebook $15.99 $20.99 CAD
This item is a preorder. Your payment method will be charged immediately, and the product is expected to ship on or around December 25, 2018. This date is subject to change due to shipping delays beyond our control.
Buy from Other Retailers:
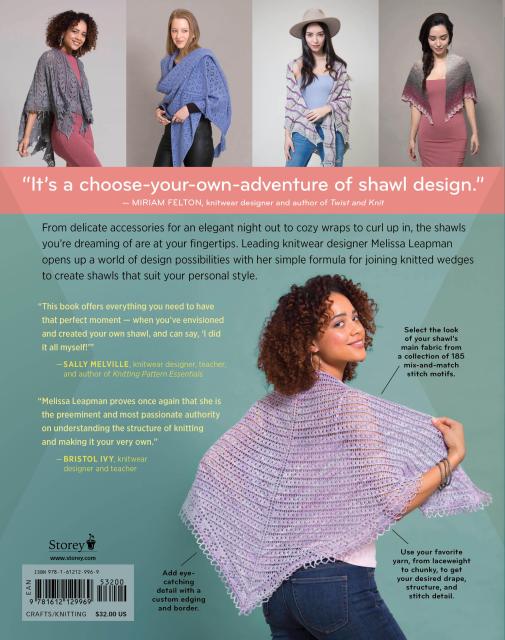
Shawls are practical, versatile, and an ever-popular project among knitters. Noted designer Melissa Leapman has developed an innovative technique that promises hundreds of beautiful shawl design options in Knitting Modular Shawls, Wraps, and Stoles!
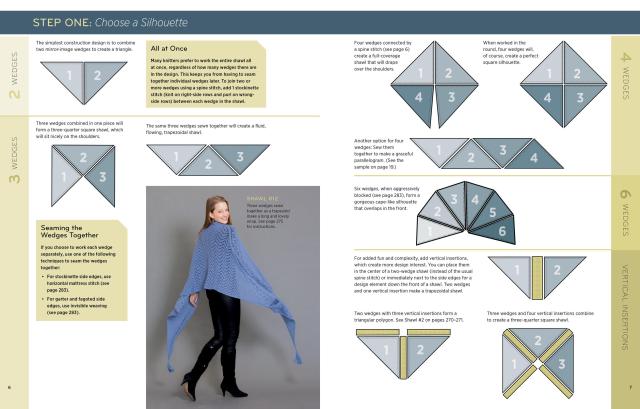
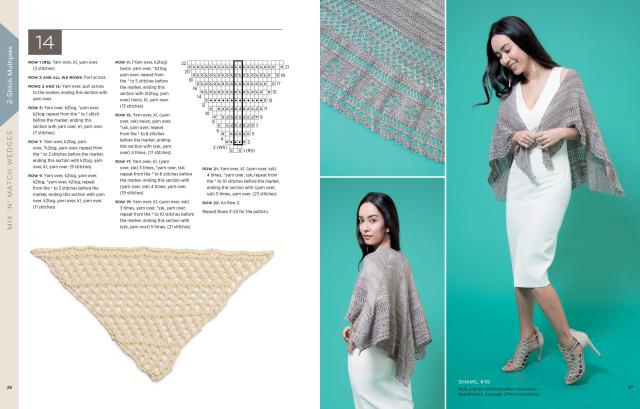
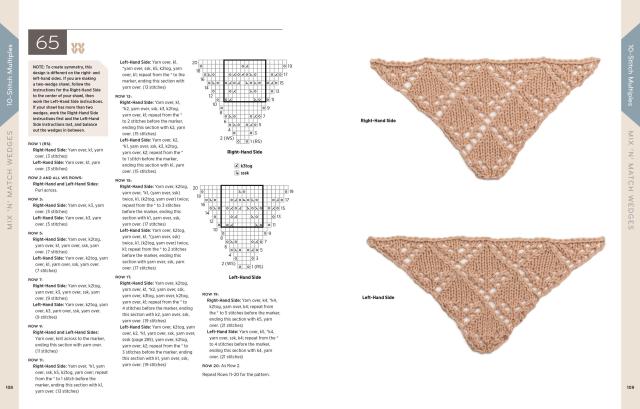
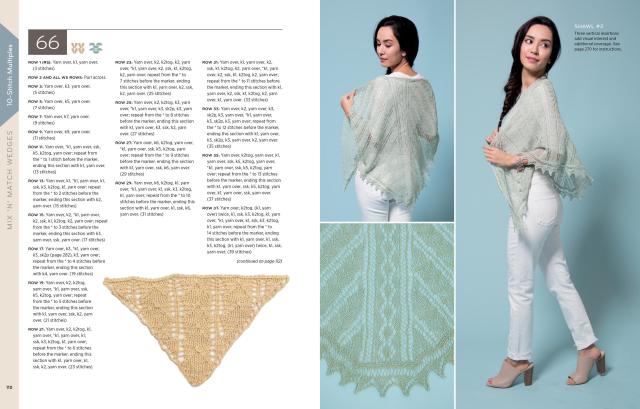
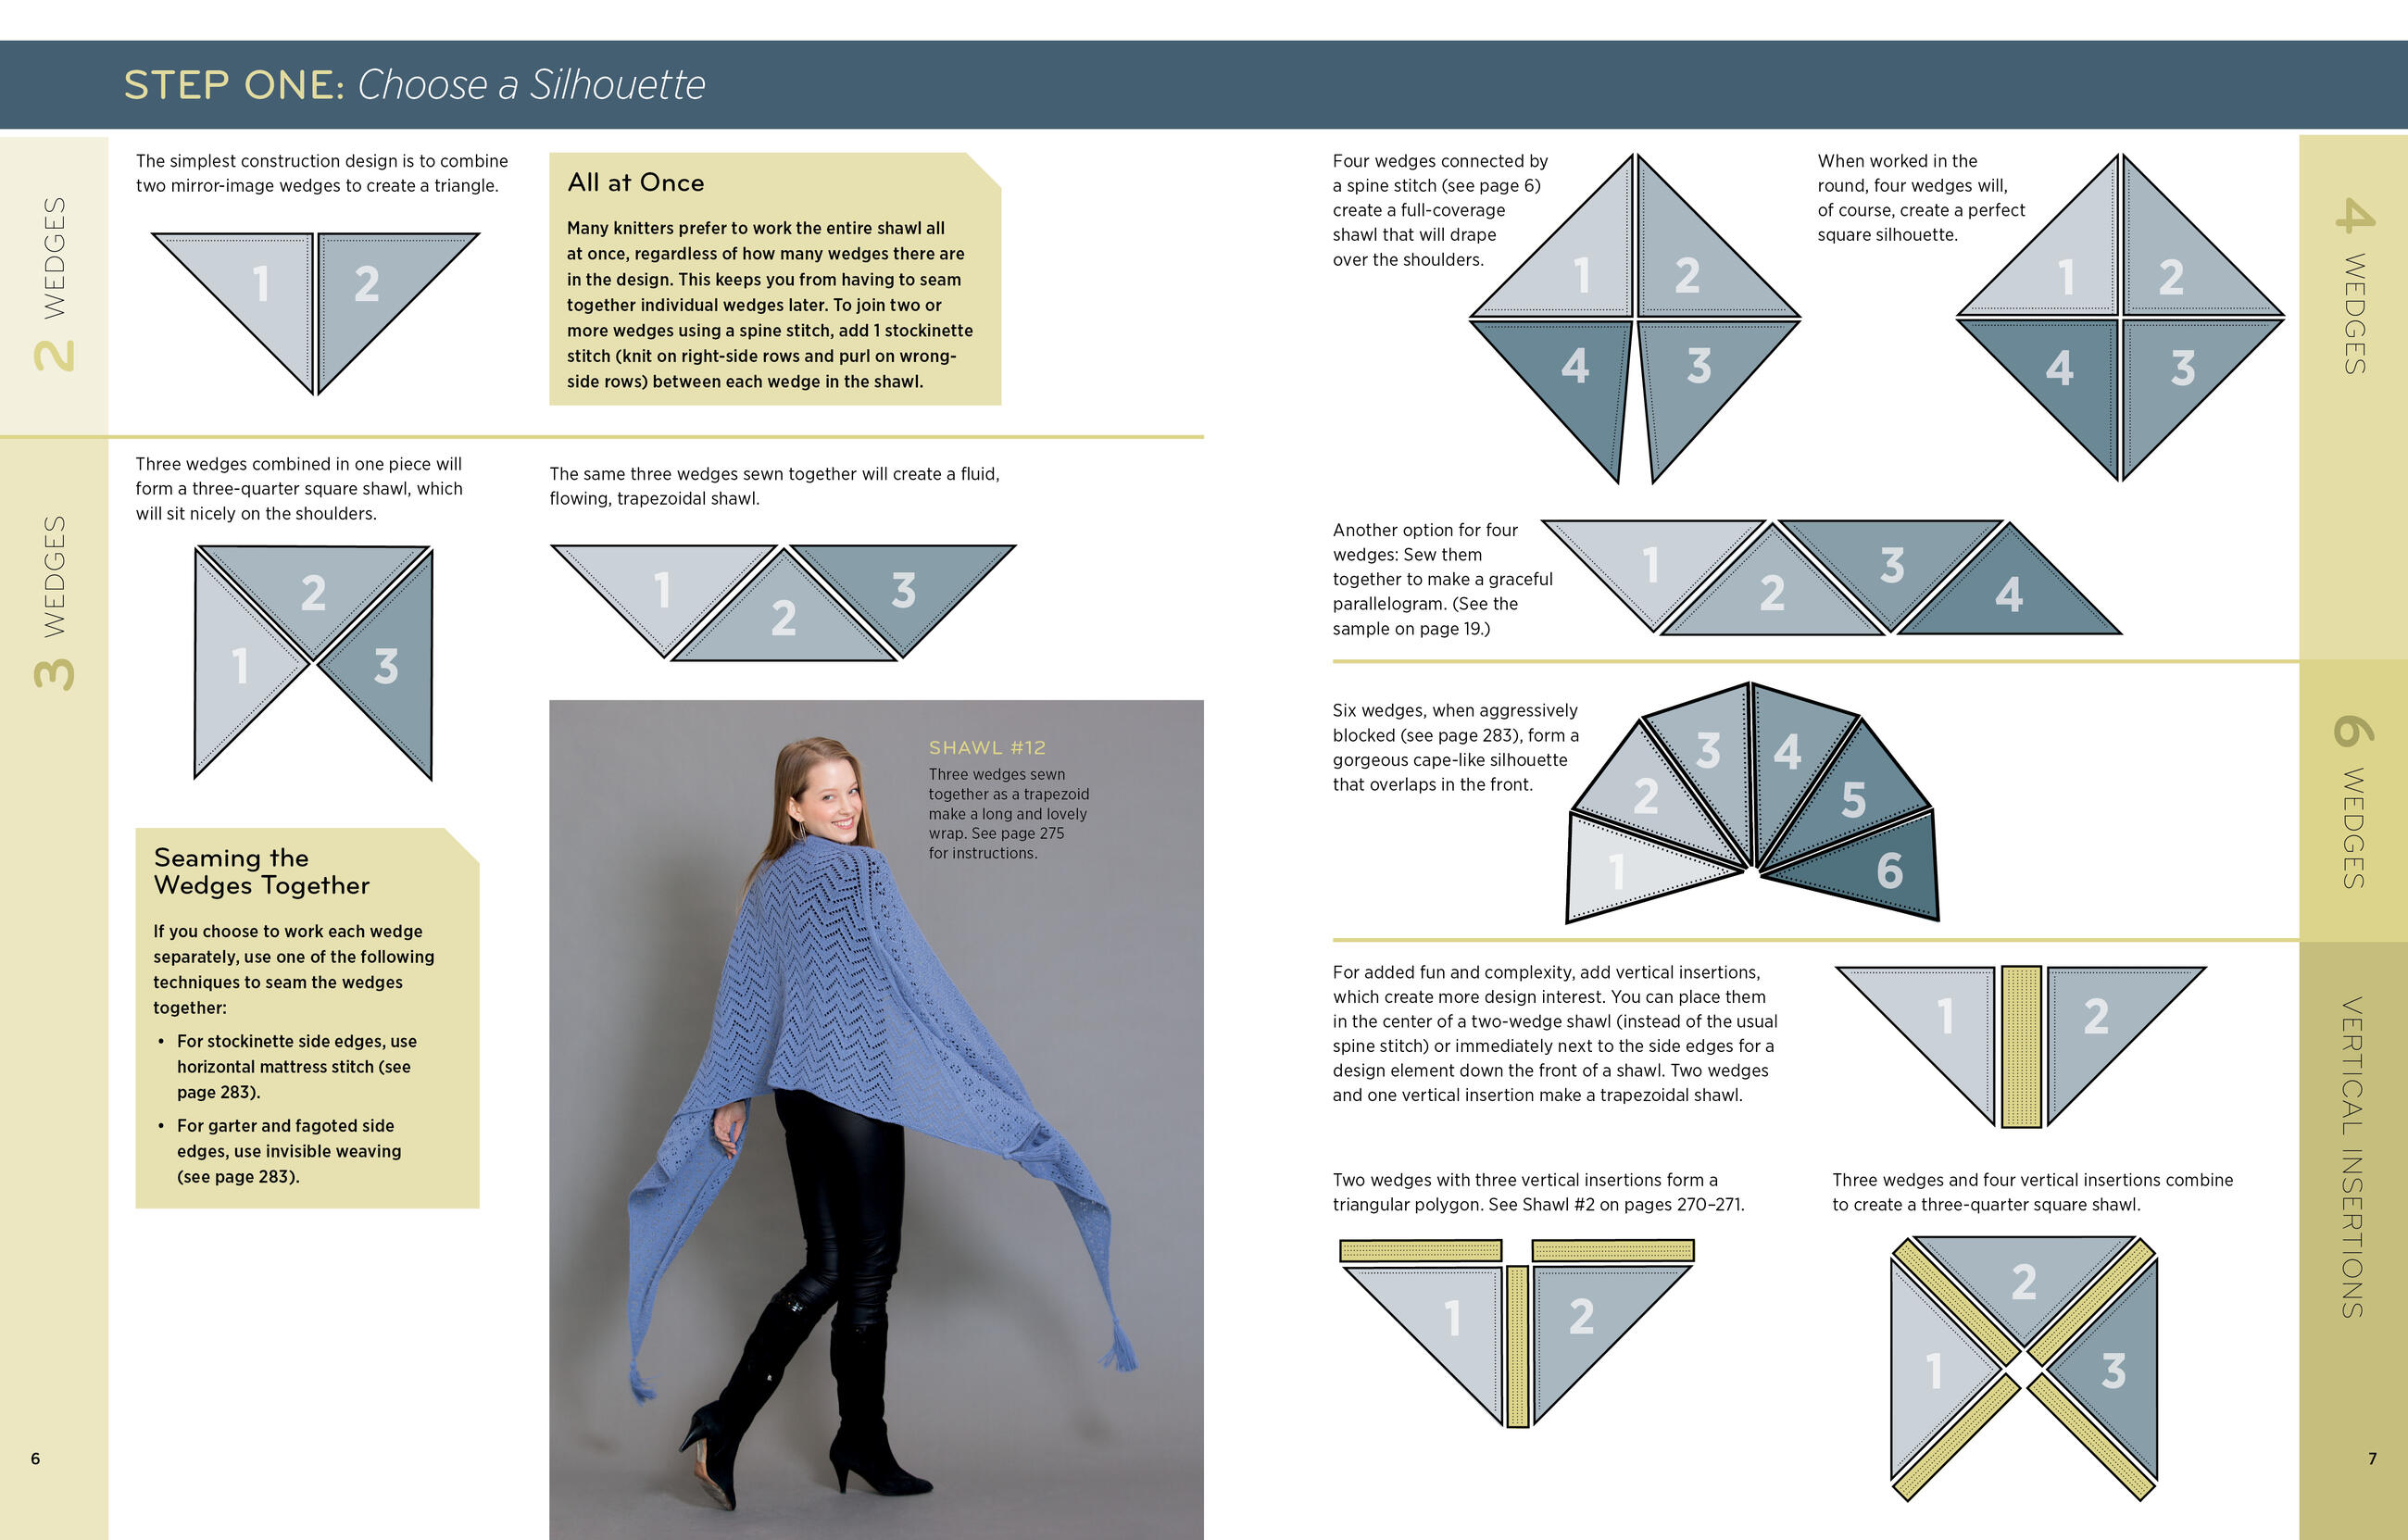
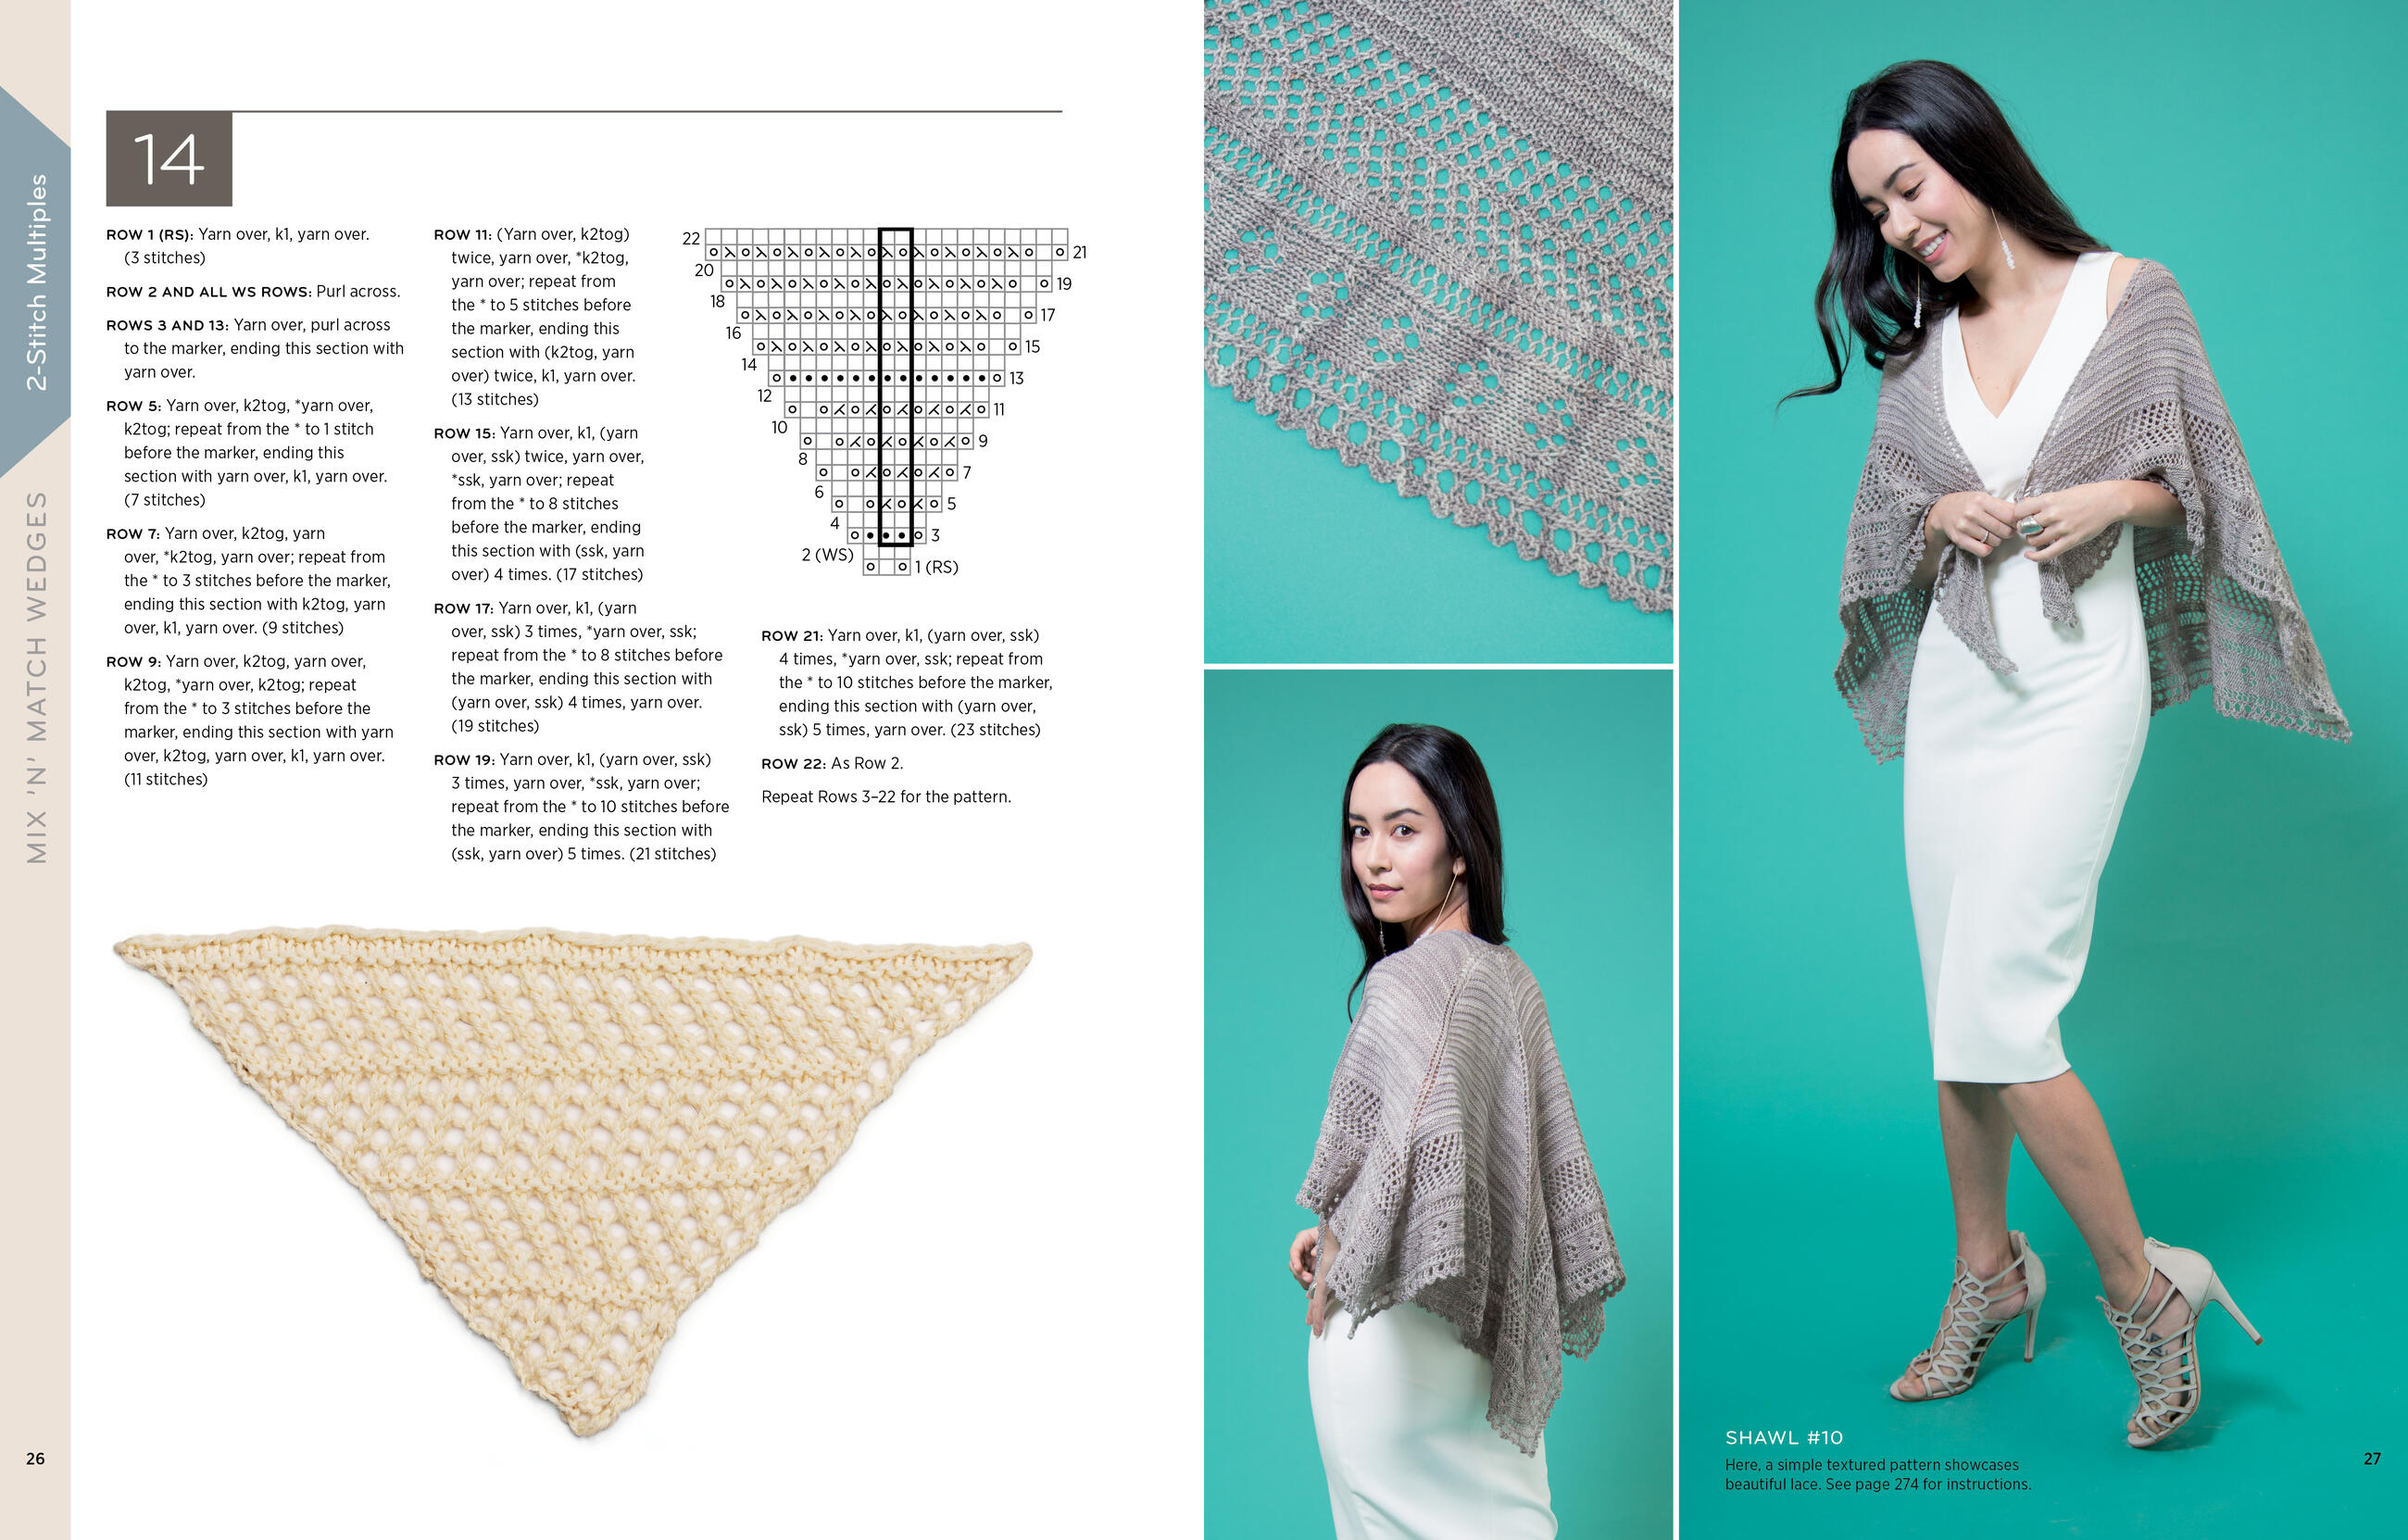
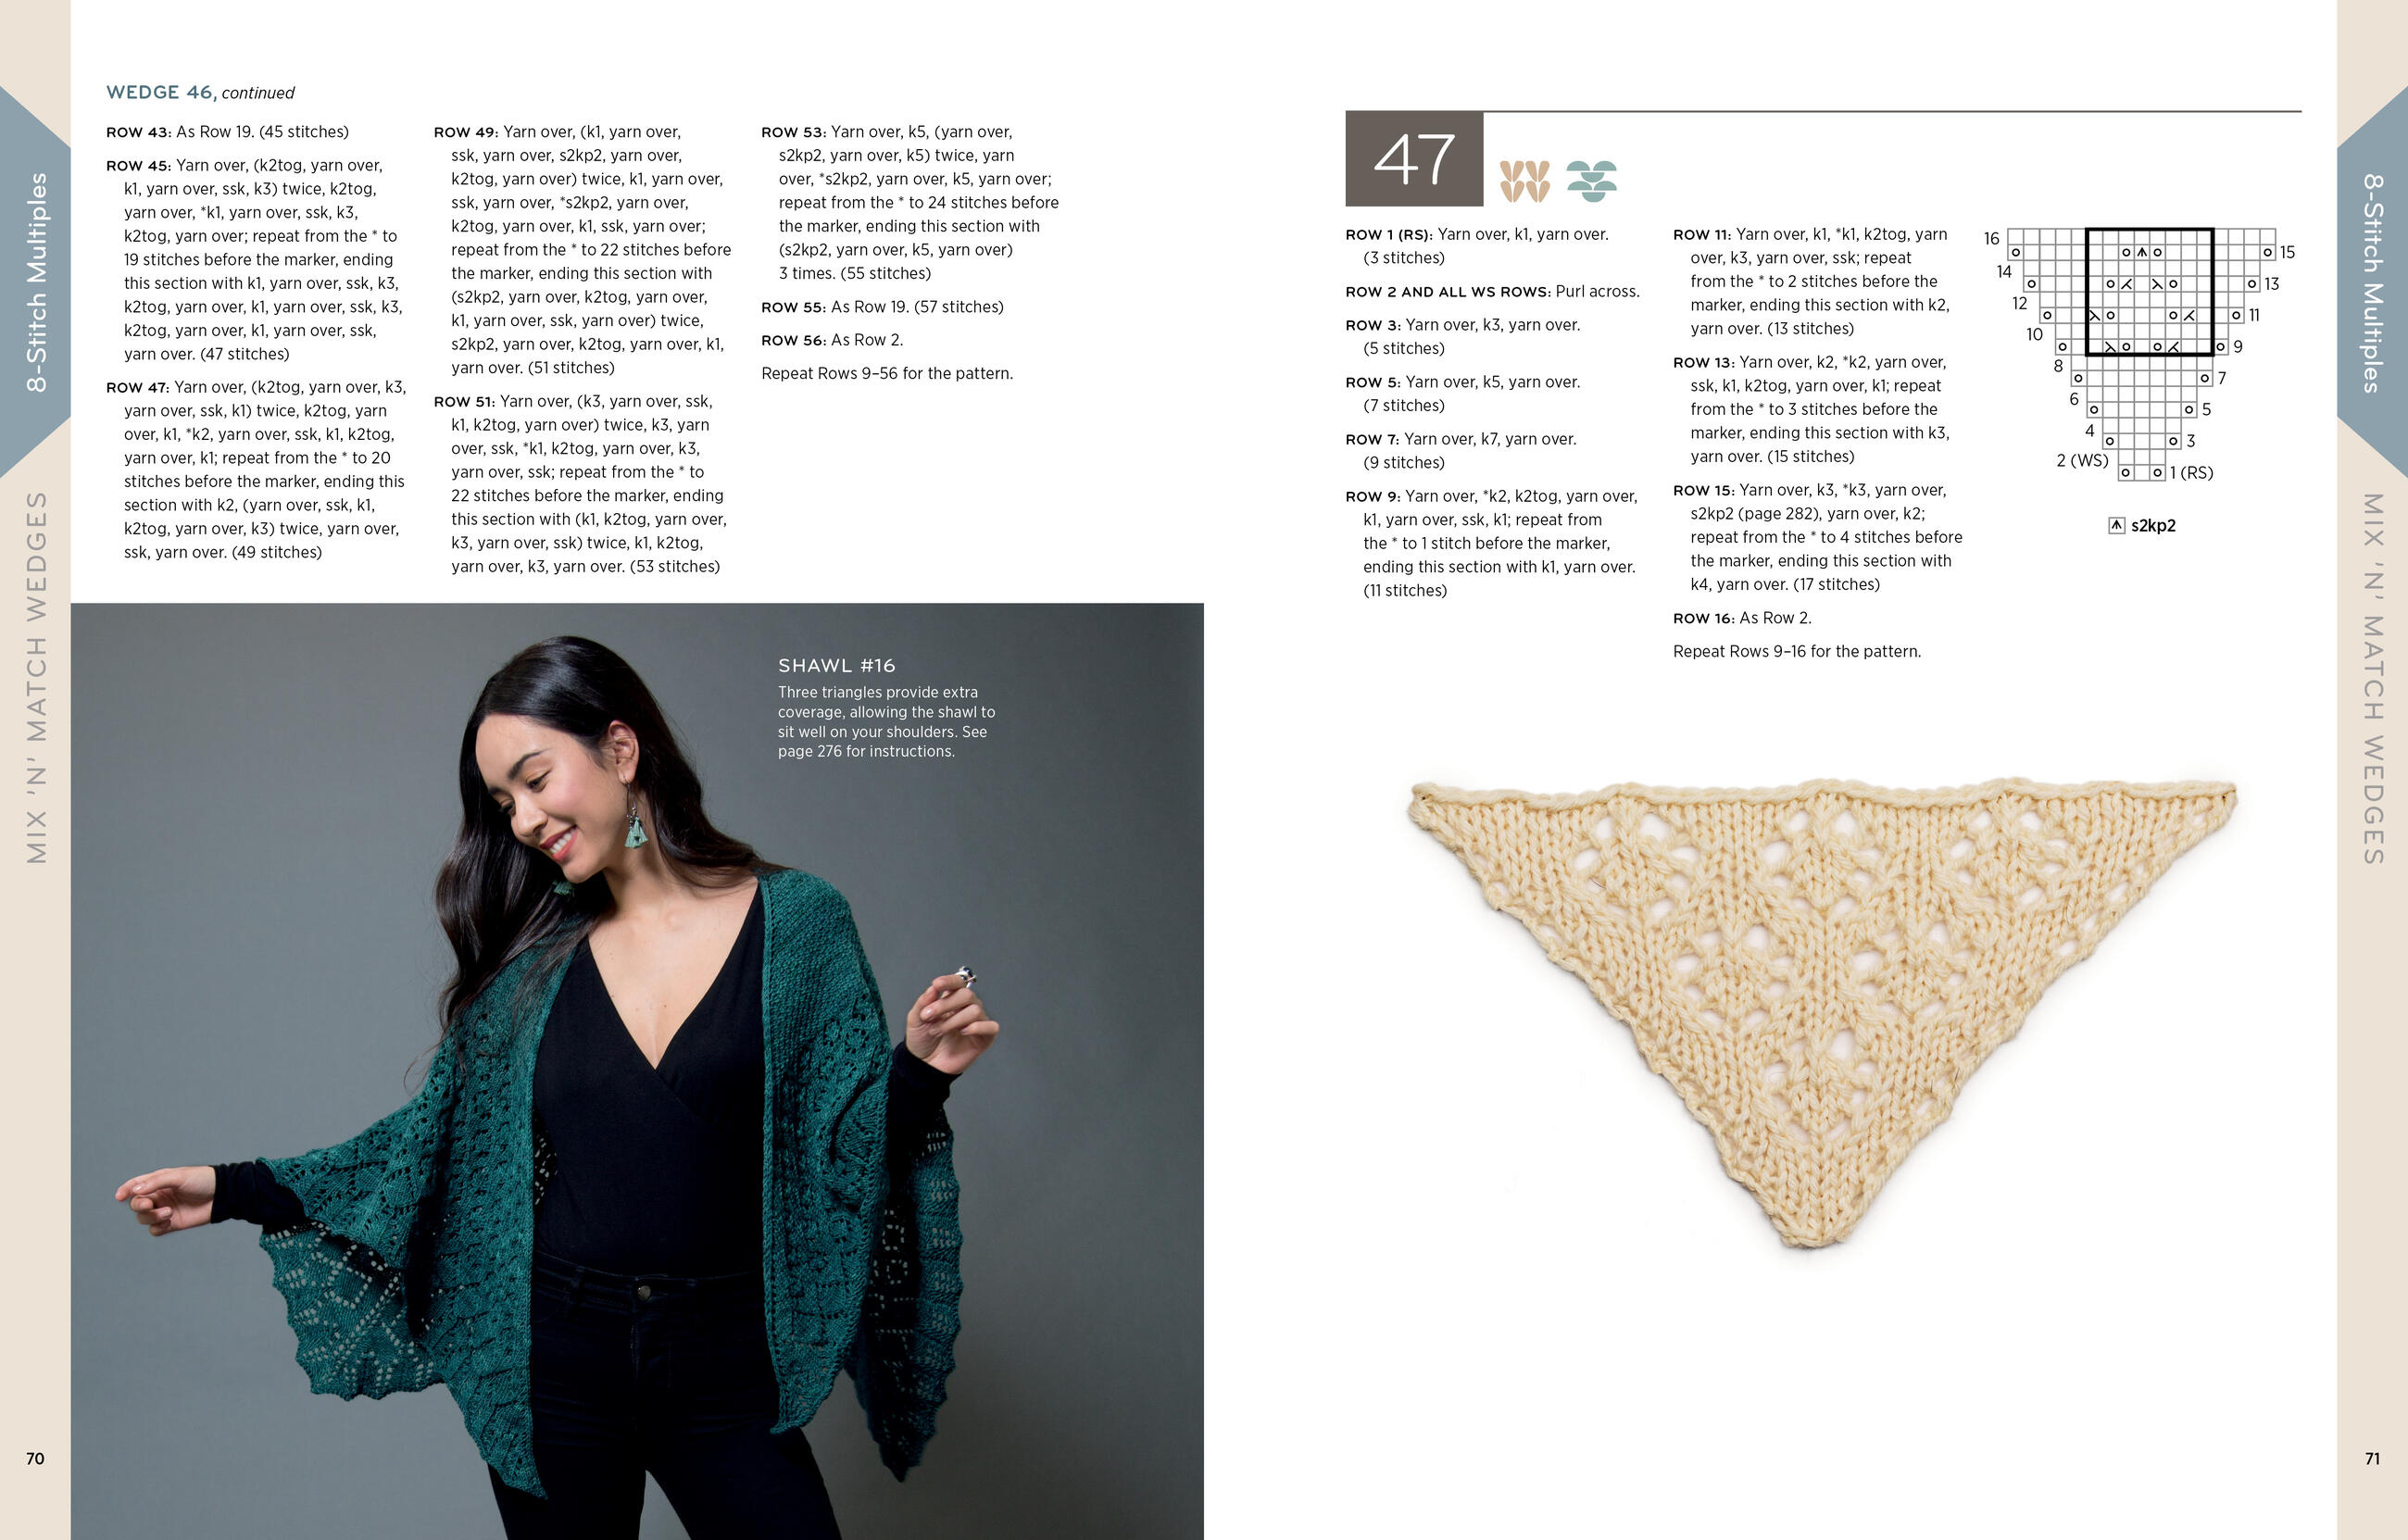
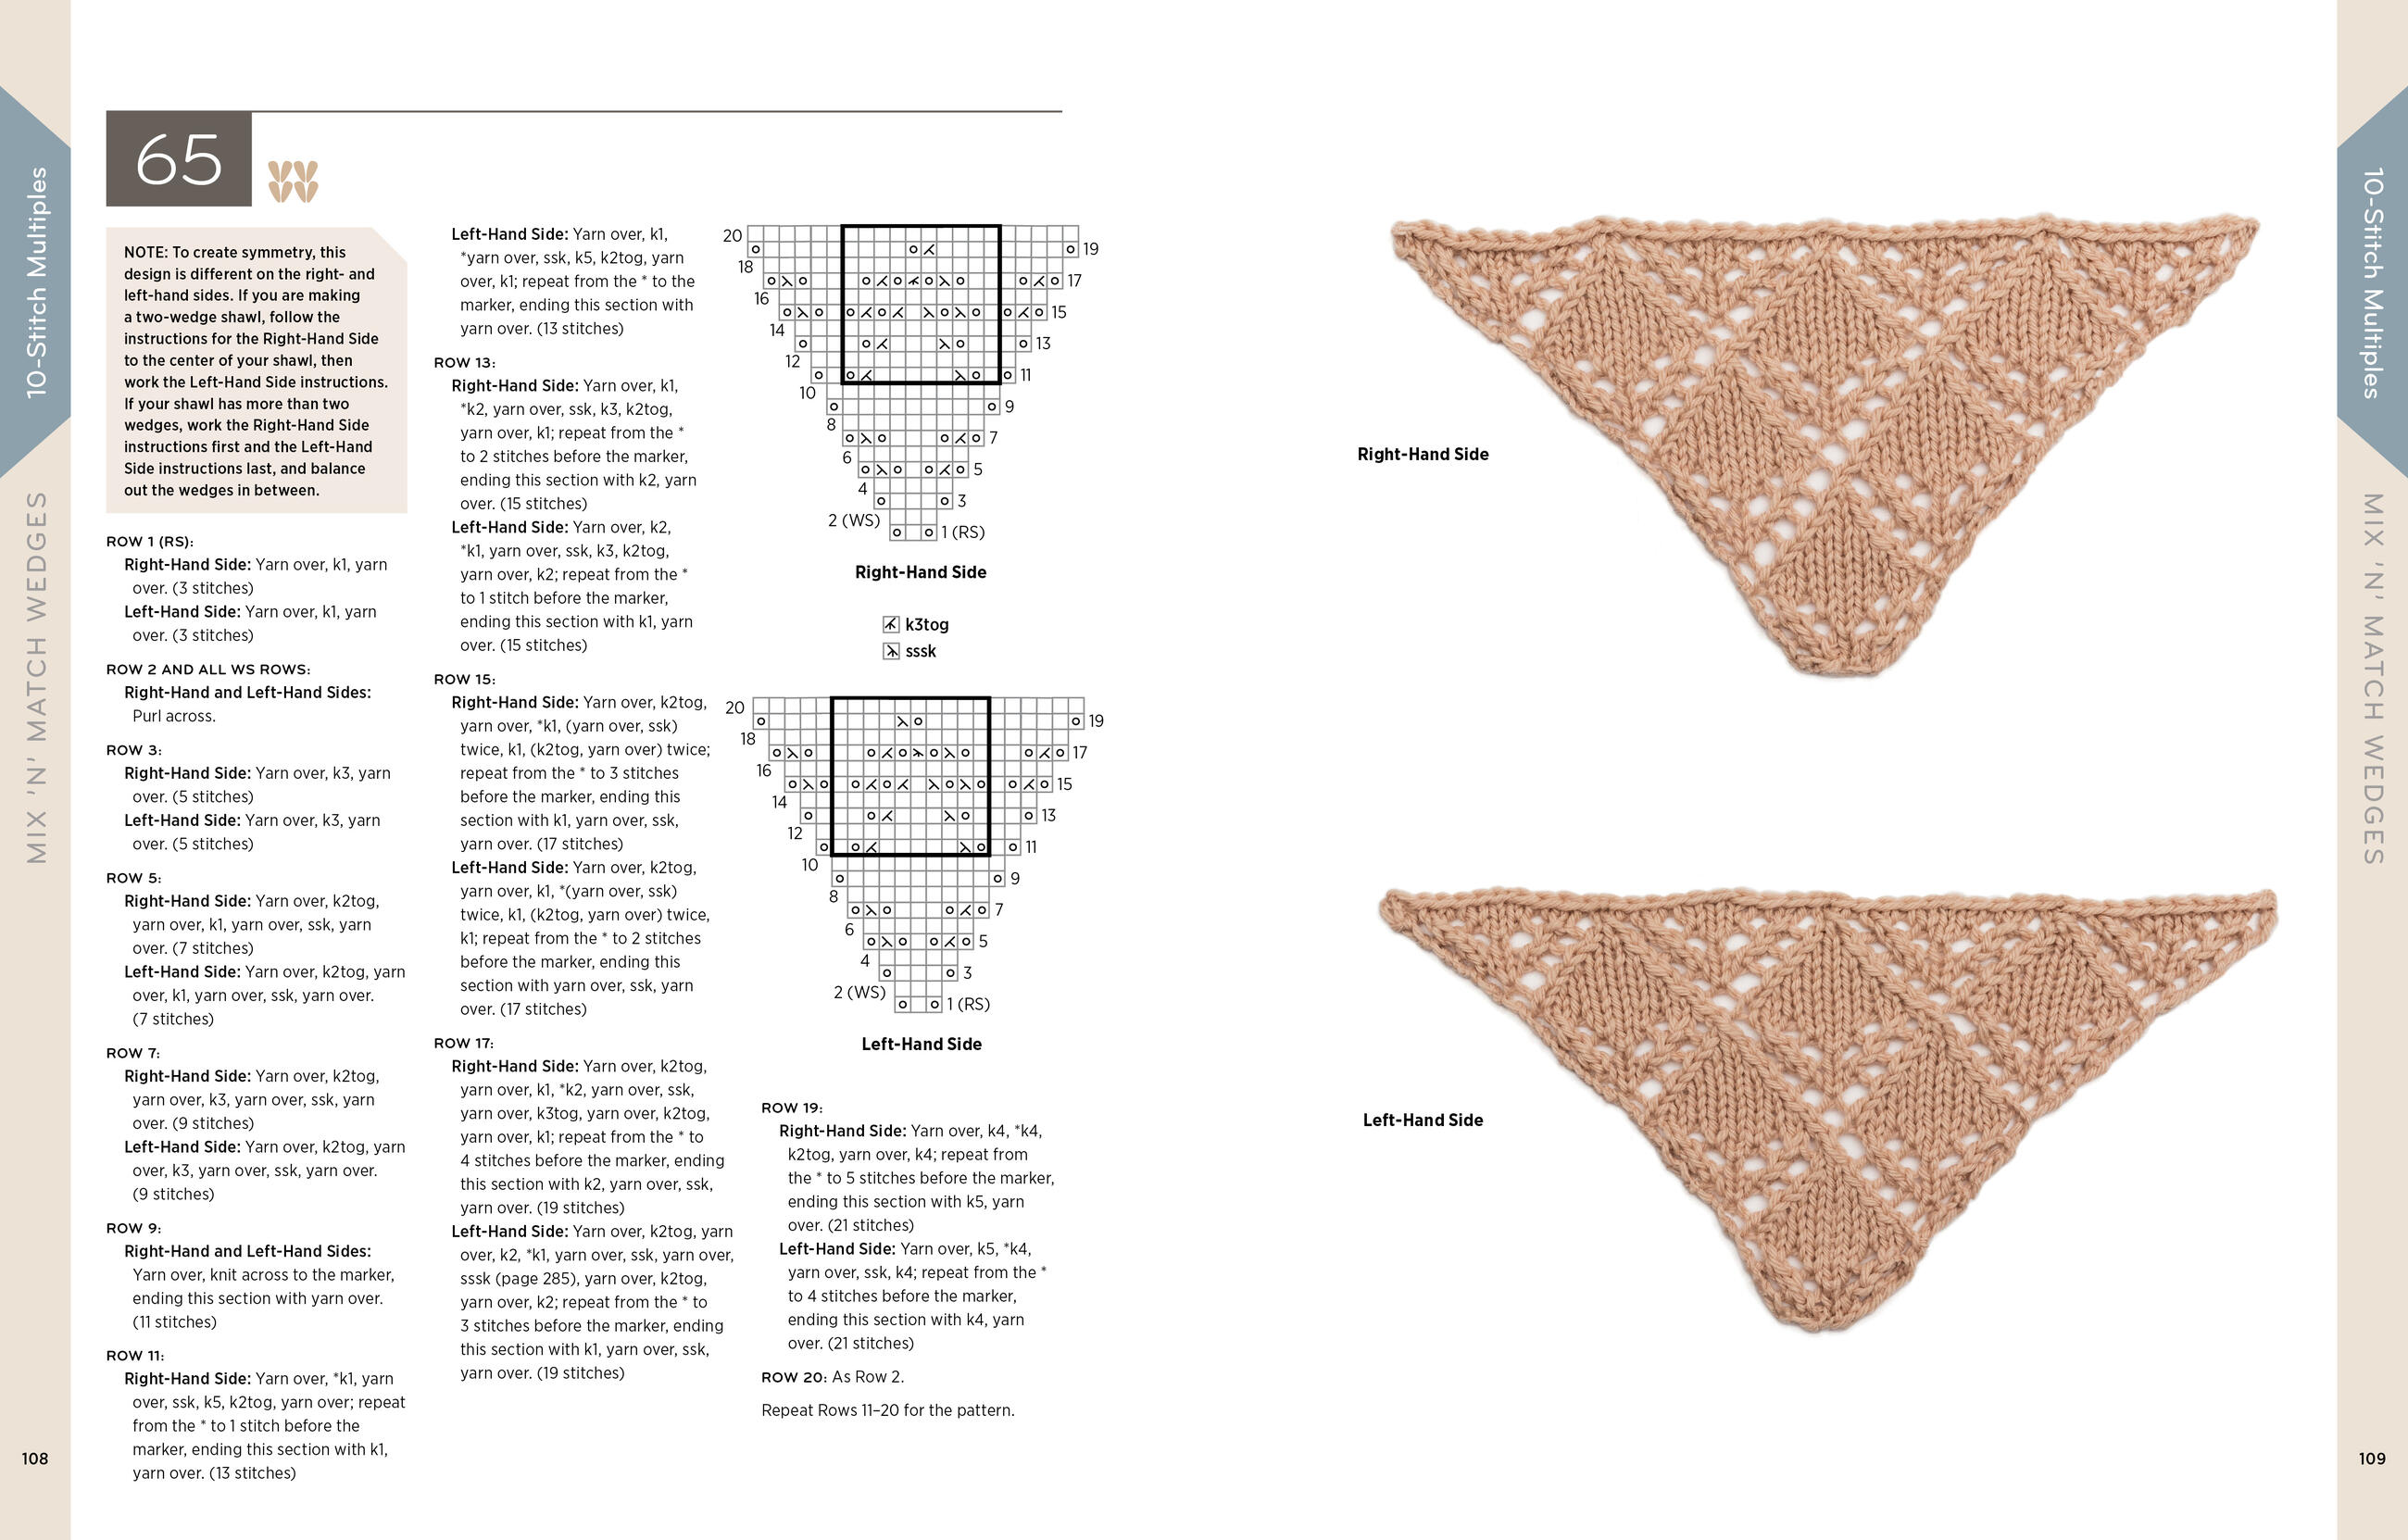
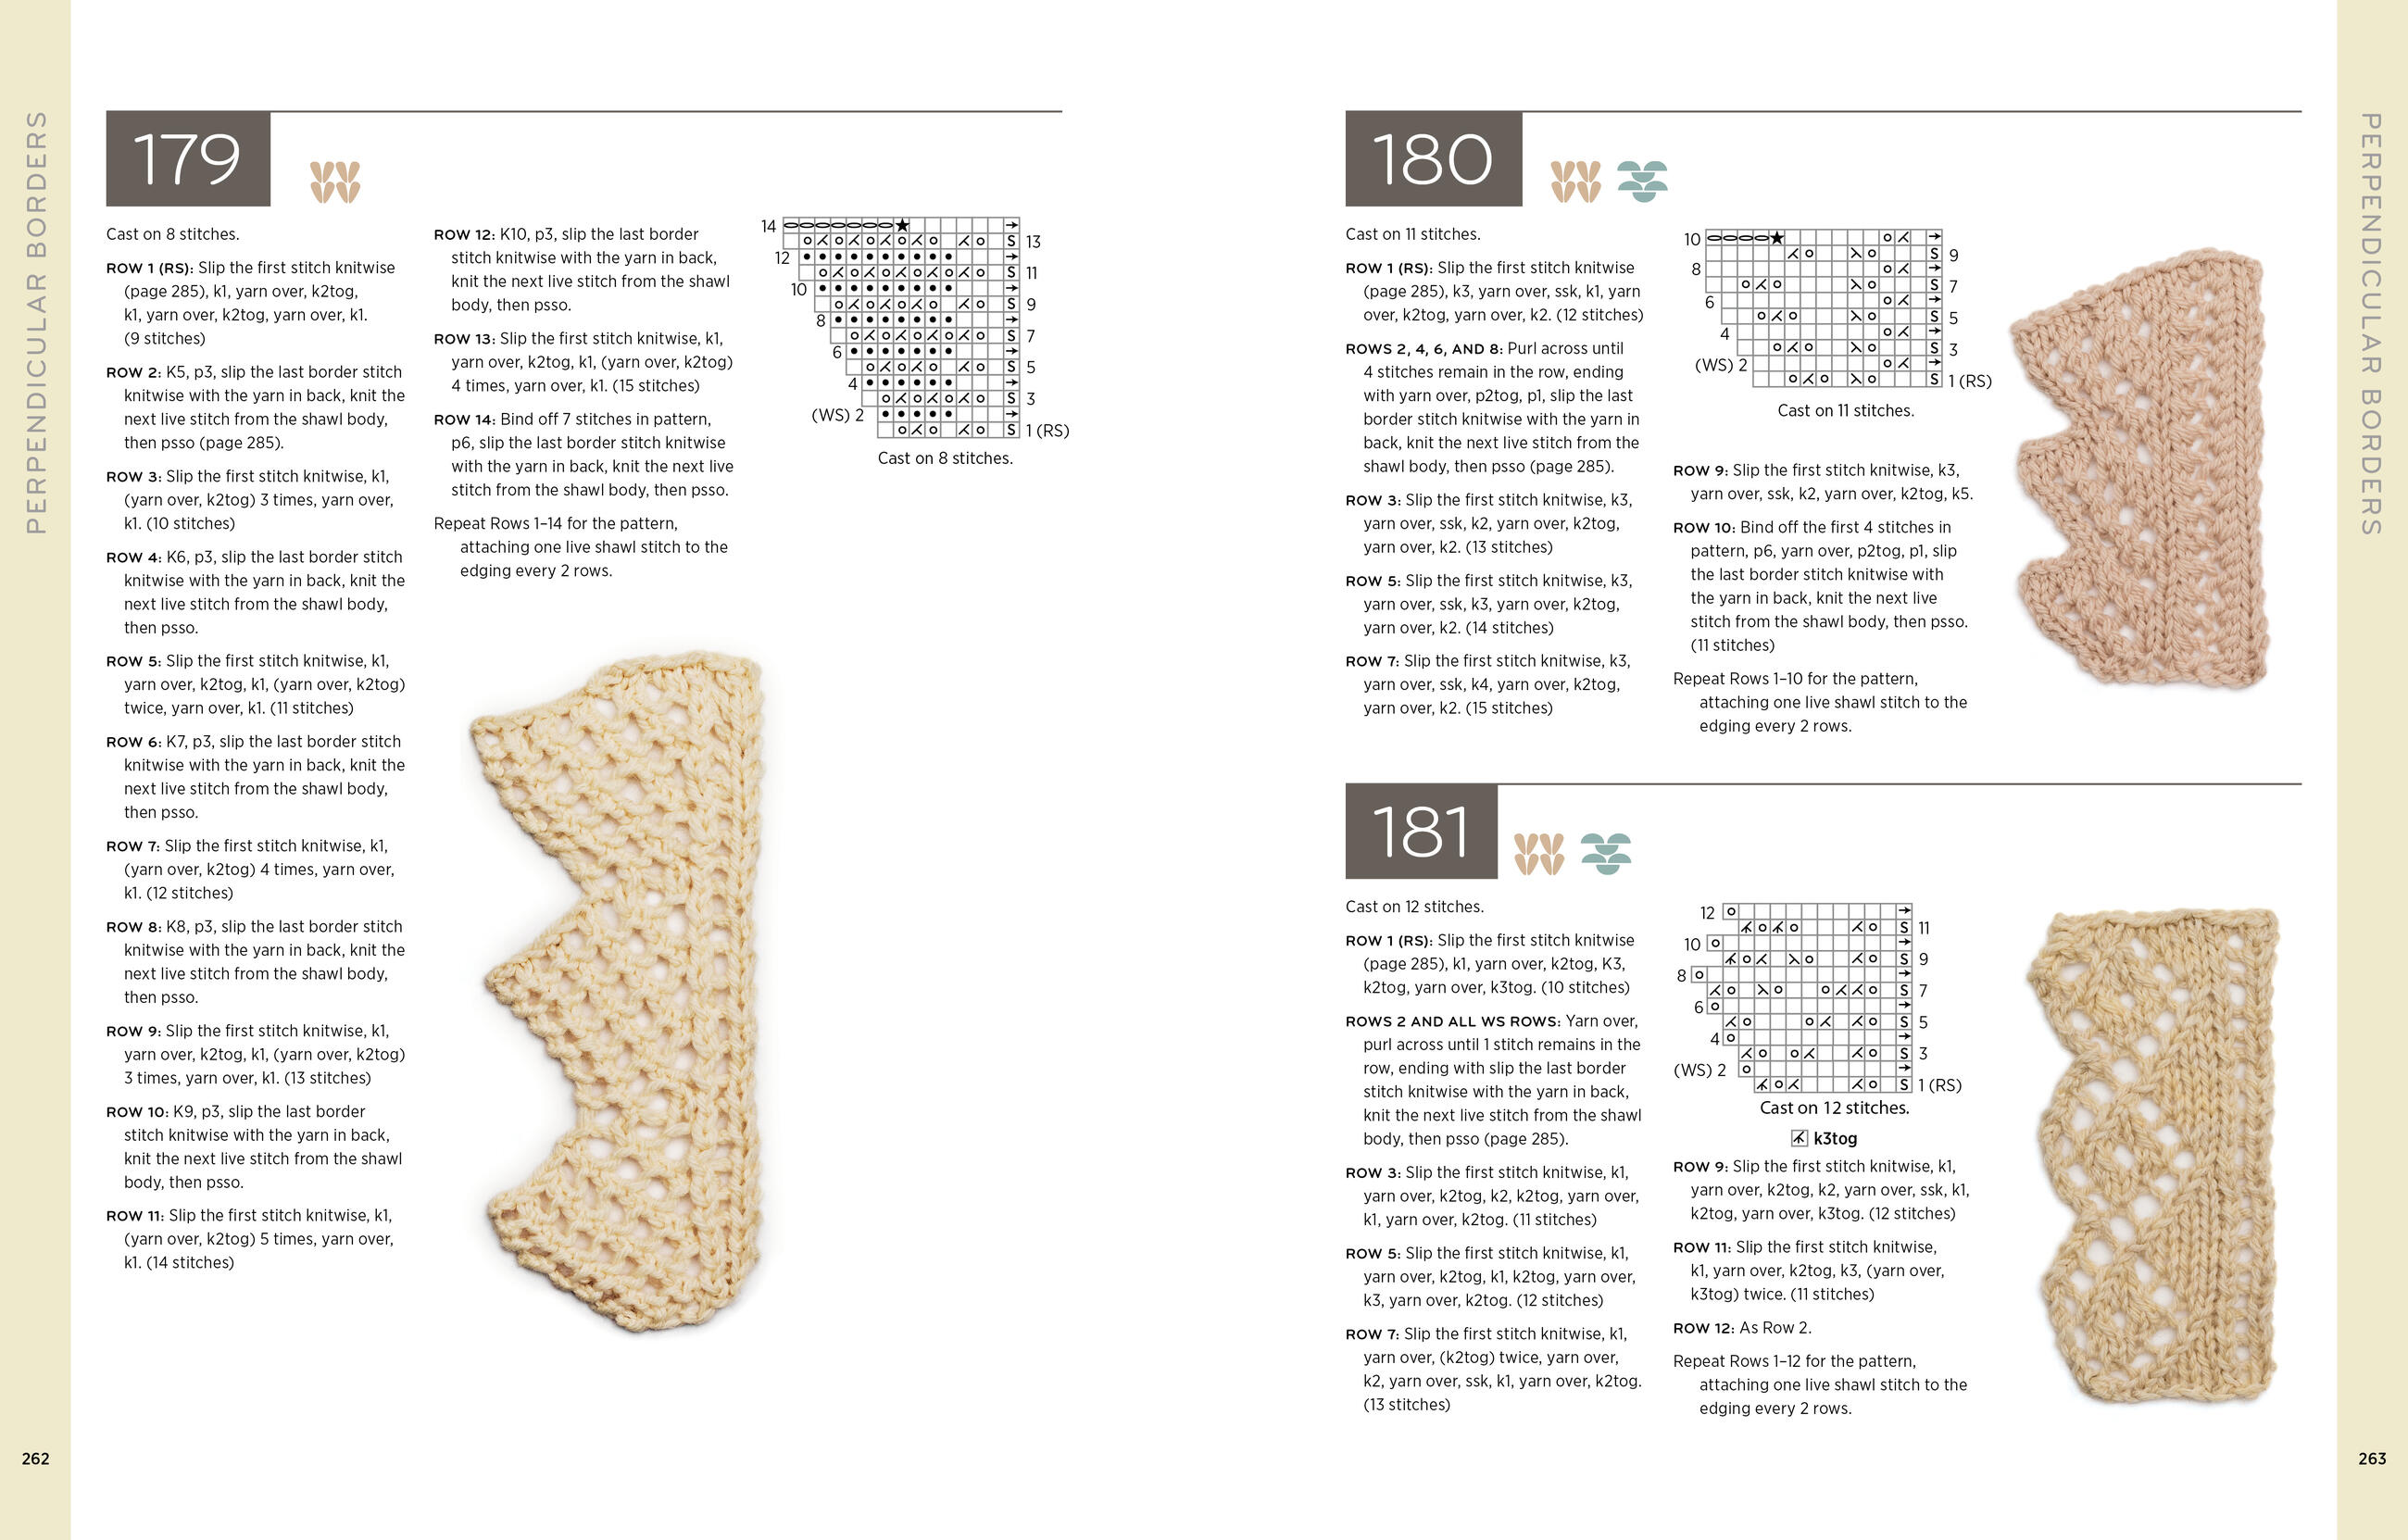
Beginning with a simple triangular wedge, Leapman shows how multiple knit triangles can be joined together to create square, rectangular, trapezoidal, and semicircular shapes. Her easy and customizable technique offers knitters of all levels endless flexibility in design and yarn choices. Charted patterns for 185 different stitches allow readers to select their favorite embellishment for the main fabric of their shawl. Colorful photographs of 20 of Leapman’s original designs illustrate the creative potential of this technique.
Beginning with a simple triangular wedge, Leapman shows how multiple knit triangles can be joined together to create square, rectangular, trapezoidal, and semicircular shapes. Her easy and customizable technique offers knitters of all levels endless flexibility in design and yarn choices. Charted patterns for 185 different stitches allow readers to select their favorite embellishment for the main fabric of their shawl. Colorful photographs of 20 of Leapman’s original designs illustrate the creative potential of this technique.