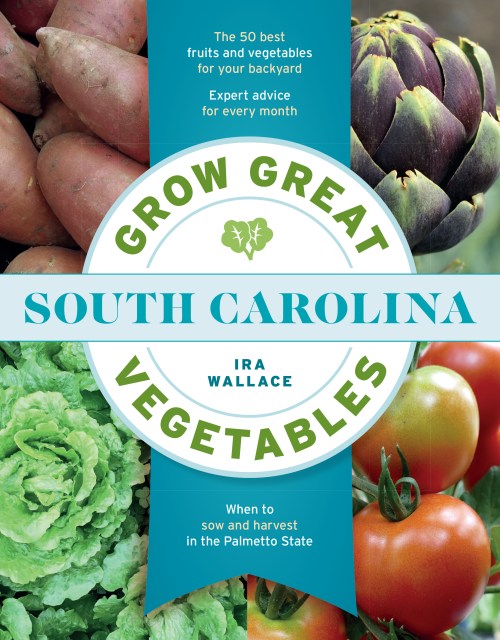
Grow Great Vegetables in South Carolina

Contributors

By Ira Wallace

Formats and Prices

Price

$19.95

Price

$24.95 CAD

Format

Format:

  1. Trade Paperback $19.95 $24.95 CAD
  2. ebook $11.99 $15.99 CAD

This item is a preorder. Your payment method will be charged immediately, and the product is expected to ship on or around March 31, 2020. This date is subject to change due to shipping delays beyond our control.

Get the inside dirt, South Carolina!

This ultimate local guide to growing vegetables and other edibles provides you with insider advice on climate zones, average frost dates, and growing season details across South Carolina. Information includes details on sun, soil, fertilizer, mulch, water, and the best varieties for your region. A garden planning section helps with design and crop rotation, and monthly lists explain what to do from January through December. In-depth profiles of nearly 50 edibles round out the information and help ensure a can’t-miss harvest.

Excerpt

Few things are more rewarding than harvesting homegrown vegetables from one’s own garden.


Get Started

Romaine lettuce grows happily alongside ornamental twinspur in a Murrells Inlet kitchen garden.


Get Planting

Rodger Winn, a well-known South Carolina seed saver and heirloom-tomato grower, uses straw to mulch vegetables during July heat.


Savoy cabbage can take an overnight frost, making it a good winter vegetable.

JANUARY

Planning for Fresh Food All Year

Even in the sunniest parts of South Carolina, January brings some rainy days well suited to sitting in a cozy chair, planning for the year ahead. The preparation work you do now—garden maps, a planting schedule, testing seeds left over from last year and ordering any you’ll need for this one, and setting up a spot to start your own plants from seed indoors—ensures a bountiful garden for the year to come. There’s plenty to do outside as well, from pruning perennials to taking soil samples for testing, to preparing beds (if the soil dries out enough). If you are new to growing your own food, the Get Started section of this book will help you learn about the climate and soils in our region, pick a good location for your garden, and get started growing healthy, fresh, delicious food for a twelve-month harvest. Let’s start planning!!

Garden Maps and Planting Schedules

There are many joys to vegetable gardening, but there are also a few predictable and avoidable frustrations. One of these is having everything ripen at once. Planning for a continuous harvest of fresh, tasty, homegrown produce is one of the major challenges for a beginning vegetable gardener.

In the previous chapters, we discussed locating your garden, succession planting, types of planting systems, and other things that will help you with your garden planning. Take some time to review those chapters and think about how much time you have, what you want to grow, how big you want your garden to be, where it will be located, and what type of planting system you prefer. A smaller, well-maintained garden is often more productive and a better situation for gaining experience than a larger garden that is a bit out of control. Once you make these decisions about the size, type, and location of your garden, it’s time to make a map and create a planting schedule to keep your garden producing all year.

Winter is the perfect time to plan your dream vegetable garden.

Measure your garden plot and plan the spacing of paths, rows, and beds. Note the location of any buildings, large trees, or shrubs that will shade your garden in the coming months. Include the north-south orientation on your map. Show sources of water and any areas with obvious drainage problems.

Graph paper is the traditional way to make an accurate, easy-to-use map of your garden. Using one square to show one foot of garden often works well for home gardeners. Make the map as large as you can with the size of paper you have so there is lots of room to write and revise. Make copies so you have maps for the different seasons you will be gardening, including succession planting and cover crops.

These days, many computer-savvy gardeners use spreadsheets or an online garden-planning tool for making their garden maps. All have many useful options for bed size and shapes, vegetable selectors, harvest log, and field notes. They even send you email reminders for planting dates. If you have a large yard or country property, Google Maps (maps.google.com) can show the exact placement of your house, outbuildings, large trees and shrubs, and north-south orientation.

You may want to make a new map for each season. By planting a spring crop, a summer crop, and a fall or overwintered crop, a gardener can get three to four crops from the same space. The more you want to grow, the more attention you need to pay to close rotation of crops (this is where good maps will help). For example, plant spring lettuce, followed by summer green beans, followed by fall spinach; usually you will plant a cool-season crop, then a warm-season crop, and finish with another cool-season crop. Careful attention to days to maturity for each crop will tell you the best rotation period.

So now that you have a map, it’s time to locate your plants and create a planting schedule. Here are some considerations.

Sun and shade. Greens can tolerate shadier areas but fruiting plants such as tomatoes and peppers need full sun at least six to eight hours a day.

Height. Trellising and caging can help you make better use of your space, increase air circulation, and reduce diseases. In general, grow taller plants like corn and trellised beans on the north side so they won’t shade the shorter plants in your garden.

Rotation. Organize your planting choices for a smooth crop rotation and easier maintenance by keeping similar plants together. For example, group together all your nightshades (tomatoes, potatoes, peppers, and eggplants). A three-year rotation will help minimize plant diseases in your home garden.

Succession planting and relay planting can really improve yields in your garden. Use planting dates and the days-to-harvest information from your seed catalogs to plan succession plantings. See the previous section for more information on these techniques.

To determine your best planting dates, determine your climate zone but also be sure to talk to experienced neighbors, local Master Gardeners, and your cooperative extension agent. Don’t forget your fall and winter garden. Allow space for later crops.

Starting seeds versus buying seedlings. There are advantages to both. Ask yourself if you have enough space, with enough sunlight, to grow your own seedlings. Can you control the temperature? Do you have the time and attention to tend your seedlings? Growing your own seedlings is easier for some crops than others. You can start some and buy others. Also remember that starting seeds isn’t just a winter or early spring activity. In many areas, gardeners interested in growing organic or heirloom varieties will need to start their own plants from seeds rather than buy conventional transplants from the garden center.

Getting away. Make sure to plan ahead if you’ll be going away for vacation.

Starting Plants Under Lights

With your map drawn and your planting charts completed, it’s time to think about the indoor starts you’re choosing to do. Timing is important. You want healthy, vigorous seedlings to transplant. Don’t start too soon before the date you will set them outside.

There are a number of ways to start plants at home. A sunny window can work if you give regular attention to rotating plants to avoid phototropism (leaning toward the light) and leggy growth. Tall, skinny plants don’t transplant well. You can also grow nice, sturdy seedlings in a cold frame or greenhouse if you have one, but I find that for many home gardeners, the most reliable way to have stout, green plants for early season plantings is to grow them under fluorescent lights. These lights give you better control of light and temperature.

Starting your own seeds is usually easy. Start most spring seedlings four to six weeks before the recommended setting-out date. Onions, hot peppers, and celery need longer, eight to ten weeks. Check with your local Master Gardeners or extension agent for best planting dates in your area.

Buy a good organic seed-starting mix from a nursery or natural products store. These mixes are sterile, light, and hold moisture well. In a 5-gallon bucket, add water to your soil mixture until it is moist without being soggy. Use nursery flats or other containers with drainage holes that are 2–3 inches deep and at least 3 inches wide. Fill them nearly to the top with your seed-starting mix. Use your finger to make small indentations in the soil about ¼ inch deep. Put one or two seeds in each spot. Cover with fine soil and tamp down to ensure the seed has contact with the soil. Gently water in the seeds and keep the soil evenly moist, but not soggy.

For strong growth, foliage should be just 2–4 inches away from the light tubes; prop the trays up to get them close enough or hang the lights on chains that can be adjusted with seedling growth.

Put the containers in a warm place with the fluorescent or grow light suspended 2–4 inches above. This may seem quite close, but I find it’s better to have the plants very close than too far away. Check the plants regularly so you’ll remember to raise the lights as they grow. Grow lights are broader-spectrum lights that cost about twice as much as regular fluorescents. They weren’t around when I started gardening, and I think the fluorescents work just fine, but some people swear they grow stronger seedlings with grow lights. Hang the lights in a way that allows you to adjust their height as the plants grow. Keep the light on twelve to fourteen hours a day. A timer is helpful. When the plants have two to four true leaves, it is time to move them into bigger pots or deeper flats. I like to move the plants into fine, fertile, well-screened compost to keep them growing steadily until it is time to transplant to the garden. Keep evenly moist and rotate the flats regularly. After four weeks, the plants can be moved to a cold frame or set outside for several hours each day to harden them off before planting in the garden. To avoid stressing our tender little friends, transplant in the afternoon of an overcast or drizzly day. Press down the soil firmly around each plant and, for most crops, add mulch to retain soil moisture and reduce weeds. Keep transplants well watered until established. See the previous section for more information on seed starting and transplanting.

A SIMPLE HOME GERMINATION TEST

Germination testing at home is easy. Count out 10 seeds and spread them in a line, lengthwise along the middle of the top half of a thick paper towel (unbleached is best). Use a spray bottle of water to make the towel moist but not soggy. Fold the towel in half, roll it up, and loosely close it with a rubber band. Put the towel in a clean plastic bag and leave it in a warm 70–80°F location. Every few days, check to see how many seeds have germinated, adding moisture if necessary. Most crops will have fully germinated after a week. Some, such as peppers and herbs, may take two to four weeks. When that time is up, count how many have sprouted. If it’s less than 50 percent, plan on buying new seed. You can, of course, chose to plant your older seed anyway, but the seedlings may not be vigorous.

Vegetable Seed Viability

When you buy a packet of seeds, the packet will usually say something like “Packed for 2020” (or whichever year the seeds were intended to be sold) or include a percentage that indicates the seed viability: the percentage of seeds that sprouted well in the test environment. However, seed viability isn’t so simple, and it’s not static: seeds lose viability over time, but some naturally last longer than others. When seeds are stored poorly, they lose viability much more quickly—and retail stores don’t have the best conditions, as they are too warm and often too humid. A reputable seed company will have excellent storage conditions for packages, right up until they ship, so you might have better luck ordering direct than buying retail.

This table is for seeds that are stored well: in a cool, dark location with low humidity. Freezing seeds in a well-sealed container can extend viability for many more years (be sure to let the container come to room temperature before breaking the seal, otherwise condensation can form on the seeds and cause rot).

If you do use older seeds or poorly stored seeds, sow a fair amount extra and be prepared to fill in gaps. Seedling vigor, or how strong the tiny plants are when they come up, is different than viability, which is simply an indication of how many will come up. Vigorous seedlings withstand disease better by getting a faster start on life, which is a good reason to use fresh seed or store your seed well.

SEED LIFE
ONE YEAR TWO TO FOUR YEARS FOUR TO SIX YEARS
leeks beans brassicas
onions beets cucumbers
parsnips carrots radishes
  corn spinach
  lettuce squash
  muskmelons tomato
  peas watermelon
  peppers  


From planning for spring to starting seedlings, there’s lots to do in February.

FEBRUARY

Sowing Seeds Indoors

As winter fades away, gardeners throughout South Carolina are enthusiastically starting their spring vegetable gardens. Those along the coast will be planting in open ground, while those in the Piedmont and mountains must plant more cautiously or under cover. February is marked by rapid and unpredictable weather changes, occasionally moving from 70°F highs to 25°F lows, with freezing rain and snow, almost overnight. To take advantage of the increasing warmth and be prepared for the unpredictable cold spells, the savvy food gardener makes liberal use of flats and transplanting. Spun polyester row covers, low tunnels, and hoop houses help us plant earlier and guarantee our crops get off to a strong start.

Great Garden Gear

Garden shows and plant symposiums abound in February and let us indulge in visions of the season to come. The larger garden shows come complete with “real” gardens and talks by garden experts on everything from container planting to the newest All-America Selection (AAS) winners. These shows are a great place to see firsthand many of the tools, planters, and garden gadgets advertised in catalogs and garden magazines. Take the opportunity to look and ask questions, but limit your purchases to fit your budget and garden size. Go to as many of the talks as you have time for. Both new and experienced gardeners can enjoy learning about novel approaches to traditional tasks. I remember first seeing Reemay at a garden show and wondering if that funny stuff would work. Reemay is a lightweight spun polyester row cover that lets through water and about 75 percent of light, while providing frost protection to 30ºF or lower, depending on the thickness. Nowadays, a wide array of spun polyester and polypropylene row covers are mainstays of year-round organic food gardening.

After a visit to a big garden show, you may feel like gardening is an expensive business. Don’t despair: it doesn’t have to be. You only need a few good tools to get started.

TIPS FOR STRETCHING YOUR GARDEN BUDGET

As an organic gardener, I always strive to “reduce, reuse, recycle” in my garden, and I really like to save money whenever I can. For those of you with similar goals, here are some interesting options.

Market bulletins. Many Departments of Agriculture publish old-fashioned market bulletins free online or just for the price of postage. These bulletins offer all sorts of strange and wonderful plants, bulbs, and seeds. The bulletins are also great places to find hay, manure, and other organic farm waste if you live in a rural area (print versions cost $10 to $15 a year).

Craigslist (craigslist.org). The go-to place online for free and inexpensive garden goodies for both city and country folk. Used tools, tomato cages, mulch, fencing, and plants are often advertised on Craigslist.

Freecycle (freecyle.org). A grassroots and entirely nonprofit movement of people who are giving (and getting) stuff for free in their own towns. It’s all about reuse and keeping good things out of landfills. Each local group is moderated by local volunteers.

Found, used, and repurposed materials. Junk art and homemade trellises can be a wonderful addition to your garden, from bamboo trellises and rubber tire planters, to stepping stones made out of pieces of a broken concrete sidewalk or driveway.

Seed swaps can be a great way to share extra seeds and try new varieties.

Seed swaps and community garden exchanges. Southern gardeners are neighborly and really like to share. Attending or, better yet, helping to organize a seed swap or community garden exchange is a great way to share your gardening excess, find new treasures in what might otherwise have become trash, and talk to neighbors about cooperating on bulk purchases such as compost. Such events are also a good place to begin organizing projects such as seasonal work parties and tool-sharing community co-ops.

Plant a Row for the Hungry. This is one of the many projects in our communities working to combat hunger and reduce wasted food. Find a group who needs your extra seeds, plants, and garden supplies, and that can use your extra garden produce at harvest time. Keep the sharing going around.

My Favorite Tools for the Garden

I like to save money, but cheap tools are no bargain. They break, dull quickly, rust, and have to be replaced, doubling the cost. My advice is to buy the best quality tools you can afford. Here are a few of the basic tools I like for my garden:

A long-handled spade, fork, or shovel will be the first tool you need for digging a new garden. Stainless steel tools are long lasting, easy to clean, and don’t rust—but they’re expensive. Tools made from carbon steel are a cost-effective alternative to stainless steel tools because they are sturdy, durable, and easy to sharpen. Tools with ash shafts and steel-strapped or forged sockets handle pressure and stress well. Choose the handle length to best fit the person who will be using the tool. I like a short-handled fork or spade. Some small women even prefer an edging spade or one specially designed for a woman’s proportions.

A strong, metal garden rake

Genre:

  • “Before your once-orderly rows tangle into an untamable jungle, or—worse yet—pests and disease put your hard work to rout, invest in Ira Wallace’s new [book]. With a chapter dedicated to every month, Wallace’s expert advice helps gardeners get the most out of each harvest.” —Charleston Magazine

On Sale
Mar 31, 2020
Page Count
252 pages
Publisher
Timber Press
ISBN-13
9781604699685

Ira Wallace

Ira Wallace

About the Author

Ira Wallace serves on the board of the Organic Seed Alliance and is a worker/owner of the cooperatively managed Southern Exposure Seed Exchange, which offers over 700 varieties of open-pollinated heirloom and organic seeds selected for flavor and regional adaptability. She is also an organizer of the Heritage Harvest Festival at Monticello, a fun, family-friendly event featuring an old-time seed swap, local food, hands-on workshops, demos, and more. She currently writes about heirloom vegetable varieties for magazines and blogs including Mother Earth News, Fine Gardening, and Southern Exposure.
 

Learn more about this author