Promotion
Use code DAD23 for 20% off + Free shipping on $45+ Shop Now!
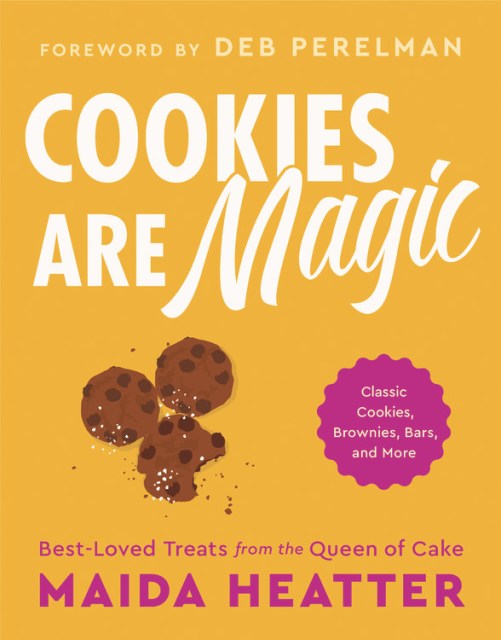
Cookies Are Magic
Classic Cookies, Brownies, Bars, and More
Contributors
Foreword by Deb Perelman
Formats and Prices
Price
$28.00Price
$35.00 CADFormat
Format:
- Hardcover $28.00 $35.00 CAD
- ebook $14.99 $18.99 CAD
This item is a preorder. Your payment method will be charged immediately, and the product is expected to ship on or around April 7, 2020. This date is subject to change due to shipping delays beyond our control.
Also available from:
Excerpt
“I heard a doctor talking on television about the dangers of stress. The doctor listed ways of coping with stress. Exercise. Diet. Yoga. Take a walk. I yelled, ‘Bake cookies.’”
foreword
If you ask a home baker, or perhaps a million of them on the internet, about their favorite Maida Heatter recipe, almost all of them will name a cake, a fitting response to a query about the woman known as the Queen of Cake. But despite my affection for her Blueberry Crumb Cake (you’ll never need another), I’ve always had a soft spot for her cookies. They were my first introduction to Maida, twenty years ago on Christmas Eve at my best friend’s mom’s house. My friend’s mother is an excellent baker, and her medley of holiday cookies always included a couple of selections from Maida’s repertoire—something featherlight and buttery, something deeply spiced. When I gushed over them and she realized I didn’t know who Maida was, she was (politely) appalled. At the time, I was just a baking enthusiast who had no inkling of my future career, but still it would be like not knowing who Dorie Greenspan is today.
Along with a lot of America, my friend’s mom learned about Maida in 1968 when she read Craig Claiborne’s article about her in the New York Times, and she went on to buy all of her cookbooks as they were released. In Maida she found someone who could really explain baking—what to look for, which oven rack to use, and even which cookies are too fragile to ship well (see: Old-Fashioned Jumbo Lemon Wafers) and which aren’t (Chocolate Scotch Shortbread)—in a way that few cookbooks did at the time. Maida’s recipes make you feel as though she’s in the kitchen with you, coaching you along, encouraging you.
I’ve been making up for lost time with Maida ever since, baking in particular her Florida Lemon Squares and Johnny Appleseed Squares, a kid favorite. To tune in to Maida Heatter’s cookies in the year 2020, some forty-six years after she published her first cookbook, is to instantly notice a few things: She loves walnuts in a way that few contemporary bakers do, where almonds and pecans reign supreme. Her recipes are precise but friendly, and you feel certain she’s having fun in the kitchen—how else would a recipe get the title Positively-the-Absolutely-Best-Chocolate-Chip Cookies (she’s not wrong). She has a knack for naming recipes, from 24-Karat Cookies to Sour-Cream and Pecan Dreams. Many of my favorites evoke places—East 62nd Street, Savannah, or Palm Beach—ones that were as important to her as they’ve since become to us.
Maida’s recipes feel lighthearted and modern even now. Stuffing candy bars inside baked goods seems straight out of Pinterest, yet it goes straight back to Maida. After you share her thick, craggy, chewy-centered Palm Beach Brownies with your friends, they will never allow you to make anything else.
But above all else, I love Maida’s cookie philosophy: Pot roast is mandatory; cookies are not. You make them because they’re pure, simple fun. I hope this book brings her baking enthusiasm into a new generation of kitchens. Mine has become unquestionably more delicious since I welcomed Maida into it.
—Deb Perelman
introduction
Baking is a great escape. It’s fun. It’s happiness. It’s creative. It’s good for your health. It reduces stress.
If you are reading this book, chances are you know what I mean. You have probably baked cookies. You could probably tell me a thing or two about what fun it is. But if you have not baked cookies, then let me tell you. Bake cookies! Happiness is baking cookies.
People often ask me how I started to bake, and I’m startled. It was so natural, part of life. That was because of my mother, a most unusual woman. She could do almost anything and did everything well. She was a great cook and a true gourmet. Every meal was an occasion… the menu planned with care, the table set beautifully and arranged with an artist’s eye. Whether or not she had help, she did most of the cooking herself because she loved it. And she imparted that love to me.
Cookies are very special to me. All cooking and baking can be great fun and a wonderful escape, but cookies are in a class by themselves. I feel that one can be especially creative with cookies, actually handling the dough—kneading, shaping, building, designing.
I was talking to a friend who is an excellent cook and I was shocked when she said, “I haven’t baked cookies since I was a little girl.” Too bad—what fun she’s missing.
My philosophy is that cookies are fun—pure, simple fun. You don’t make cookies if you’re hassled. It’s not like pot roast—you don’t have to make cookies.
Cookies are love, the love of making them and the love of sharing them. (It is so much looser and easier to bring someone a few cookies than a layer cake or chocolate mousse.) Many of the recipes in this book will keep well, travel even better, and are perfect straight out of the freezer when a guest comes around unexpectedly. I keep many cookies on hand in my freezer, individually wrapped in wax paper or plastic, for company. And nothing makes a better gift than some cookies, elegantly packaged in a beautiful box.
One more word about this book—about any cookbook—before you get down to the serious (fun) business of making cookies. A cookbook should be treated like a school textbook. When reading it, or cooking from it, keep a pencil handy for notations. Underline things you especially want to remember, make notes—just don’t be afraid to write in it. Write down your experiences with the recipes and any changes you make. In the future you will find that your own notes have added to the book and made it more valuable to you.
I have made each of these recipes many times, and have experienced many moments of pure pleasure and joy at each bite. I am sure that you can make them all, and I am sure you will have fun with them.
Enjoy!
before you bake
I have cooked and tested every one of the recipes in this book over and over so that they are worked out perfectly. But in order for these recipes to work for you as they do for me, it is of the utmost importance that you follow every direction exactly. Many instructions may seem trivial, arbitrary, or unimportant, but there really is a practical reason for everything.
If a recipe says to line a cookie sheet with aluminum foil, it is not because I am a fuddy-duddy and care about keeping cookie sheets clean. In some recipes, you would encounter disaster without the foil. With it, if you are like me, you will squeal with joy at the ease, fun, and satisfying excitement of peeling the foil from the smooth, shiny backs of the cookies.
If brownies are not allowed to stand for the specified time after they come out of the oven, they will squash when you cut them into portions.
I could go on and on, but please, take my word for it. Read the recipes carefully and follow them exactly.
1 Read the recipe completely. Make sure you have everything you will need, including the correct-size baking pan.
2 Remove butter, cream cheese, and eggs from the refrigerator.
3 Adjust oven racks and preheat the oven.
4 Prepare the pan according to the directions.
5 Grind or chop nuts.
6 Sift flour (and other dry ingredients) onto a large piece of wax paper or baking parchment.
7 Crack open the eggs (and separate them if necessary).
8 Measure all the other ingredients and organize them into the order called for in the recipe.
Ingredients
• BUTTER •
Whenever butter is called for it means unsalted (sweet) butter.
• CHOCOLATE •
Unsweetened chocolate is also called baking chocolate or bitter chocolate.
Sweet, semisweet, bittersweet, and extra-bittersweet chocolates are generally interchangeable in cooking and baking, depending on your taste and the availability of chocolates.
Semisweet chocolate morsels, chips, or bits: Made by Nestlé, Hershey, and others. I seldom use them (although many people do with excellent results) except in cookies—and for making one of the greatest cookies of all, Toll House Cookies. The recipe for those cookies is printed on the package of Nestlé’s Chocolate Morsels. Of course, that did not stop me from including my own Positively-the-Absolutely-Best-Chocolate-Chip Cookies here.
Milk chocolate: I seldom use milk chocolate in cooking or baking. When I do, it is mostly used cut or broken up, like morsels (for chocolate chip cookies).
Compound chocolate or melting chocolate: Real chocolate contains cocoa butter. Compound chocolate contains some shortening rather than cocoa butter. Real chocolate should be tempered to prevent discoloring or streaking after melting and cooling—compound chocolate does not need to be tempered and will set up (harden) faster than real chocolate. I use compound chocolate for dipping, as in my Chocolate Chip Coconut Macaroons (here).
To Melt Chocolate
When melting chocolate with no other ingredient, the container must be absolutely dry. Even the merest drop of moisture will cause the chocolate to “tighten” or “seize,” becoming a pasty, gritty mess. (If it should tighten, stir in 1 tablespoon vegetable shortening for each 3 ounces of chocolate.) Melt chocolate by stirring it slowly in the top of a double boiler over hot, but not boiling, water. The reason for this is that boiling water might bubble up and get into the chocolate. Some people swear by melting chocolate in a microwave oven.
Chocolate should melt slowly—it burns easily. To be sure chocolate doesn’t get overheated and burn, it is always advisable to remove it from over the hot water before it is completely melted and then stir it until it is entirely melted and smooth. Milk chocolate should be melted even more slowly than other chocolates.
Unsweetened chocolate will run (liquefy) as it melts; sweet, semisweet, and milk chocolates hold their shape when melted and must be stirred. Some semisweet chocolates might not melt as smoothly as unsweetened. If the chocolate is not smooth, stir it briskly with a rubber spatula, pressing against any lumps until it becomes smooth. Various chocolates have different consistencies when they are melted. Unsweetened chocolate is the thinnest, and milk chocolate the thickest. When you melt chocolate in or with milk (or when you mix melted chocolate and milk), if the mixture is not smooth and the chocolate remains in little flecks, beat it with an electric mixer, a wire whisk, or an eggbeater until smooth.
• COFFEE •
Instant espresso or coffee in a recipe means dry—powdered or granules.
Instant coffee powder will dissolve more easily than granules. If you happen to have granules on hand, it is easy to powder it yourself. Whirl some in the blender, then strain it and return the coarse part to the blender to grind until it is all powdered. Medaglia d’Oro instant espresso is finely powdered and works very well. It is generally available at specialty food stores and Italian markets.
• CREAM •
To Whip Cream
Heavy cream may be whipped with an electric mixer, a rotary beater, or a large, balloon-type wire whisk. It will whip more easily and give better results if the cream, bowl, and beaters are cold. The bowl should be metal (but not copper), as that gets and stays colder. Place the bowl and beaters in the refrigerator or freezer just before using them; they should be thoroughly chilled. If the room is very warm, the bowl in which you are whipping the cream should be placed in a larger bowl of ice and water.
Do not overbeat or the cream will lose its smooth texture; if you beat even more it will turn into butter. If you use an electric beater, a handy safeguard is to stop beating before the cream is completely whipped and then finish the job with a wire whisk. This allows less chance for overbeating.
• EGGS •
These recipes are all based on the use of large eggs, or occasionally extra-large or jumbo eggs.
If directions call for adding whole eggs one at a time, they may all be cracked open ahead of time into one container and poured into the other ingredients, approximately one at a time. Do not crack eggs directly into the batter—you wouldn’t know if a piece of shell had been included.
To Separate Eggs
A new bride, when faced with the direction “separate eggs,” placed them carefully on the table about 4 inches apart, and wondered how far they should be from one another…
Eggs separate best (that is, the yolks separate most readily from the whites) when they are cold. Place three small bowls in front of you, one for the whites and the second for the yolks. The third may not be needed, but if you should break the yolk when opening an egg, just drop the whole thing into the third bowl and save it for some other use. When cracking the shell it is important not to use too much pressure or you will break the yolk at the same time.
Some cooks open the egg directly onto the palm of a hand and let the white run through their fingers into a bowl while the yolk remains in their hand. But the most popular method is to tap the side of the egg firmly on the edge of a bowl to crack the shell. Then, holding the egg in both hands, separate the two halves of the shell, letting some of the white run out into the bowl. Now pour the yolk back and forth from one half of the shell to the other, letting all of the white run out. Drop the yolk into the second bowl.
To Beat Egg Whites
Egg whites may be beaten with an electric mixer, a rotary eggbeater, or a large balloon-type wire whisk. Both the bowl and the beater must be perfectly clean and dry. Just a bit of oil, egg yolk, or grease will prevent the whites from inflating properly.
If you use an electric mixer or a rotary beater, be sure not to use a bowl that is too large, or the whites will be too shallow to get the full benefit of the beater’s action. Also, if you use an electric hand mixer or a rotary beater, keep moving it around in the bowl. If you use a mixer on a stand, use a rubber spatula frequently to push the whites from the sides of the bowl into the center. If you use a wire whisk and a bowl, an unlined copper bowl is best, though you may use glass, china, or stainless steel. Do not beat egg whites in an aluminum or plastic bowl.
The beaten whites will have a better—creamier—consistency if you beat some of the sugar into the whites as they begin to hold a shape.
Do not beat egg whites ahead of time. They must be folded in immediately after they are beaten.
Do not overbeat the whites or they will become dry and you won’t be able to fold them in without losing the air you have beaten in. Beat only until they hold a shape or a point—“stiff but not dry.”
• FLOUR •
With only a few exceptions, these recipes call for sifted flour. This means that it should be sifted immediately before it is measured. If the flour is not sifted, or if it is sifted long before it is used, it packs down and 1 cup is liable to contain a few spoonfuls more than 1 cup of flour that has been sifted immediately before measuring.
To Sift Flour
If you have one, use a double or triple sifter (which forces flour through multiple layers of fine mesh); otherwise sift the flour twice using a fine-mesh sieve. Sift onto a piece of wax paper or baking parchment, sifting a bit more than you will need. Use a metal measuring cup. Spoon the sifted flour lightly into the cup. Do not shake the cup or pack the flour down; just scrape any excess off the top with a metal spatula or any flat-sided implement. It is not necessary to wash a flour sifter; just shake it out firmly and store in a plastic bag.
• SUGARS •
When sugar is called for in these recipes, unless otherwise stated, it means granulated white sugar.
Sugar should be measured in the same metal cups as those recommended for flour. If granulated sugar is lumpy it should be strained before use. Brown sugar and confectioners’ sugar are best strained also. (Hard lumps in brown sugar will not disappear in mixing or baking.) Unlike flour, sugars may all be strained ahead of time and you may do several pounds at once. Use a very large strainer set over a large bowl and press the sugar through with your fingertips.
Brown Sugar
Most brown sugars are made of white granulated sugar to which molasses has been added. Dark brown has a slightly stronger flavor than light brown sugar, but they may be used interchangeably.
You can make your own brown sugar by blending together ½ cup granulated sugar with 2 tablespoons unsulphured molasses. The yield is equivalent to ½ cup brown sugar.
Brown sugar is moist; if it dries out it will harden. It should be stored airtight at room temperature. If your brown sugar has hardened, place a damp paper towel or a slice of apple inside the bag and close the package tightly for 12 hours or more.
Confectioners’ Sugar
Confectioners’ sugar and powdered sugar are exactly the same. They are both granulated sugar that has been pulverized very fine and has had about 3 percent cornstarch added to keep it in a powdery condition. Of these, 4X is the least fine and 10X is the finest; 10X is now the most common. They may be used interchangeably. Store it airtight.
• NUTS •
I’ve given weights as well as volume measure for nuts weighing over 2 ounces. If only volume is given, the weight is under 2 ounces.
To Store Nuts
All nuts should be stored in the freezer or refrigerator. Always bring them to room temperature before using, and smell them and taste them—rancid nuts would ruin an entire batch of cookies.
To Blanch Nuts
To blanch almonds: Cover almonds with boiling water. Let them stand until the water is cool enough to touch. Pick out the almonds one at a time and squeeze each one between thumb and forefinger to squirt off the skin. As each one is skinned, place it on a towel to dry. Then spread the almonds in a single layer in a shallow baking pan and bake in a 200-degree oven for half an hour or so, until they are dry. Do not let them brown. If the almonds are to be split or sliced or slivered, cut them immediately after removing the skin and bake to dry as above.
To blanch hazelnuts: Spread the hazelnuts on a rimmed baking sheet and bake at 350 degrees for 15 minutes, or until the skins parch and begin to flake off. Then, working with a few at a time, place them on a large coarse towel (I use a terrycloth towel). Fold part of the towel over to enclose the nuts and rub firmly against the towel. Or hold that part of the towel between both hands and roll back and forth. The handling and the texture of the towel will cause most of the skins to flake off. Pick out the nuts and discard the skins. Don’t worry about the few pieces of skin that remain. This is not as quick and easy as it sounds.
To Grind Nuts
When the instructions say to grind nuts, it means that the nuts should be reduced to a powder, the consistency of coarse flour. Chopped nuts are much less fine and are left in visible pieces. To grind nuts in a food processor, use the metal chopping blade; you can also use a nut grinder or blender. If possible, always add some of the flour called for in the recipe. It will help to prevent the nuts from becoming oily. If the recipe does not have any flour, add some of the sugar called for. And do not overprocess.
• DATES AND RAISINS •
Raisins and dates must always be fresh and soft—baking will not soften them. They may be softened by steaming them in a vegetable steamer or strainer over boiling water, covered, for about 5 minutes. Dates and raisins should be stored in the refrigerator or freezer.
• ORANGE AND LEMON ZEST •
When grating orange or lemon zest, if your grater has a variety of shaped openings, it is best to grate the zest on the side with the small, round openings, rather than the diamond-shaped ones.
• OATS •
All cookie recipes that call for oats mean uncooked. There are many varieties of oats and they give different qualities to cookies. Instant oats should not be used in cookies; they are too fine, too absorbent, and do not give any of the crunchy quality you want. The recipes in this book call for old-fashioned or quick-cooking oats, and I suggest you use those if you can. Steel-cut oats (cooking directions are generally to simmer for 20 to 25 minutes) may be used for cookies but the oats will remain rather hard and will give an even crunchier texture.
Equipment
• COOKIE CUTTERS •
Obviously it is not necessary to use exactly the same size or shape cutter that the recipe calls for; that is just a guide. Cutters should be sharp with no rough edges. If the cutter sticks to the dough, dip it in flour each time. Always start cutting at the edge of the dough and work toward the center, cutting the cookies as close to each other as possible.
• COOKIE SHEETS •
A cookie sheet should be flat, not warped. Shiny, bright aluminum sheets are the best. Cookie sheets should be at least 2 inches narrower and shorter than the oven so the heat will circulate around them and the cookies will bake evenly. Generally 12 x 15½ inches is the most practical size.
Many of these recipes call for placing the cookies on sheets of aluminum foil and then sliding a cookie sheet underneath for baking. The foil is not called for in order to keep your cookie sheets clean (although it will, and if you do a lot of baking you will be delighted with not having to wash and dry them). It will keep the cookies from sticking, and some of the really thin wafer-type cookies, which would be a problem without the foil, will be easy and fun if you use it. I also find that in many recipes the cookies hold their shape better on foil than they do on buttered sheets; often the butter makes them run too thin and become too brown on the edges.
Another reason is mathematics—if you have only two sheets, and if you need four or five for a recipe, by using the foil you can prepare all of the cookies for baking, place them on the foil, and then just slide a sheet under the foil when you are ready to bake them. (You do not have to wait for the cookie sheet to cool.)
Therefore, the recipes say to cut the foil, place the cookies on it, slide a sheet under, and bake. I find this system works very well.
• COOLING RACKS •
You should have several cooling racks. Almost all cookies should be removed from the cookie sheet immediately or soon after baking (unless the recipe specifies otherwise) and cooled with air circulating around them. Many racks are not raised enough for air to circulate underneath, which causes the bottoms of the cookies to be damp and soggy instead of dry and crisp (there should be ½ inch for crisp, thin wafers, 2 inches for large cookies). To raise the racks (especially if the cookies are large and/or thick), simply place the rack on a right-side-up cake pan or bowl.
• DOUBLE BOILER •
Since it is essential to melt chocolate slowly it is generally best to do it in a double boiler, and many of these recipes specifically call for one. If necessary, you can create a double boiler by placing the ingredients in a heatproof bowl over a saucepan of shallow hot water. The bowl should be wide enough so that its rim rests on the rim of the saucepan and the bowl is supported above the water.
• ELECTRIC MIXER
Genre:
- On Sale
- Apr 7, 2020
- Page Count
- 272 pages
- Publisher
- Voracious
- ISBN-13
- 9780316460187
Newsletter Signup
By clicking ‘Sign Up,’ I acknowledge that I have read and agree to Hachette Book Group’s Privacy Policy and Terms of Use