The Home Winemaker's Companion

Secrets, Recipes, and Know-How for Making 115 Great-Tasting Wines

Contributors

By Ed Halloran

By Gene Spaziani

Formats and Prices

Price

$11.99

Price

$15.99 CAD

Format

Format:

  1. ebook $11.99 $15.99 CAD
  2. Trade Paperback $19.95 $25.95 CAD

This item is a preorder. Your payment method will be charged immediately, and the product is expected to ship on or around November 12, 2012. This date is subject to change due to shipping delays beyond our control.

Raise a glass of homemade burgundy and enjoy the fruits of your labor. This informative guide provides an overview of the entire home winemaking process, from the vine (or the boxed kit) to your glass. With more than 100 recipes for a wide range of delicious wines, ports, and champagnes, you’re sure to find a wine to suit your taste. Clear diagrams for setting up your equipment and fail-safe instructions ensure that your home winemaking will be a success. 

Excerpt

PREFACE

May our wine brighten the mind and strengthen the resolution.

—Traditional Toast

THIS BOOK WAS WRITTEN WITH YOU IN MIND, and we hope it will bring a new and exciting dimension to your home winemaking. We’ve included information and recipes for novice and experienced winemakers and expect this book will quickly become an invaluable addition to your winemaking library.

By paring down the art of winemaking to its simplest form and demystifying what actually is a fairly straightforward process, we hope to encourage a lifelong interest in the winemaking hobby. As technology continues to improve, the opportunities for making excellent wine get better and better. If you follow our recommendations and instructions and embrace the discipline of patience, you will be richly rewarded.

HOW TO USE THIS BOOK

Begin by reading the first two chapters in their entirety. They will provide you with a good overview of the process of making wine and later will serve as ready reference tools.

Next, read the introductory pages of chapters 3 through 7. They’ve been designed to walk you through the entire spectrum of winemaking, from the simple (using kits) to the most complex (producing red wine from grapes). Subsequent chapters deal with more advanced issues.

Choose a method, based on your comfort level with the procedures required to produce the wine. Then carefully follow the instructions in the recipe.

Generally speaking, people who balk at making wine from grapes do so because they’re afraid of what they call “all that science.” Actually, checking specific gravity and acid and sugar content doesn’t require a degree in chemistry. We’ll show you how it’s done, and your wines will be even better because you’ll be able to exercise more control over them from start to finish.

People from every walk of life have been making wine for a long while, and you can too. Good luck!


1
GETTING STARTED

Good company, good wine,
good welcome make good people
.

—Shakespeare (1564–1616)

OUR GOAL IS TO ASSIST YOU in the process of making wine. We will present a simple method for attaining quality results with easy-to-understand recipes. Although experienced winemakers rarely use recipes, people who are just starting out find that if they follow instructions carefully, they will make good wines from the outset.

Modern technology makes it easy to make high-quality wines, as new methods for preserving freshly crushed grape juices, either by blast-freezing or through various pasteurization processes, enable them to remain stable and usable for a long period.

Wine, by the way, can be made from any number of things besides grapes, including a variety of other fruits and vegetables. Depending on where you live, many of the raw materials for winemaking may be available locally from vineyards, farms, wholesalers, and retailers.

Whether you make your wine from scratch or a kit, from juices or concentrates, you’ll find that making your own wine is easy and fun!

Novices have produced excellent wines by using kits. These provide the necessary ingredients and instructions, and make it a simple matter for first-timers to create delightful wines. We’ll explore this approach in chapter 3.

Using juices or concentrates also will enable you to produce wonderful wines. Thanks to the preservation techniques we mentioned earlier, it is possible for home winemakers to make wines from all of the world’s great grape regions. There are separate chapters devoted to these methods.

Of course, the ultimate experience comes when you make wine from scratch. This requires more work, but the satisfaction you’ll get makes it worth the effort.

DON’T BE AFRAID!

The process of making wine is simple, and we’ll walk you through it one step at a time. This book is designed to meet the needs of many people — from novices to experienced winemakers eager to learn a few new techniques.

Some people will discover that they already know a great deal about the process, because they’ve learned how to brew their own beers and ales. Winemaking is the logical next step for home brewers, because they already have a lot of the equipment they will need and have learned the importance of cleanliness and patience.

Cleanliness is critical when you’re making wine, and you’ll find that if you follow our suggestions for keeping your work area, equipment, and bottles squeaky clean, you’ll avoid many of the problems caused by unwanted bacteria and foreign matter.

Patience is also important. It’s quite natural to want to taste your wine as soon as possible, but Mother Nature needs to be allowed time to work — alone! Often, the best thing to do is simply to stay away from your wine and let it develop on its own. In fact, oftentimes all you have to do is step back and let nature take its course.

EIGHT STEPS TO WINEMAKING

Winemaking is a fairly simple process and can be accomplished in eight steps:

1. Choose grapes.

2. Crush grapes.

3. Strain juice into fermentor.

4. Inoculate juice with yeast.

5. Allow wine to ferment. Be patient!

6. Rack wine (that is, move the wine to new containers as needed). Be patient!

7. Bottle wine.

8. Age wine. Be patient!

As you can see, during fermentation, between rackings, and after bottling, all you have to do is let the wine “work” by itself.

Using kits, juices, or concentrates lets you skip the pressing and crushing steps, which is why many beginners feel more comfortable with these winemaking methods. Some winemakers never get beyond these methods, because they enjoy producing their wines with relative ease. There’s nothing wrong with this: Regardless of the method, every winemaker puts his or her own stamp on the finished product, and it’s this variation that makes making and tasting wines such a delightful experience.

A BRIEF HISTORY OF WINEMAKING

According to Greek legend, Dionysus (Roman Bacchus), the son of Zeus, made the first wine on Mount Nysa in what is now Libya.

According to the Egyptians, Osiris was the inventor; the Bible credits Noah with developing the art of grape growing and winemaking after the Flood.

For thousands of years wine has served as a tonic, a soporific, a tranquilizer, an elixir, a daily beverage, a food, and an important element in religious ceremonies. The Roman legions brought the vine to England, Germany, France, and Belgium. The Roman influence carries on today, and its viticultural and winemaking processes are legendary.

As Christianity spread throughout the world, so too did wine. Church leaders required it for religious rites and understood the food value of wine. Monks became vintners, and laypeople followed in their footsteps.

Even in the Americas, the Church’s influence was felt: A Dominican missionary, Padre Junipero, is credited with bringing the first grapevines to California from Spain.

It wasn’t until the 1860s that the miracle of winemaking was explained. The French scientist Louis Pasteur clarified the process of fermentation and identified organisms he called fermints as the stimuli for fermentation. Thanks to his efforts, winemakers now knew what happens when grape juice starts to change color, begins to bubble, and eventually turns into wine.

Thomas Jefferson, himself a winemaker, once said, “I think it is a great error to consider a heavy tax on wines as a tax on luxury. On the contrary, it is a tax on the health of our citizens.” Recent medical studies would seem to concur, suggesting that wine — red wine in particular — promotes good health by lowering cholesterol and moderating conditions that can lead to heart disease.

After centuries of making wine, modern technology has taken a lot of the guesswork out of the process, and we are now producing the finest wines ever made.

EQUIPMENT

Earlier, we used the term kit when we talked about ingredients for making wine. Now it’s time to look at another type of kit: the equipment you’ll need to turn your ingredients into wine.

Becoming a home winemaker requires a small financial commitment for basic equipment. Over time, you may decide to experiment with different varieties of wine (including champagnes) and in greater quantities. In that case, you’ll need to purchase additional equipment. If, however, you opt to continue making wine from juices and concentrates, the basic kit will serve you well for many years.

Pay a visit to your local wine supply store. Staff there are likely to have put together one or more basic winemaking kits, or they can create one to meet your specific needs. They’re also a good source of information concerning equipment that you may not want to purchase at this point in your winemaking career, but that may be available for a small rental charge or even on loan from other winemakers.

For example, stemmer-crushers, which are used by people who make grape wine from scratch, are relatively expensive. Generally speaking, winemakers use these devices for only a few hours a year, so they’re usually willing to share.

In any event, when you’re starting out, it’s best to purchase just the items you’ll actually need for your first winemaking project. Therefore, we urge you to talk it over with a knowledgeable person at the wine supply store so you can put together a basic list.

The great thing about the equipment you acquire is that you can use it again and again. And if you’ve been brewing your own beer, you already have most of what you need!

THE ESSENTIALS: BASIC EQUIPMENT

Let’s take a closer look at what you’ll need to get started. You may already have some of these items on hand. We’ve included alternative equipment where possible.

PRIMARY FERMENTOR. You’ll probably use either a 6- to 7.5-gallon (23–28 L) glass carboy or a food-grade plastic pail in sizes ranging from 6 to 32 gallons (23–121 L). You’ll need a container that’s larger than the amount of wine you plan to make in order to allow for foaming and expansion. Stainless-steel and enamel containers with no cracks are also acceptable.

GLASS OR PLASTIC CARBOYS. You’ll need at least one 5- to 7-gallon (19–27 L) carboy for aging and racking your wine. Two containers would be better because you’re going to have to lift and handle them when they’re filled with wine, and this can be cumbersome and awkward. You may even want to consider 3-gallon (11 L) glass carboys for greater ease in handling.

SIPHON. A 6-foot (1.8 m) piece of -inch (0.95 cm) or ½-inch (1.3 cm) polyvinyl tubing will do nicely. A J-tube is another type of siphon. There are also bottling siphons that can do the job — these are inexpensive and efficient, as they will pick up virtually every drop of wine.

STIRRING SPOON OR PADDLE. These are particularly helpful when you are making a red wine (more on this later). Spoons or paddles should be of food-grade plastic, stainless steel, or wood. If you have a lathe, you can turn out your own paddles at minimal cost.

BOTTLE BRUSHES. You’ll need two, one for carboys and the other for bottles. They should have nylon bristles and heavy-gauge wire handles. You can then bend them to reach into tight corners and realign them as necessary.

FERMENTATION LOCK. This device may also be called an air lock, bubbler, water seal, or fermentation trap. Whatever the name, it serves a dual purpose — to allow gas to escape during fermentation and to keep air from getting to the wine. This lock fits into the carboy bung.

CARBOY BUNG (RUBBER STOPPER). This is a rubber stopper with a hole drilled through it to allow for the insertion of the fermentation lock. The bung is made of sulfur-free, pure gum rubber, and is usually sold in combination with a fermentation lock. You’ll need several of these units.

FUNNELS. Buy several plastic or polypropylene funnels. A large one, 12 inches (30 cm) across, used with a strainer, will help you to fill carboys or barrels. You should also have one that measures 7 inches (17.8 cm) across, and a smaller funnel with an outside diameter of ¼ inch (6 mm). We’ll discuss their uses later. Funnels are readily available at the supermarket, hardware store, and wine supply shop.

MEASURING CUPS. You probably already have a standard-size measuring cup in your kitchen, but you’ll also need at least a ½-gallon (1.9 L) cup. There are times when you’ll find the larger one particularly useful, especially if you’re making red wine from grapes and have to scoop the must into a pressing container.

HYDROMETER (SACCHAROMETER). This is a necessity for all winemakers. The hydrometer eliminates guesswork and ensures accuracy. It measures the sugar content of the juice and describes the potential alcohol content. There are a number of different types, but we advocate purchasing one that measures the sugar percentage (Brix temperature; see page 22), alcohol potential, and specific gravity.

HYDROMETER JAR. The hydrometer floats inside this container, which contains either wine or must. The jar is cylindrical and can be made of glass or plastic. Graduations will be marked in milliliters (100 mL, 250 mL, 500 mL, for example).

FLOATING THERMOMETER. A mercury column and scale encased in a %-inch (1.9 cm) glass cylinder, the thermometer floats upright in liquid and is used to measure the temperature of wine.

ACID TEST KIT. After the test for sugar content, the test for acidity is the most important measurement a winemaker takes. Although it is a relatively simple procedure, many home winemakers object to learning how to do it and find myriad excuses to avoid it. Perhaps they are intimidated by the fact that chemistry is involved. Whatever the case, without determining the amount of acidity, a winemaker is prone to make one mistake after another.

It is important to perform this test because your sugar and acid counts should be in harmony before you inoculate for fermentation. It is very difficult to make adjustments later. A complete acid test kit is reasonably priced, and worth every penny! Most kits include a 25 mL burette with a pinchcock; a 5 mL pipette, burette stand, and clamp; 16 ounces (474 mL) of N/10 sodium hydroxide; 1 ounce (30 mL) of phenolphthalein; and a set of instructions.

You should also purchase a 250 mL Erlenmeyer flask to hold your samples. A 250 mL Pyrex beaker is also handy, and you’ll need a supply of distilled water in order to perform the tests. Buy a gallon (3.8 L) bottle (they’re usually cheapest at the supermarket) and keep it with your testing gear.

BOTTLES. Generally speaking, we recommend using the bottle type traditionally used for the wine you’re going to produce (see page 10 for illustrations of standard bottles). Still, there really aren’t any hard-and-fast rules, so you can be flexible. The main thing is to make sure that your bottles are properly cleaned and sanitized before filling them (see page 10) and that they are tightly sealed.

CORKS OR CAPS. Corks, either plastic or natural, are perfectly fine for sealing your bottles. For that matter, so are plastic-capped push corks and screw caps, unless you’re making champagne! (See page 9 for more on bottle closures.)

ADVANCED EQUIPMENT

You’ll need to purchase most of the equipment that follows from a reliable wine supply store or, if you’re lucky, perhaps at reduced cost from a home winemaker who’s having a going-out-of-business sale. In either case, whether new or used, make sure that the equipment you buy is in good shape. And be sure to tell your friends and relatives that advanced winemaking equipment makes a great gift!

VINOMETER. This is an inexpensive instrument for measuring alcohol content. Strictly speaking, it isn’t necessary, but we believe that you’ll find it useful to know what your wine’s final alcohol count is.

WINE THIEF. This is an inexpensive gadget that allows you to lift samples out of barrels, carboys, and other containers. It’s a good thing to have on hand.

BOTTLE STERILIZER/RINSER. This unit consists of a water reservoir (we recommend using a sulfur dioxide solution) and a spring-loaded pump. A screen filters out foreign matter from the recirculating liquid. To operate, push down the bottle several times while it is placed over the pump mechanism. Do this just prior to filling your bottles.

CRUSHER. If you decide to make wine from fresh grapes, you’ll have to crush and press them in order to obtain their juice. Creative individuals have made their own devices, but if you don’t have a lot of grapes to deal with, you can always do it by hand.

When dealing with a large amount of grapes, options are to purchase this relatively expensive equipment, rent it, or use a friend’s.

There are a number of crushers on the market. Our favorite, the flywheel type, usually has a stainless-steel hopper and is about 48 inches (1.2 m) long.

Fruit crushers can also do the job, and more than one winemaker has acquired his at a garage sale. Or you may decide to purchase the upscale stemmer-crusher. This electrified unit crushes greater quantities in a short period. Grapes are placed in the trough, crushed, and dropped into a container underneath while unwanted stems are dispensed out the back of the machine.

PRESSES. Basket presses have been around for many years. In fact, a used one that was more than 100 years old when it was replaced served the Spaziani household well for decades.

These days, bladder presses are coming into vogue (see page 127). They’re larger and more expensive than basket presses, but they’re highly efficient and should last for years.

Either way, look into purchasing a used press. Generally speaking, the only reason to replace one is to move up to a larger unit. Presses are needed for just a few hours a year, so secondhand ones tend to be in excellent condition.

BOTTLE CLOSURES. If you intend to drink all of your wine within one year, plastic-top corks are perfectly fine. They’re easy to insert; in fact, you can do it by hand.

With access to the proper bottles, you can save time and money by using screw caps. Otherwise, spend the money and buy good-quality corks. Trying to save on corks can cost you a great deal in the long run; cheap corks tend to leak and will ruin the wine. If you use regular wine corks, you’ll have to acquire an insertion device.

BOTTLE CORKERS. Hand corkers earn mixed reviews. Some people swear by them; others swear at them. We recommend a floor or a bench model, as it will function efficiently with minimal effort on your part. After more than 15 years, the Portuguese floor-model corker we use still works flawlessly. A four-piece plastic compression head squeezes the cork evenly on all sides, the bottle stand locks in place, and cork depth is adjustable.

BROODS OF BOTTLES

Home winemakers are constantly dealing with acquiring, cleaning, and storing bottles. Our cellars and garages are filled with bottles of all shapes and sizes. They’ve been scrounged from restaurants, wineries, tasting rooms, and friends. This can be something of a pain, but it beats buying new bottles all the time, which is expensive, and shipping charges alone may exceed the cost of the bottles.

If you’re a resourceful scrounger, it’s particularly important to keep your word and pick up the empties on the appointed day and at the designated hour. Even though friends may be flexible, empty bottles are a hazard and create space problems in restaurants and wineries.

BOTTLE CLEANING

If your donors will rinse out the used bottles for you, so much the better, but you still must clean the bottles at home. Start by rinsing them to get rid of accumulated debris, fungus, and other undesirables. (If any of this material solidifies, it will be difficult to clean and sanitize your bottles.) Then soak the bottles in cold water to which 1 tablespoon (15 mL) of chlorine bleach per gallon has been added. A dash of sal soda also helps. When the bottles have been properly soaked and you have scraped off the old labels, rinse each bottle thoroughly with hot water. Let dry before placing them in storage.

When it is time to fill the bottles, first rinse them in hot water. Sanitize each bottle, using your bottle sanitizer/washer with a potassium metabisulfite powder solution (see page 28). Then shake free any excess liquid before bottling. Allow for approximately ½ inch (1.3 cm) between the wine and the bottom of the cork once it’s been inserted.

TYPES OF BOTTLES

Different regions of the world use specifically shaped and colored bottles to identify the wine’s origin. Bordeaux bottles have sharp shoulders and use colored glass to indicate the type of wine in the bottle.

Burgundy bottles have sloping shoulders, and several colors are used.

Most German wines are made in the area of the Rhine River or along the Moselle. In both cases, they use tall, slender bottles. There are two colors of glass, brown for the Rhine region and green for Moselles. German-style bottles are also used in the Alsace region of France.

The most common size today is the 750 mL (25.4 oz) bottle. Other sizes are the 1.5 L (50.7 oz) and the 375 mL (12.7 oz) half bottle. These are particularly good for wine left over during the bottling process.

Some winemakers prefer using even larger jugs. They may hold a gallon (3.8 L) or more, and they’re fine — provided, of course, that the wine is consumed soon after the jug has been opened.

INGREDIENTS

“You can’t make good wine from poor grapes … you must have good grapes to make good wine.” We’ve heard this statement over and over from the world’s best winemakers. On the other hand, as a lot of people can tell you from experience, it is possible to make bad wine from good grapes, and quite a few of us, learning gradually through trial and error, have done that many times.

Genre:

On Sale
Nov 12, 2012
Page Count
272 pages
Publisher
Storey
ISBN-13
9781612122274

Ed Halloran

About the Author

Author Ed Halloran is a freelance writer, a radio and television commentator, and a college marketing professor.

Author Gene Spaziani has been a home winemaker for over 40 years. He shares his knowledge by teaching wine courses in New Haven and Bridgeport, Connecticut. He is a charter member of the Society of Wine Educators, president of Amenti del Vino-The Wine Society, and a past president of the American Wine Society. Together with Ed Halloran, Gene has co-written the Storey book, 
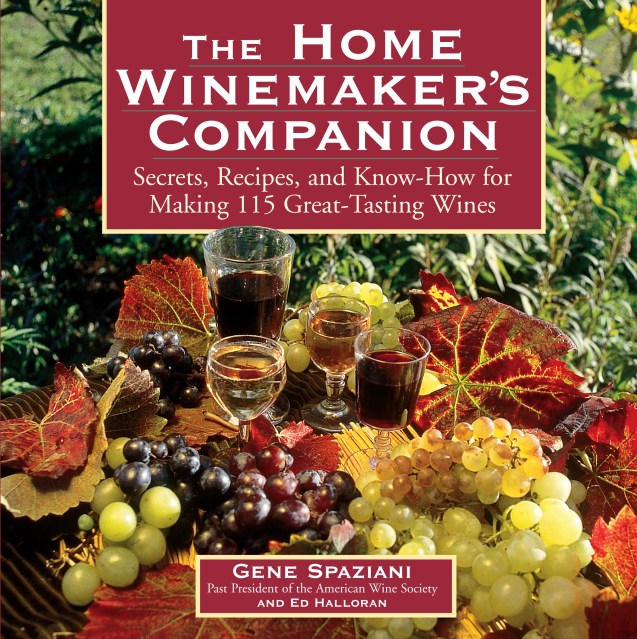
The Home Winemaker’s Companion. Their book is a complete guide for the beginning or advanced winemaker, with instructions for using concentrates, kits, juices, fruits and herbs to create a wide variety of homemade wines. In addition, Gene is a writer for New England Wine Gazette, WineMaker Magazine, and the American Wine Society Journal. At the sixth annual Connecticut Amateur Home Winemakers Competition, Gene took home the show’s highest award. He won Best of Show for his 1996 Cabernet Franc, as well as gold, silver, and bronze medals for other entries. He has also won gold medals for his entries in the American Wine Society Amateur Competition, the Indiana State Fair Amateur Wine Competition, the Connecticut Amateur Wine Competition, and the Pittsburgh Amateur Wine Competition.

Gene lives in Connecticut with his wife, Isabel. He has four children and five grandchildren.

Learn more about this author