Promotion
Use code DAD23 for 20% off + Free shipping on $45+ Shop Now!
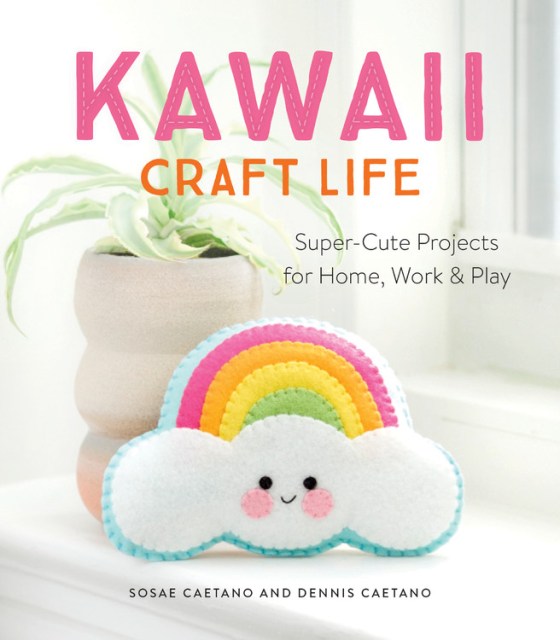
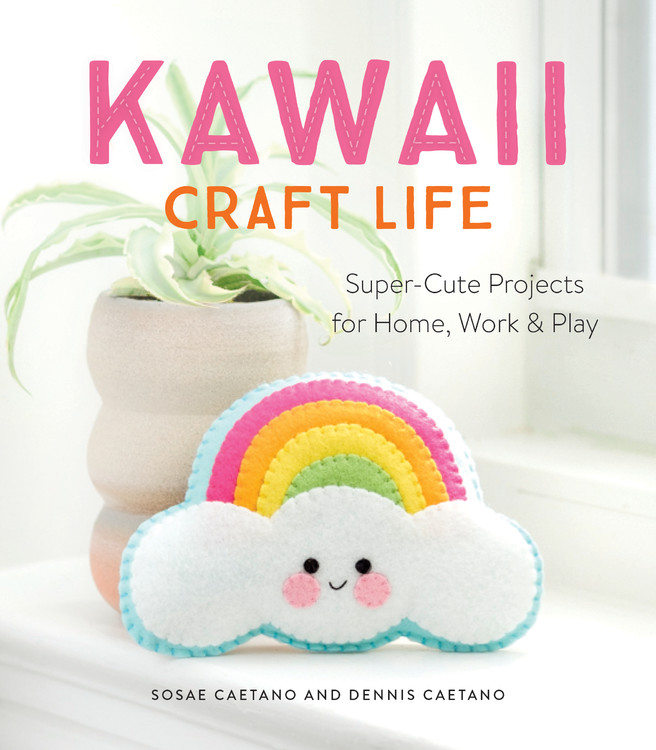
Kawaii Craft Life
Super-Cute Projects for Home, Work, and Play
Contributors
By Dennis Caetano
Formats and Prices
Price
$19.99Price
$24.99 CADFormat
Format:
- Trade Paperback $19.99 $24.99 CAD
- ebook $12.99 $15.99 CAD
- Trade Paperback $9.95 $12.50 CAD
This item is a preorder. Your payment method will be charged immediately, and the product is expected to ship on or around May 14, 2019. This date is subject to change due to shipping delays beyond our control.
Also available from:
Few can resist the charm of kawaii — the Japanese word for “cute” or “lovable” — which has grown from a national trend to a worldwide phenomenon. Now you can add an adorable kawaii touch to your home, dorm room, or office with this charming collection of feltcraft, cross-stitch, and embroidery projects.
This complete introduction includes materials lists and hand-stitching basics, step-by-step instructions and illustrations, printable templates, and beautiful photography. A celebration of all things kawaii style and suitable for both beginners and seasoned crafters alike, you can create dozens of cute and cuddly crafts.
Projects include:
Feltcraft…
Rainbow Cloud Plushie
Woodland Critters Garland
Sweet Sloth Pencil Topper
Cross-Stich…
Super Sushi Magnets
Cactus Garden Smartphone Case
Happy Avocado Gift Tag
Embroidery…
Sweet Dreams Slumber Mask
Coffee Shop Cup Cozy
And more!
Excerpt
Explore book giveaways, sneak peeks, deals, and more.
introduction
WHAT IS KAWAII?
Simply put, kawaii is the aesthetic of all things cheerful, sweet, and adorable. The word kawaii means “cute” in Japanese. But it’s so much more than that. Kawaii is about seeing the bright side of life, and it has the power to make you smile. (Yes, the same disarming power that babies and little animals have!) It’s the precious, the cuddly, the silly, and the imperfect. Kawaii is all things super-cute.
NEEDLECRAFT
Needlecraft is as old as time, and yet it’s forever modern. That’s because there’s no end to the wonderful things you can create with a needle and thread. These days, stitching is a perfect antidote to technology overload. Once you pick up needle and thread, you’re only a few stitches away from a lower heart rate, calmer breathing, and a more tranquil mind. And we should also note: Stitching is fun. A lot of fun.
A BIT ABOUT US
We started our needlecraft journey years ago, when the hurly-burly of life got to be a bit much. Crafting with needle and thread quickly became an empowering way to deal with stress, to unwind, and to express our creativity. And, of course, we’ve always loved kawaii style—long before we even knew what kawaii was! Our first hand-stitched kawaii felt plushie—a sweet and dreamy blue cloud—inspired us to design even more needlecraft projects. And design we did: from felt animals to whimsical cottage ornaments and kawaii monsters. We made digital instant-download patterns of all our designs and launched our pattern company, Trellis & Thyme.
Since then, we’ve created over 140 patterns, and that’s just the beginning. Inspiration strikes us every day and we’re always designing, sketching, and playing with ideas for the next project. Whether we’re creating a pattern or stitching it to life, needlecraft brings us so much happiness, and we hope it does the same for you!
ABOUT THE PROJECTS IN THIS BOOK
For this book we’ve designed thirty-five original kawaii projects for you to hand-stitch, cross-stitch, and embroider. Our hope is that you’ll feel inspired to try some (or all!) of them. Many of the projects can be created in a single afternoon, but some will take a bit more time and patience. They all require your unique hand and style to come to life.
This book is divided into four main sections: Needlecraft Essentials, Feltcraft, Counted Cross-Stitch, and Embroidery. Needlecraft Essentials (here) is a wonderful introduction to the basics of hand-stitching. You’ll learn all about needle, thread, fabric, and other essential tools for creating the projects in this book. Plus there’s a handy Stitch Library (here) that shows you how to make the simple stitches that bring these projects together.
Each project in this book includes a list of materials and illustrated step-by-step instructions—some also have templates, included at the back of the book—to guide you through the making process. We want your creative time to be well-spent and, above all, fun! We’ve also included a few alternate colors for some of the projects, such as the Cupcake Bag Charm (here) and Fudge Pop Plushie (here). We hope this encourages you to play and choose your own color combinations. Remember, with kawaii style there is no right or wrong—just do what you love!
In writing Kawaii Craft Life, more than anything we wanted to show how needlecraft can be a creative and exciting way to add charm to everyday life. Almost anything can be adorned with stitches, so let your imagination run wild. For example, if you like the Dragon Bookmark design (here), maybe you’d rather stitch it on a pillowcase or even the back pocket of a pair of jeans. And remember, kawaii style encourages playfulness, so don’t fuss with perfection.
We’d love to see your projects! Follow Trellis & Thyme on Instagram (@SosaeCaetano) and be sure to include #KawaiiCraftLife with your project posts.
So go ahead and add some kawaii charm to your life! Remember to make it silly. Make it cute. Make it wonky. Make it uniquely yours.
—Sosae and Dennis
Needlecraft Essentials
The projects in this book focus on feltcraft, counted cross-stitch, and embroidery. Though they share similar tools and techniques, there are still plenty of details that set these crafts apart. Get to know the essentials and have fun!
FELTCRAFT
To work with felt is to fall in love with felt. Maybe it’s the rich, dense fabric that doesn’t fray when you cut it. Maybe it’s all the vivid felt colors, or the fact that it’s so versatile you can create almost anything with it. Here are a few things to know before jumping into the wonderful world of felt.
CHOOSE YOUR FELT
ACRYLIC: This is the kind of felt you will find at big craft stores. It tends to be thin and the quality is not ideal for hand-stitched projects.
WOOL: Wool felt is a soft and dense fabric. It has an heirloom quality, which makes it perfect for hand-stitched items, and it comes in lots of rich colors. It’s also rather expensive. You can find wool felt at craft stores or online.
WOOL-BLEND: This is our favorite type of felt. It feels like pure wool felt, comes in hundreds of rich colors, and is very affordable. You can find the best selection of wool-blend felt online.
FELTCRAFT TOOLS
EMBROIDERY NEEDLE: A sharp embroidery needle is a must for working with felt. They come in a variety of sizes, so choose a size that suits the project. For example, if you’re stitching something quite small, you’ll want to use a smaller needle (size 9 or 10). Some projects require you to stitch through more than two layers of felt at once. In those instances it may be helpful to change to a larger needle (size 5 or 6) to help poke through all the layers. (Note: Smaller needles have a larger number.)
THREAD: Six-stranded cotton embroidery floss is ideal for hand-stitching with felt. Cut a working length of about 20 inches. Most of the felt projects in this book will have you stitching with three strands of floss. Be gentle as you pull the strands apart to avoid tangles.
CRAFT SCISSORS: To cut through felt, you need a pair of sharp craft scissors. Choose a pair that has a pointed tip, as that will come in handy for cutting out tiny felt pieces.
FINE-TIP BLACK MARKING PEN: When you need to mark things on felt, a fine-tip black pen is very handy. (Avoid felt-tip pens, as they will bleed ink and the ink will spread through the felt fabric.)
FABRIC GLUE: Fabric glue comes in handy when working with felt. It’s ideal for attaching small felt pieces (like Cheeks, Noses, etc.) that would be very difficult to stitch otherwise. When applying glue to felt, use a small paintbrush to coat the surface evenly. Always let the glue dry completely before continuing with the project.
SNAP CLOSURES: Some of the projects in this book require metal snap closures. They’re super-easy to sew. Simply mark their location on the felt using a fine-tip pen, then sew in place according to the manufacturer’s instructions.
STITCHING WITH FELT
Stitching with felt is easy. Simply cut out the templates and felt pieces, thread your needle (making a knot at the end), and follow the simple project instructions. All the stitches you’ll need for this book can be found in the Stitch Library (here).
COUNTED CROSS-STITCH
Cross-stitch is all the rage. It’s hip, it’s fun, it’s relaxing, and it creates a unique and very pretty stitch-scape! Counted cross-stitch simply refers to a kind of cross-stitch that follows a pattern chart and uses a gridded fabric called aida.
CROSS-STITCH TOOLS
FABRIC AIDA: Aida comes in many colors and grid sizes. For the projects in this book, we recommend white 14-count aida. It’s the most common type and can be found at major craft stores.
PLASTIC AIDA: Some of the projects in this book call for 14-count plastic aida. It’s ideal for anything that needs to be a bit more sturdy. You can order plastic aida online or look for it at your local craft store.
NEEDLE: A dull-tip tapestry needle is best for cross-stitching. (The aida fabric already has holes in it, so you don’t need a sharp needle to poke through.) Use a medium-size needle so it doesn’t stretch the holes in the aida (size 24–26.)
THREAD: Cross-stitch the projects in this book using six-stranded cotton embroidery floss. Cut a working length of about 15 inches and stitch with two strands. The cross-stitch patterns in this book reference DMC floss colors.
SCISSORS: You will need a pair of sharp craft scissors to cut through fabric or plastic aida. Cutting out finished cross-stitch designs is all about precision, so make sure your scissors have a pointed tip.
HOW TO READ A CROSS-STITCH CHART
In this book, cross-stitch charts feature solid color blocks for quick and easy reference. Each color block corresponds to a DMC floss color as well as a position on the aida fabric.
HOW TO CROSS-STITCH
Remember to cross-stitch using only two strands of embroidery floss. Most of the projects in this book require aida pieces that are too small for a hoop, which is just fine because aida is great to hold and stitch as is.
Before you begin, it’s helpful to locate the center of your aida. Once you know the approximate center, you can count over to your chosen starting point on the cross-stitch design chart.
Cross-stitches are done in two parts: First you will make a series of half cross-stitches, and then you will return to complete each one. Here’s how you begin: Start by bringing your needle up through the aida at point 1 (leaving a 1-inch “tail” of floss in the back). Bring your needle down to point 2. Come back up at point 3 and back down at point 4. Repeat for the entire column.
To complete the cross-stitches, come up at point 9 and go back down at point 10. Then come up at point 11 and go back down at point 12. Repeat until you’ve completed all the cross-stitches in the column.
When changing threads or finishing, simply weave the working floss into a few stitches on the back of your aida and cut. (Unlike in hand-stitching and embroidery, in cross-stitch you do not tie off with a knot. All ends are woven in to existing stitches for a smooth, flat finish.)
A quick and gentle press with an iron will remove any creases from finished cross-stitch designs that are stitched on fabric aida. Place a cloth over the aida as you press (or press on the opposite side of the design) and remember to be very gentle so as not to flatten the stitches. If the project calls for cutting out the design, do so carefully with a pair of pointed-tip scissors. Cut one full square away from the design’s edge, leaving an aida border around the design. (If you cut any closer, you will break the grid and your stitches will come undone.) Note: Never iron plastic aida—it will melt!
EMBROIDERY
Embroidery is both fun and pretty. You can embroider on anything, from aprons to cotton napkins, felt pencil cases to knit onesies. It’s a way of bringing fabric to life, by adorning it with precious handmade stitches.
EMBROIDERY TOOLS
NEEDLE: A sharp embroidery needle is necessary for embroidering on felt or other fabric. Make sure you have a few different sizes on hand, but in general, it’s best to stitch with a midsize needle (size 7–9). (The larger the needle, the larger the hole it makes in your fabric.)
THREAD: Six-stranded cotton embroidery floss is ideal for embroidering the projects in this book. Use three of the six strands when stitching. Cut a working length of about 20 inches. The embroidery designs in this book reference DMC thread colors, but feel free to choose whatever colors you love most.
SCISSORS: Embroidery scissors come in all kinds of beautiful shapes and colors. The one thing they have in common is how sharp they are. You need a pair of small sharp scissors that can easily cut little threads.
MARKING PENS: A fine-tip black pen is ideal for transferring embroidery designs onto felt or other fabric. For marking on dark felt, use a white, fine-tip, oil-based paint pen. (Both can be found at office supply and craft stores.)
HOOPS: Embroidery hoops come in many different sizes. Choose a size that suits your project. When stitching with an embroidery hoop, it’s best not to tighten it too much. A too-tight hoop can damage your fabric. Also, be sure to remove your project from the hoop whenever you’re done stitching for the day to prevent permanent creases. The only time you want to really tighten the embroidery hoop is when you’re using it as a frame to display a finished project.
THIMBLE: Some people like using a thimble when they stitch to help push the needle through the fabric. Experiment with metal or rubber thimbles to see what you like best.
HOW TO EMBROIDER
The most important step in embroidery is getting the design onto your fabric. (See the transfer guide to your right for more information.) Once the design has been transferred, place your fabric in a hoop or, in the case of felt and other thick fabrics, simply hold it in your hand. Thread your needle, make a small knot on the end, and poke upward through the underside of the fabric. Based on the project’s instructions, choose an appropriate stitch from the Stitch Library (here), reference a color chart if necessary, and follow the design on the fabric. It’s that simple.
If your embroidery is done on fabric, you can either soak it in a warm bath to relax the hoop creases, or just give it a gentle press with the iron on the opposite side of the design. Do not iron felt—it can shrink or melt.
DESIGN TRANSFER TECHNIQUES
Whether you’re stitching a teacup on a flour-sack towel or a cheerful face on a felt fudge pop plushie, you need a way of getting the design onto your fabric. Read through the following transfer techniques and choose the best one for your particular project.
WINDOW: This is the classic design transfer tool for lightweight fabric. Simply take your design template and tape it to a sunny window. Then place your fabric over it, tape it, and proceed to trace the design onto your fabric using a fine-tip pen.
LIGHTBOX/LIGHTPAD: A lightbox/lightpad is a wonderful tool to have if you plan on embroidering often. With strong light settings, it works well for transferring on all sorts of fabric, including cotton canvas and light-colored felt.
TISSUE PAPER: Trace the design onto white tissue paper. Then pin the tissue paper to your fabric and stitch through it. When you’re done, gently tear the tissue paper away.
PIN-POKE TECHNIQUE: This is one of our favorite transfer techniques. It’s suitable for transferring small designs (like face details) and even complex ones onto felt or any fabric. Once you’ve photocopied your embroidery design template, take a sharp pin and carefully poke holes through the design at 1/8-inch intervals. When your design template looks like Swiss cheese, you’re ready to transfer. (Note: It’s very important that your template not move during the transfer process, so be sure to pin it to your fabric!) With a fine-tip pen, mark tiny dots through the holes you made in the design. When you’re finished, you should have a lovely connect-the-dots transfer to stitch over.
Pin-Poke Technique
Stitch Library
All the projects in this book can be created by learning a few simple stitches. Whether you’re hand-stitching a felt plushie or embroidering on a soft cotton napkin, the techniques are simple and fun to learn.
Running Stitch
Blanket Stitch
Backstitch
Whipstitch
Stem Stitch
Appliqué Stitch
RUNNING STITCH: This is a very simple stitch to make. It looks best when the stitches are even in length and evenly spaced.
Bring the needle up through the fabric at point A, then back down at point B. Come back up at point C, and go back down at point D. Repeat.
BLANKET STITCH: This stitch is used throughout this book for stitching the edges of felt together, and for attaching Ears, Feet, Tails, etc. between felt pieces. It creates a pretty edging and is also quite fun to do.
From point A, insert your needle into the fabric at point B, keeping the thread behind the needle at point C. Tug to tighten thread and repeat.
BACKSTITCH: This is a very versatile stitch, most often used for outlining. Most embroidery designs can be stitched entirely in backstitch. We love it for its simplicity and clean lines. To create smooth curves with backstitch, shorten the stitch length.
Bring your needle up through the fabric at point A, then go back down at point B, and come back up through the bottom at point C. Repeat.
WHIPSTITCH: This stitch is a clean and simple way to bind the edges of felt together. It’s best to keep your stitches compact and even.
Go through both layers of felt at point A, then around the edge of the felt to insert through the other side at point B. Tug the thread gently to tighten, and repeat.
STEM STITCH: This stitch is perfect for making smooth, curvy lines. It creates a thicker outline than backstitch.
Come up through the fabric at point A, but keep the thread loose as you go down into point B. (It helps to put your finger on the thread to keep it from pulling all the way through.) Come back up at point C, then go back down into the fabric at point D, and pull the thread snug.
APPLIQUÉ STITCH:
Genre:
- "This book is nonstop cuteness. Sosae and Dennis Caetano have dreamed up adorable crafts that I can't wait to make myself. These projects are the perfect way to add a homemade kawaii charm to everything in your life!"—Rachel Fong, creator of Kawaii Sweet World
- "Kawaii Craft Life is full of so much fun! The projects will make perfect, sweet little gifts. They are super cute, colorful, and sure to bring a smile to makers' and receivers' faces alike. And who doesn't need more smiles in their life?"—Aimee Ray, author of the Doodle Stitching book series
- "Chock-full of coo-worthy creations that are as delightful to make as the finished products are to behold, Kawaii Craft Life is a salute to cute!"—Jessie Oleson Moore, author of Stuff Unicorns Love
- On Sale
- May 14, 2019
- Page Count
- 192 pages
- Publisher
- Running Press
- ISBN-13
- 9780762493814
Newsletter Signup
By clicking ‘Sign Up,’ I acknowledge that I have read and agree to Hachette Book Group’s Privacy Policy and Terms of Use