Promotion
Use code MOM24 for 20% off site wide + free shipping over $45
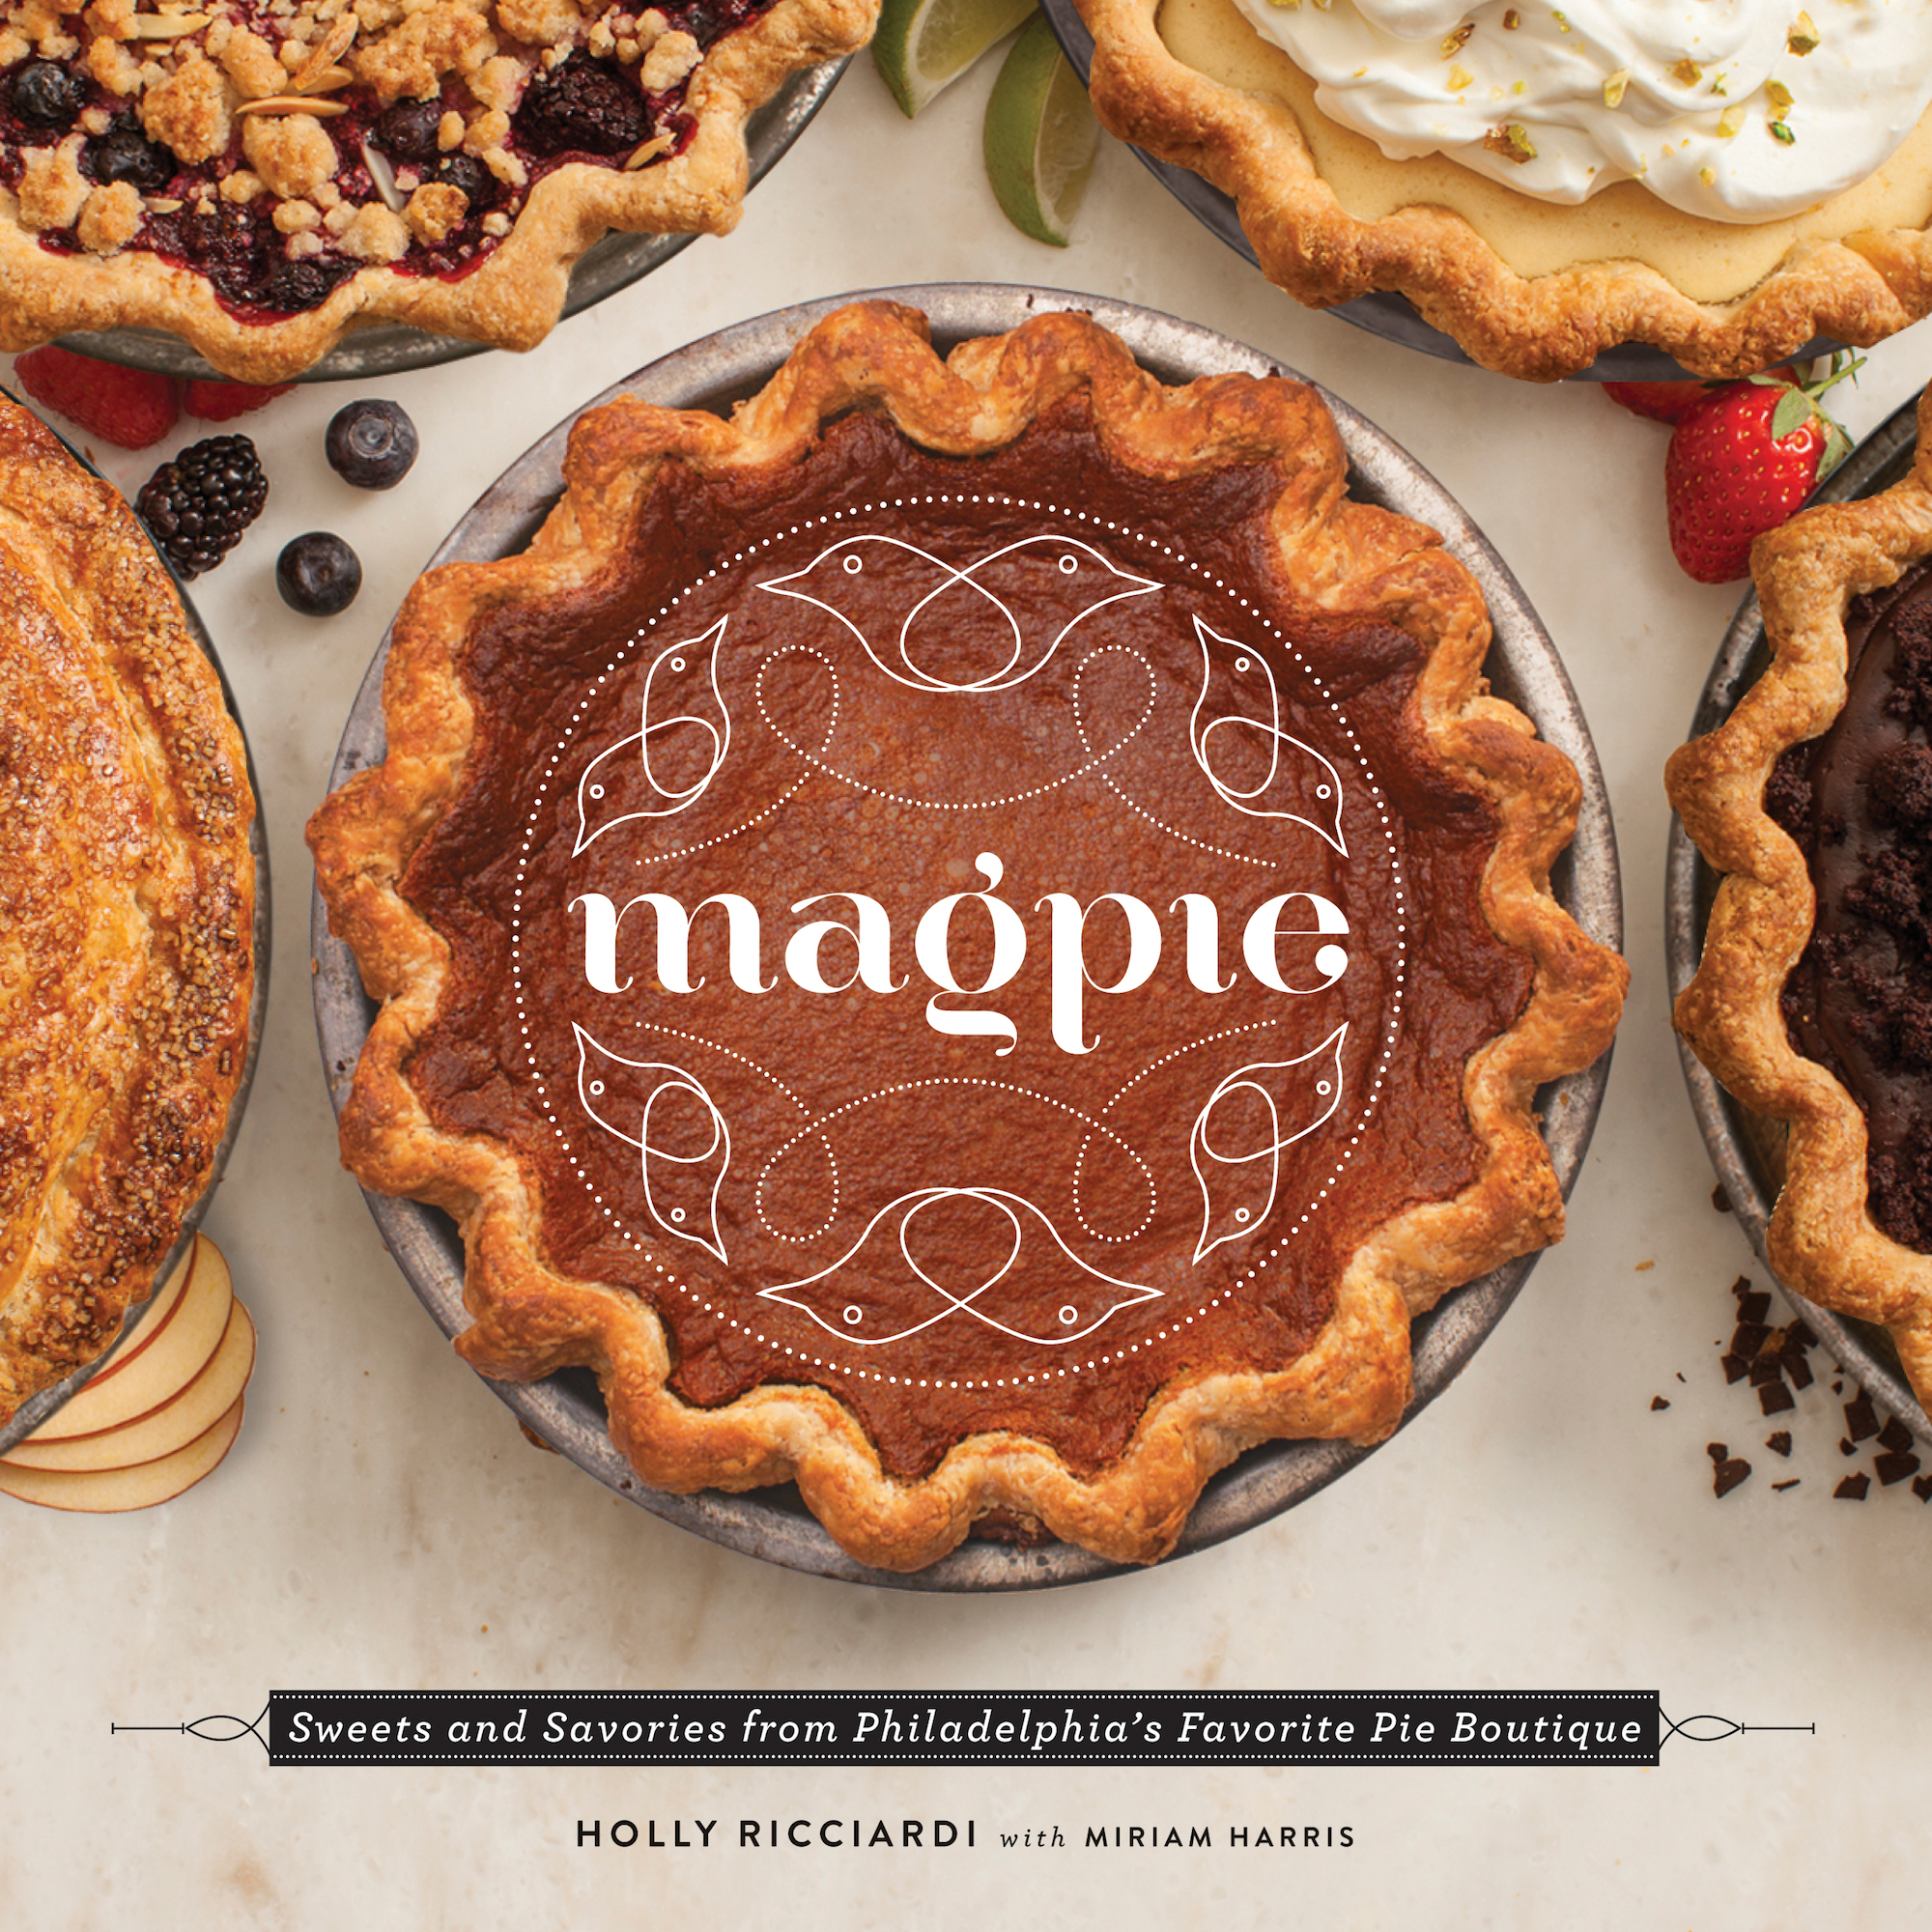
Magpie
Sweets and Savories from Philadelphia's Favorite Pie Boutique

Contributors
With Miriam Harris
Formats and Prices
Price
$14.99Price
$19.99 CADFormat
Format:
ebook $14.99 $19.99 CADThis item is a preorder. Your payment method will be charged immediately, and the product is expected to ship on or around September 15, 2015. This date is subject to change due to shipping delays beyond our control.
Also available from:
Since 2012, the pocket-size shop on South Street in Philadelphia has been turning out flaky crusts and luscious fillings. Now this book serves up Magpie’s seasonal menu for home bakers everywhere: the fruity, creamy, and nutty pies; hand pies, pot pies, and quiches; and even pie shakes and pie “fries,” all fine-tuned to exacting standards and with lots of step-by-step instruction for that all-important crust.
Baker-owner Holly Ricciardi’s upbringing deep in the Central Pennsylvania countryside provided the basis for Magpie’s perfect synthesis of classic favorites and new twists-alongside down-home favorites like Sweet Crumb Pie and Shoofly Pie you’ll find Holly’s bourbon-infused update of her great-grandmother’s special butterscotch pie as well as the ingenious (and instant-sellout) Cookie Dough Hand Pies. More than 90 recipes also include sweets like:
- Cranberry Curd Mini Meringue Pies
- Blueberry Rhuby Rose Pie
- Chocolate Blackout Pie
- Summer Squash Pie
- Ham-Leek-Dijon Potpies
- Quiche Lorraine
From crusts to crumbles and sumptuous savories to sweet confections, there’s a Magpie pie for every occasion.
Genre:
-
"Beautiful pies (and a lot of gorgeous atmosphere) from an iconic Philadelphia pie shop make this a book that will appeal to crust-making pros and amateurs alike."Eater.com naming Magpie one of Fall 2015's Best Cookbooks: Sweet and Savory Baking
-
"Gorgeously illustrated with full-color photographs, Magpie is as informative as it is delicious. The plethora of recipes will have readers reaching for their aprons so they can whip up a pie or two to share with those they love."Shelf Awareness
-
"Full-color photos, step-by-step images, and a contemporary, clean design round out this stellar title."Publishers Weekly
- On Sale
- Sep 15, 2015
- Page Count
- 240 pages
- Publisher
- Running Press
- ISBN-13
- 9780762458059
You May Also Like


Newsletter Signup
By clicking ‘Sign Up,’ I acknowledge that I have read and agree to Hachette Book Group’s Privacy Policy and Terms of Use
