Promotion
Use code DAD23 for 20% off + Free shipping on $45+ Shop Now!
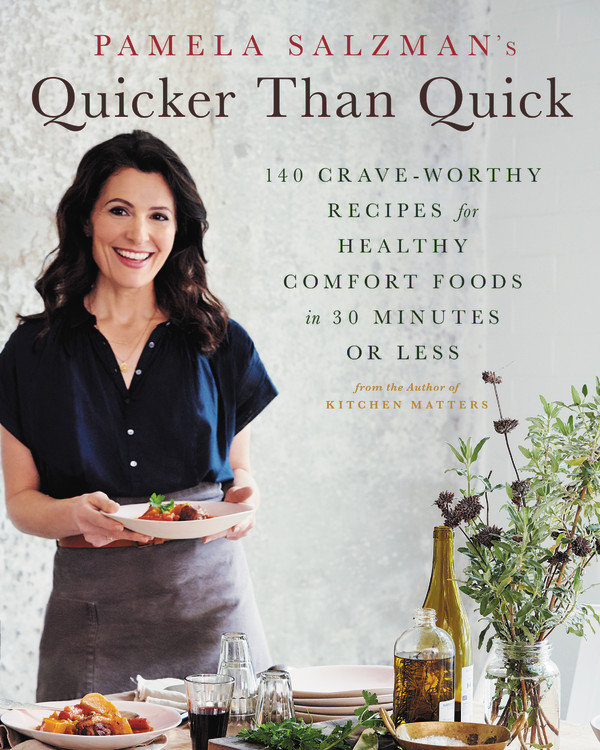
Pamela Salzman's Quicker Than Quick
140 Crave-Worthy Recipes for Healthy Comfort Foods in 30 Minutes or Less
Contributors
Formats and Prices
Price
$28.00Price
$35.00 CADFormat
Format:
- Hardcover $28.00 $35.00 CAD
- ebook $4.99 $4.99 CAD
This item is a preorder. Your payment method will be charged immediately, and the product is expected to ship on or around April 21, 2020. This date is subject to change due to shipping delays beyond our control.
Also available from:
Pamela Salzman, beloved Los Angeles-based cooking instructor and author of Kitchen Matters, is back with a collection of quick, delicious meals that don’t compromise on flavor or nutrition. In Quicker Than Quick, Pamela shares an arsenal of cooking class-tested, family-approved, easy, healthful recipes that will have you covered through breakfast, lunch, and dinner. These inventive sheet pan dinners, stovetop skillet meals, Instant Pot recipes, and quick versions of time-consuming comfort foods require minimal hands-on time and don’t use exotic, hard-to-find ingredients.
Equally useful are the techniques and tricks that teach you great ways to hack your meals, without sacrificing quality. With recipes customizable for a range of diets (vegan, vegetarian, gluten-free, dairy-free, grain-free, Paleo, and nut-free), as well as suggestions for how to repurpose almost every recipe in the book and general ideas for using up leftovers, Quicker Than Quick will make your cooking like a snap — and your local fast food delivery obsolete.
Excerpt
You don’t have to cook fancy or complicated masterpieces—just good food from fresh ingredients.
—JULIA CHILD
GETTING STARTED
Cooking More Quickly and Efficiently
First off, to make the most of this book, read through every section. Some people may not think it’s necessary to read through a whole cookbook, especially if there’s a recipe they want to try right away! (If that’s you, go ahead—but be sure to read through the recipe first!) The reason I suggest you read through the entire book is that in every chapter I’ve included great tips and tricks that apply not to just the recipes in this book, but cooking in general. They truly will make your time in the kitchen faster—and more enjoyable.
Second—but equally important: If you want to cook more often and more efficiently, one of the most important strategies is setting up your kitchen with a few great tools, and your pantry with the essential building blocks of many recipes. You will have your own go-to items, but these are things I keep close in my kitchen, and ones I recommend to my students.
The Well-Stocked Kitchen
I have taught in hundreds of home kitchens, so I consider myself somewhat of a kitchen expert! I can cook the same recipes sixteen to twenty times in a month and have a different experience every time, based on the environment I am in and tools I am working with. My efficiency, speed, and overall enjoyment is very much tied to not how large or fancy the kitchen is, but how well it is set up and edited. By that I mean, clutter-free countertops, a well-lit workspace, and organized drawers and cabinets with functioning tools. One of my favorite kitchens to teach in happens to be one of the smallest, but it is perfectly organized and has a small drawer with a few very sharp knives, just the right amount of space where I can set up a large cutting board, and a place for everything else. Find another spot for mail, organize like items with like items, and position appliances that you want to use (such as a food processor) in an accessible spot in your kitchen. In Kitchen Matters, I provided a more comprehensive list of kitchen equipment and tools. In this book, I am focusing on features of certain products that aid in more efficient cooking, starting with larger appliances and moving to smaller tools.
OVEN. I have come to the conclusion that there is no perfect oven, so get to know yours and its flaws and work around them. For example, some ovens have hot spots in the back or on the bottom, which means that if you are baking more than one sheet pan of cookies, you should rotate the pans at the halfway point of the cooking process. In general, it is best to cook in the center of the oven. If you need to use more than one rack, position the cookware in the upper third and the lower third of the oven.
Most ovens, but not all, have a CONVECTION setting. It uses a fan to circulate heat throughout the oven, which results in a more even heat distribution. The CONVECTION setting can cook food more quickly and can dry excess moisture in the oven better than the traditional heating element. I especially like to use convection for roasting vegetables or for cooking multiple sheet pans or multiple chickens, for example. Since recipes are not tested with the CONVECTION setting, my rule of thumb is to decrease the temperature in any recipe by 25°F when using convection. The cook time should still be the same, but it’s never wrong to check a few minutes early.
Quick tip: If you need to preheat your oven in a hurry, set it to BROIL. When you are ready to bake or roast, change the setting to the normal BAKE or CONVECTION setting and it will likely be at your desired temperature.
STOVE. I much prefer gas over electric, since gas heat adjusts much faster to changes in the dial. I also really like the stoves with extra-wide burners so I can use multiple large skillets next to each other and keep them perfectly centered over the flame. I have also never met a perfect stove, so I just get to know their quirks and work around them the best I can.
EQUIPMENT
You don’t need every gadget on the market to be a good cook or a quick cook. But you do need at the minimum a few basics, and I believe in quality over quantity. I have many staple workhorses in my kitchen that I have had for decades. In general, I favor nontoxic materials, such as Pyrex, glass, ceramic, enameled cast iron, cast iron, stainless steel, and black baker’s steel. Try to avoid nonstick coatings and untreated aluminum, both of which when heated leach into your food. If that’s what you have, grease your bakeware and then line with unbleached parchment paper before using. To determine the size of the pan, measure from the top as opposed to the bottom. I have provided a cheat sheet of volumes here so you don’t have to compare the volumes and areas of all your cookware each time when you are adjusting the yield of a recipe either up or down.
BAKING PANS (RECOMMENDED NUMBER)
9- or 10-inch pie plate (1 or 2)
9- or 10-inch springform pan (1)
9-inch round cake pan (1 or 2)
Standard 12-well muffin tin (1), plus unbleached parchment liners or reusable silicone liners
8-inch square baking pan (1)
8½ x 4½-inch or 9 x 5-inch loaf pan (1)
BAKING DISHES
9 x 13-inch (1 or 2)
7 x 11-inch (1)
BAKING SHEETS. I suggest at least two 13 x 18-inch half sheet pans, and if you also have a smaller oven, two 10 x 13-inch quarter sheet pans. If your oven is wide enough, it is ideal to have at least one 15 x 21-inch three-quarter sheet pan. This larger size can fit more food in one layer, making it a more efficient way to roast and bake. Check the width of your oven to make sure it will accommodate this size.
BLENDER. A good blender is so useful for making smoothies, nut milk, dressings, and creamy desserts. The stronger your blender, the more creamy and smooth the results will be. If it is in your budget, go for a Vitamix, which is a professional-strength blender that can turn cashews into cream and blitz rock-hard fruit into the smoothest puree. I use mine daily. If you are typically making smoothies for one or two people only, or are blending small quantities, a NutriBullet would be a more cost-effective option. You don’t need both a standard blender and a Vitamix, however.
COFFEE GRINDER. I keep a small electric coffee grinder for grinding seeds (e.g., flax), grains, spices, and freeze-dried fruit. It’s not an essential tool, but I find it handy. You can also use a Vitamix to grind these items.
COLANDERS AND SIEVES. I use colanders for draining pasta and veggies, but a fine-mesh sieve is what you need for rinsing itty-bitty quinoa or straining stock to be ultraclear.
COOLING RACKS. I can’t believe how many kitchens I work in without cooling racks! It may seem optional, but honestly, if you bake, you need a wire rack onto which you transfer cookies, cakes, muffins, and quick breads so that they cool properly. These racks are also handy for drizzling doughnuts!
CUTTING BOARDS. You need at least one large cutting board, preferably with grooves on the edges to catch drippings from cooked meat, and a small one for smaller jobs.
I prefer wood or bamboo; either is naturally antibacterial and won’t dull your knives the way plastics do. Wood requires a bit more maintenance, so be sure to dry your boards well before putting them away, and every couple of months, rub a little coconut oil into the surface. I clean mine with a rough sponge, dish soap, and the hottest water possible.
FOOD PROCESSOR. If I had to pick only one appliance to keep in my kitchen, it would be a food processor. I use it constantly for pureeing, chopping, ricing vegetables, making pastry dough and pesto, and more. Sometimes a blender can stand in for a food processor, but more often than not, it can’t. In general, I prefer a blender for liquids, such as smoothies, soups, and dressings, and a food processor for everything else.
I recommend at least an 11-cup capacity. My favorite is the 16-cup Breville Sous Chef, which I find powerful and easy to use. I am obsessed with the adjustable slicing disk and the reversible shredding disk. (Check out my YouTube video for how to use a food processor.) No matter which brand you have, you must keep it in prime real estate in your kitchen, or you will never use it! You can buy additional disks from the manufacturer or online.
INSTANT POT. An Instant Pot is one brand of multicooker, an appliance that is a pressure cooker, slow cooker, rice cooker, and yogurt maker all in one. I have the 6-quart unit. Most people use it for its quick pressure-cooking function and these machines are all the rage for that reason. I do think multicookers, including the Instant Pot, have their limitations, but I have included a short chapter of Instant Pot recipes in this book, since the theme is quicker cooking. Read more about the Instant Pot here.
KITCHEN TIMER. I am usually cooking multiple things at once and I am often helping someone with homework or working on the computer at the same time. Therefore, I have a triple timer by OXO to keep me from getting distracted; I find it invaluable.
KITCHEN SCALE. When you need to be accurate, there’s no other way than with a kitchen scale. Choose one that can measure in pounds and ounces and can weigh at least up to 5 pounds.
KNIVES. You need decent, not the most expensive, but sharp knives. You only need four knives to complete your kitchen. These include:
A chef’s knife, either a 6-inch or 8-inch, or both
A 4-inch serrated knife for slicing tomatoes
A paring knife for trimming, poking beets, and coring fruits
A serrated bread knife
Please, please, please keep your knives sharp. Prep work will be so much more fun, efficient, and safe with sharp knives. All knives, even if they are expensive, need regular sharpening. You can use a honing steel to sharpen your knives at home, but I would still take them every six months to a professional. Check your area for cutlery stores or ask your local cookware store whether it does sharpening.
Hand wash your knives and dry them right away, to make them last longer.
MEAT THERMOMETER. This is nonnegotiable, since this is the only way to determine whether your poultry or meat is cooked to the perfect temperature. If you aren’t sure your thermometer is accurate, put an oven mitt on your hand and dip the tip of the thermometer into a pot of boiling water. If the temperature goes up to 212°F, it’s a keeper!
MICROPLANE GRATER/ZESTER. I have a larger grater for ginger, Parmesan cheese, and garlic, plus a finer zester for citrus and nutmeg.
MIXER. A stand mixer keeps me free to do other things while it creams butter or beats egg whites. My favorite is the 5-quart KitchenAid tilt-head stand mixer. Make sure you have the paddle and whisk attachments, and large bowl. You can buy additional accessories that connect to the mixer to make pasta or ice cream or grind meat. A handheld mixer is fine, but not as efficient.
MIXING BOWLS. I like a set of nesting glass bowls, which are easy to keep clean and easy to store. You need at least one large bowl, one medium-size, and one small.
PEPPER MILL. You can elevate your cooking simply by swapping freshly ground pepper for preground. Big flavor boost. Trust me.
POTS AND PANS. I only use stainless steel, enameled cast iron, or cast iron. Avoid untreated aluminum or nonstick containing PTFEs and PFOAs. If you must own a nonstick skillet, look for one with a ceramic coating. They tend to scratch easily, but they are not terribly expensive, so replace them as needed. Here are the basics:
Butter warmer (although a 1-cup stainless-steel measuring cup can be used on the stove to melt small quantities)
Small: 2-quart saucepan with lid
Medium: 3- to 4-quart saucepan with lid
Large: 5- to 6-quart pot with lid
Extra-large: 10-quart stockpot with lid if you want to make a huge amount of stock or chili for a crowd
Stainless-steel or enameled/cast-iron skillets (8-, 10- and 12-inch)
Dutch oven (7-quart) for soups and stews
RULER. If, like me, you are terrible at guessing measurements, whether it is a 2-inch cube of squash or figuring out whether the pan is 8 or 10 inches, a standard 12-inch ruler is an essential piece of equipment. It’s also handy for leveling off flour.
TOASTER OVEN. Most people use their toaster ovens for, not surprisingly, toast. For sure, it is a luxury, not a necessity, for a kitchen to be complete. But I do use my toaster oven quite often for toasting nuts and for baking small, flat items, such as a couple of cookies, a frittata, or my salty snack bars. Toaster ovens preheat much more quickly than a wall oven and use less energy, but mine also has a timer so I can pop in a baking dish before I go out for a run, and it will turn off automatically.
UNBLEACHED PARCHMENT PAPER. I line all my baking sheets and loaf pans with unbleached parchment paper, and many of my baking pans, too. (Bleached parchment paper may contain a toxin called dioxin, so I always use unbleached.) It makes clean up easy and protects your food from heavy metals and toxins, but it also enables you to remove breads and cakes in one piece, so you can avoid cutting them inside the pan and scratching the pan. Another option for baking sheets is Silpat reusable silicone baking mats. Silicone is an inert substance that does not leach, so it is safe to use in an oven. I have one mat that I use for baking, but not for foods with strong odors, such as fish, which might transfer to the mat.
WATER FILTRATION SYSTEM. Clean water is a basic necessity. Unfortunately, most municipal water is tainted with chlorine, fluoride, and other undesirable toxins. A water filter for the kitchen sink is a great investment. Or, if you can manage, a filtration system for the whole house is even better.
SMALL TOOLS
Measuring spoons. You need at least one set, preferably in stainless steel. But it’s nice to have a second set if you bake a lot. I have one set with elongated, narrow spoons that fit into spice jars.
Dry measuring cups (individually sized ones that you can level off). I prefer stainless steel with the measurement imprinted into the metal, as opposed to a decal that will wear off.
Liquid measuring cups (with a pouring lip). 1-cup, 2-cup, and 4-cup, all made of glass. You can always use your blender jar to measure larger quantities. Be sure to read the increment markings at eye level, not from above, for accuracy.
Vegetable peeler
Can opener
Wine opener
Scalloped tongs (buy ones that are self-locking and are stainless steel on the bottom)
Citrus juicer
Silicone pastry brush (easier to clean than boar’s hair and heat resistant)
Stainless-steel ladle
Pot holders (I like fabric-lined silicone ones)
Wooden spoons and wooden turners (a.k.a. wooden spatulas)
Metal spatula
Silicone spatulas
Whisks
NICE TO HAVE, BUT NOT NECESSARY
IMMERSION BLENDER. You can use a blender to puree soups, but a handheld immersion blender is so much more convenient, since you just stick it right in the pot and blend everything right in there. I use the Breville, which has a nonscratch guard on the bottom to protect my stainless-steel pots. It is very easy to clean.
SPLATTER GUARD. Place this on top of your skillet when searing protein in oil. The mesh allows heat to escape, but also prevents oil from splattering all over your stove.
A Quicker Pantry
One of the most important strategies to be able to cook more quickly is having a pantry stocked with certain basic ingredients. Everything in the following list is something I almost always have on hand and these are the ingredients that are used in the recipes to follow. I do have preferred brands of products, ones that I have had success with over and over again and ones that I consider “clean”; that is, as close to their natural state as possible, minimally processed with no added chemicals or preservatives. Of course, I have not tried every single brand of rolled oats or quinoa out there, so feel free to use what you like. Everything listed here can be found at your local health food store, and many items can also be found at Trader Joe’s and larger markets, such as superstore-size supermarkets Costco and Walmart, as well as online sources, such as Amazon.com, ThriveMarket.com, and Vitacost.com. Many items, you’ll only need to buy two or three times a year.
As I always say to my students, recipes are just road maps and guidelines. If you don’t have an ingredient or two, there is likely a perfectly good substitute.
FATS AND OILS
We need high-quality fats in our diet to support our brains, hormones, satiety, and more. I use unrefined, saturated, or monounsaturated fats that are more stable when heated. Refined versions of these fats have gone through a chemical and/or heat process to strip the fat of its healthful natural fatty acids, and oxidize it in the process (which means they have more free radicals, not good for us!). In my opinion, the best oils are unrefined and whole food–based, such as avocado, coconut, and olive.
You may have heard about the smoke point of oils; the smoke point is the temperature at which an oil will start to burn and, yes, smoke!—and diminish some of the healthy benefits. I try not to heat my fats and oils to a temperature that’s too high. I am happy to finally see evidence that it is fine to cook with olive oil (which my Italian parents and family have been doing my whole life!). But we still don’t want to burn it. Sometimes, I mix oils together if I am trying to raise the smoke point of one (e.g., olive oil) or balance the flavor of another (e.g., sesame oil).
Whenever you have a choice, purchase fats and oils in dark glass jars or bottles. Store all oils, except nut and seed oils, in a cool, dark place, such as the pantry. Nut and seed oils are more perishable and should be refrigerated.
Avocado oil
Butter, unsalted and grass-fed, or good-quality vegan butter
Coconut oil, virgin
Ghee, grass-fed (clarified butter with the milk solids removed, therefore it is lactose-free. It has a stronger, nuttier flavor than butter but is more stable at higher temperatures.) Fourth and Heart brand has a lovely ghee with vanilla and another with garlic added. I also like Countertop Foods’ ghee with Ayurvedic spices.
Olive oil, cold-pressed extra-virgin
Sesame oil, toasted
Truffle oil (not necessary, but a nice finish on the vegan mushroom pasta and also great to drizzle on salads or popcorn)
VINEGARS
Vinegar is not just for salad dressing, but a wonderful ingredient that can round out the flavors of many dishes from soups to meats. Raw (apple) cider vinegar contains antibacterial, antioxidant, and digestive benefits that the others do not. Vinegars have different acidity levels, which is why I keep all of these in my pantry. Mirin (technically a rice wine) and balsamic vinegars are a little sweeter, but I have used wine vinegars plus a little honey or maple in their place. If you have a choice, purchase vinegar in glass bottles. I keep all these vinegars at room temperature in the pantry.
Balsamic vinegar
Cider vinegar, raw and unpasteurized
Red wine vinegar
Rice vinegar
Unseasoned rice vinegar
White balsamic vinegar (not aged) or Trader Joe’s white Modena vinegar
White wine vinegar
SWEETENERS
Most of the time, I use unrefined, minimally processed sweeteners, which I think taste more interesting and are not quite as acid-forming to the body as refined sweeteners. Concentrated sweeteners are still not health foods, no matter how natural they are, and should be consumed sparingly. Sweeteners cannot always be swapped one-to-one with each other. Things to consider are the flavor, color, and whether the sweetener is wet or dry. I find maple syrup and maple sugar to be the most versatile, although they are pretty expensive.
Unrefined sweeteners: coconut palm sugar, maple sugar, mild raw honey, pure maple syrup
Refined sweeteners: brown sugar, natural cane sugar, powdered sugar (look for one with tapioca starch instead of cornstarch)
FLOURS
Genre:
- "Browsing through Pamela's recipes always makes me feel hungry and this book is no exception. She has a real talent for combining fresh, real ingredients in a way that simply makes you want to eat them. Whether you're just getting started with cutting out processed food or you're a seasoned cook, her easy and delicious recipes and simple philosophy will appeal to just about anyone!"—Lisa Leake, #1 New York Times bestselling author of 100 Days of Real Food
- "When I became a mom, cooking healthy meals at home became a priority. Pamela's teaching and recipes make it super easy! Her tips for planning meals and prepping ahead have changed my life."—Molly Sims
- "Pamela is one of the most well-respected cooking teachers in Los Angeles, and this culinary bible is the next best thing to sitting with her, taking in her vast knowledge of whole, natural food cooking."—Catherine McCord, author of Weelicious and Weelicious Lunches
- "This cookbook is for everyone; gluten-free, dairy-free, paleo, or vegan. Not to mention, the recipes are delicious and loaded with my favorite 'Fab Four' wild proteins for muscle tone, healthy fats for glowing skin, plus loads of fiber and antioxidant-rich vegetables for gut health!"—Kelly LeVeque, author of Body Love, Holistic Nutritionist & Health Coach
- "Kitchen Matters is packed with tasty, enlivening homemade meals that are so easy and approachable, they become second nature. It's an incredible resource for anyone who's looking to rid their pantry of processed foods and get on a path to a healthier kitchen and lifestyle."—Jodi Moreno, author of More with Less
- "You'd better be standing in a kitchen when you flip through this book for the first time-the enticing color photos of the dishes will make you want to start cooking immediately."—Taste for Life
- "Beautifully and profusely illustrated throughout, Kitchen Matters is an impressive compendium of palate pleasing, appetite satisfying, kitchen cook friendly recipes that would grace any and all dining occasions."—Midwest Book Review
- On Sale
- Apr 21, 2020
- Page Count
- 272 pages
- Publisher
- Hachette Go
- ISBN-13
- 9780738285672
Newsletter Signup
By clicking ‘Sign Up,’ I acknowledge that I have read and agree to Hachette Book Group’s Privacy Policy and Terms of Use