Promotion
Free shipping on $45+ Shop Now!
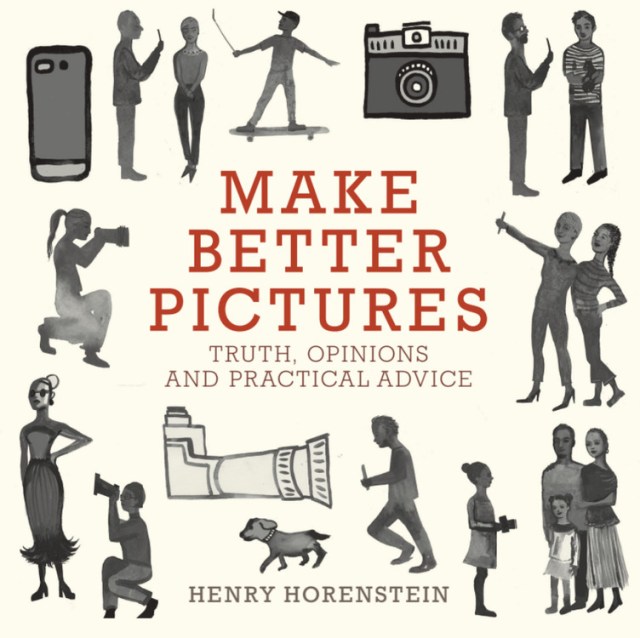
Make Better Pictures
Truth, Opinions, and Practical Advice
Contributors
Formats and Prices
Price
$19.99Price
$25.99 CADFormat
Format:
- Trade Paperback $19.99 $25.99 CAD
- ebook $12.99 $16.99 CAD
This item is a preorder. Your payment method will be charged immediately, and the product is expected to ship on or around November 6, 2018. This date is subject to change due to shipping delays beyond our control.
Also available from:
Photography has never been a bigger part of our lives. But how do you transform everyday snapshots into enduring images — or merely upgrade your Instagram game? With images illustrating the impact of each tip, and with examples drawn from iconic artists, Horenstein shows casual and expert photographers alike how to take the best photographs on every device — from a DSLR to an iPhone.
Excerpt
Alex MacLean has a slightly different point of view than most of us. That’s because his world is thousands of feet below him, as he flies and shoots at the same time from his two-seater.
INTRODUCTION
Make Better Pictures took five years to write, a ridiculously long period of time given its length and my familiarity with the subject. After all, I am a professional photographer, writer, and teacher. I know my subject well and can type fast. So why so long?
Barring the usual reasons my students give (procrastination, laziness, other commitments), there was the simple fact that in these five years I had actually written three versions of this book—each one longer than this. And then I threw them all out.
It wasn’t that I thought they were bad. How would I know? The online reviews don’t come in until after a book is published. No, they were probably good enough, but they were… boring. Typical. Predictable. All things I rail about in my classroom.
They were books of facts, pure and simple. And I had written books of that sort before. A few of them. Worse, there were a ton of books out there like that already. So why bother?
I decided to rethink the whole thing and write a shorter book, highlighting some of the things I’ve learned over the years that I think are important, interesting, worth knowing. Then sprinkle that with some pure facts and pure opinions.
In short, I decided to let it all hang out. And for toppers deliver a strong, energetic design and original, quirky drawings. And terrific, often unusual photographs by many great photographers. Some of my own photographs even. A perk of being an author.
I set out to make a book like no other in our field. Feel free to disagree, rant, or even post a negative review (though I’d really rather you didn’t). But mostly, I hope you see it for what it is, and enjoy while you learn some things you maybe didn’t know.
Some photographs have a “digital look”: eye-popping sharpness, ultra-saturated color, maybe some image noise or other visual artifacts. But most images taken with a digital camera or printed digitally look a lot like traditional photos taken with film and printed in an old-school darkroom. Much the way photographer Justin Kimball worked when he began his career.
DIGITAL DEFINED
ASPECT RATIO: Ratio of the width of an image to its height.
BIT DEPTH: The amount of color information stored in a digital image. The higher the bit depth, the more color gradation.
COMPRESSION: Digitally reducing the file size of an image for more efficient use, storage, and transmission. Beware of reduced image quality when compressed too much.
DNG: A RAW file format that is universal, as opposed to typical RAWs that are proprietary.
HISTOGRAM: Graph that maps image exposure.
IMAGE FILE: The digital form of a photograph.
NOISE: Random, grain-like, and textured specks in the image, as opposed to smooth, continuous tones.
SENSOR: Light-sensitive chip that sits behind the lens in a digital camera to capture (take) the picture, providing the electronic data needed to convert the image into digital form.
ISO: Numerical rating of an image sensor’s sensitivity to light.
JPEG: Information-compressed file format created by camera-applied automatic corrections.
LANDSCAPE ORIENTATION: Horizontal view.
MEGAPIXELS (MP): One million pixels.
PIXELS: Color picture elements that make up a digital image.
POSTPRODUCTION OR “POST”: Work done to an image file after capture, such as cropping, sizing, and a variety of fine-tuning actions, such as work in Photoshop.
PORTRAIT ORIENTATION: Vertical view.
RAW: Uncompressed file format, retaining virtually all the information captured by the camera sensor.
RESOLUTION: Pixel count of an image file, described as pixels per inch (ppi).
KEY SETTINGS
One great advantage of digital photography is the dozens of options your camera allows. But this can also be a disadvantage. Most photographers use only a very few of these options regularly. And sometimes settings get changed accidentally, which can lead to flawed or unexpected results.
The following are the primary camera settings you should be concerned with, and an opinion on how you should set them. Feel free to deviate. Regardless of the settings you choose, these are settings you should check before every photo session to make sure they are set as you want them:
1. IMAGE FILE QUALITY/SIZE: RAW (or DNG) and large JPEG, if available
2. ASPECT RATIO: As you want it. 16:9 for wide; 3:2 or 4:3 for more square
3. EXPOSURE MODE: Aperture-priority
4. EXPOSURE COMPENSATION: 0 or +1/2 or +2/3, usually
5. ISO: ISO 200 or 400 in bright light, ISO 800 or 1600 or higher in low
6. FOCUS: Automatic
7. WHITE BALANCE: Automatic
8. IMAGE STABILIZATION: Always on, except sometimes when using a tripod
CAMERA MUSINGS
The best cameras generally offer the most features, but many of these go forever unused. The most important features, such as interchangeable lenses and RAW capture, are typically available on DSLR and interchangeable-lens mirrorless cameras. The differences are often in the quality of the features.
Professional cameras are almost always more rugged—better protected against impact, dust incursion, or water damage. Moreover, the best cameras are often paired with the highest-quality lenses. Many DSLR manufacturers make two levels of lenses—a standard and a professional model. Both will produce very good results, but professional lenses are more sturdy and should show less distortion or other optical aberrations, though you may not see these in your results, and more important they probably open to a wider aperture for better low-light capture and/or shallower depth of field.
Good lenses are important to the quality of your final result, but more important are the image sensor and processor. The sensor captures light and the processor turns that capture into an image file. The newest and physically largest sensors most often produce the best quality, and manufacturers don’t put large sensors on less-expensive cameras.
Cellphone and tablet cameras have tiny sensors and simpler lenses, but many still produce good-quality results, especially for screen viewing.
Obsession with camera equipment did not arrive with the digital age. It’s been with us since the beginning of photography.
GO GEEK
People come to photography for their own reasons. And it takes all kinds. Some are romantic and dreamy, while others socially conscious or practical. In most cases, people make photographs that match their interests, moods, or personality.
But there is another quite common type in photography circles—the geek. For the geek, tech is what drives them. Perhaps it’s the number of the image sensor’s pixels, the optical design of a lens, or hidden tricks or actions in postproduction. For the true geek, photography may be more about equipment and technique than about the image itself.
While this goes against all creative reasoning, it’s not too surprising. Photography is technically driven, after all. You may or may not agree with this, but remember: geeks have rights, too. And you may even benefit from their obsessiveness. After all, who else writes the endless equipment reviews on photo blogs and other sites?
Modern digital images, properly saved and stored, shouldn’t degrade, but older, casually treated images may be soft, pixelated, and off-color. This image by Bill Anderson is showing its age.
GET THE BEST
You can spend pretty much any amount on a digital camera/lens—from less than $100 to tens of thousands. Of course, you have a budget to consider and can’t buy whatever you want. But in general, buy the best camera you can afford. Usually, a more expensive camera gives you better quality and more features, but it also gives you some surety that the pictures you make now will have all the quality you need in the future.
It’s hard to predict the future, as technology today is so much better than it used to be, but look back at older digital still and moving images. The quality is often inferior, even when made with the best equipment available at the time. Shooting with the best now helps guarantee that your images will still look good years down the road.
This image was made with a Canon camera and a third-party lens. Technically it looks good. Would a Canon lens do better? Possibly. But other user-error factors (camera shake, poor exposure, etc.) and subject movement are more likely to impact the results than lens quality.
THIRD PARTY
What does the “best” mean when you can choose, when buying lenses, between the camera manufacturer’s lens or any number of third-party models?
Not long ago, third-party lenses were strictly for bargain-hunting amateurs and poorly regarded. Their construction was often shoddy, as was their optical quality. But modern versions have made great strides, and a few are even rated better than their branded equivalents, if user reviews are any measure.
Some third-party companies even offer both standard models and pro models. And a few even offer lenses or features that comparable brand-name lenses don’t—maybe advanced image stabilization or larger maximum apertures. A few third-party brands even offer old-school manual focusing along with premium optics.
Lower cost has always been the draw of third-party lenses, but costs have crept up with the addition of professional-level models. Consider a lens’s features, including its bulk and weight. DSLR zooms, in particular, can be hefty, making a more compact, lighter lens very tempting. And that model may just come from a third party.
When photographers refer to the lighting ratio, it’s usually, but not always, in a studio setting. This portrait of Triple Crown winner Seattle Slew has a ratio of about 1:2, which means that one side of his face is one stop brighter than the other.
STOP
The term “stop” usually refers to f-stop, a measure of the size of the lens opening. Standard f-stops double or halve the light that reaches the image sensor, so f/4 lets in twice as much light as f/5.6, and f/16 lets in half the light of f/11.
But photographers also use the term “stop” as shorthand for a general doubling or halving of light, as in: This image is a stop underexposed. Or, the right side of her face is two stops brighter than the left. Here are the usual ways the term “stop” is used.
1. F-STOP: As described above.
2. SHUTTER SPEED: 1/125 lets in one stop more light than 1/250; 1/500, one stop less than 1/250.
3. SENSOR SPEED: ISO 800 is a one-stop-higher setting than ISO 400, requiring half as much exposure.
4. LIGHTING RATIO: When light on one part of the image is twice as bright, or one stop brighter, than another part.
Shooting RAW, Jennifer McClure was able to pull detail from dark and light areas of this contrasty subject, making for a far richer look, with darker areas surrounding a bright center. This leads the viewer to the crux of the image.
JPEG VS. RAW
Digital cameras produce RAW or JPEG image files. As the camera’s sensor captures the subject, its processor digitizes and stores it on your memory card. With JPEGs, the processed information is compressed (made smaller) as the camera automatically decides how much data to keep. With RAWs, information is uncompressed, so it allows much more adjustment in post.
The upside of RAWs is significant. Since no information is lost, it gives you far more control of the final results—more ability to darken a bright image and lighten a dark one. Or pull detail out of shadows and highlights. And so much more. Note that DNG files are RAWs that are universal, which means they can be used pretty much by all software.
JPEGs can be useful, however. They provide generally good results with minimal work, and they hog less space on your memory card and hard drive. Fortunately, many good cameras allow you to make both JPEGs and RAWs at the same time. Use JPEGs for convenience, RAWs for quality. The best of both worlds.
Image sensor sizes vary widely, and these are approximations. But almost always the bigger the sensor the better the overall image quality—and the more expensive the camera. Naturally.
SIZE MATTERS
There are many factors that go into picture quality, but one of the most important is the size of the camera’s image sensor. Large sensors almost always produce better-quality images than small sensors. Thus, most full-frame cameras trump cameras with APS-C or Micro Four Thirds sensors—and, of course, cellphones. And not all cellphone cameras have equal-size sensors either.
Even if you have, say, 24 megapixels on both a full-frame and APS-C camera, the larger sensor will usually rule because the pixels will gather light more effectively. Large image sensors contain larger individual pixels, and large pixels mean better light-gathering ability. This means reduced image noise, better low-light capture, higher dynamic range (the range between the whitest white and darkest black the camera can record), and generally more image detail/information, especially in low light at high ISOs.
Image noise happens in poorly exposed images and those taken with a high ISO (usually in low light) but rarely with perfect exposure and bright light, when you can use lower ISOs. The detail view here shows noise produced by a high ISO.
NOISE
Image noise is most likely to occur with underexposure, when too little light has reached the image sensor. But even in a well-exposed image, there are shadow areas. Because they are dark, shadow areas have less exposure and are most likely to show image noise.
Some cameras are better than others in suppressing noise in the shadows, notably full-frame and other large-sensor cameras. Also, newer models are usually better at suppressing shadow noise. Witness many of the latest smartphone models.
You can reduce image noise in shadows (or otherwise) in postproduction, but you can also help a lot when taking the picture. When framing your subject, don’t include heavy shadow areas unless they are critical to the composition. You can also use flash to fill in (brighten up) the shadows. Overexposing a little also brightens up the shadows. Slight overexposure is good practice anyway, as long as your highlight areas don’t blow out (start blinking).
Genre:
- On Sale
- Nov 6, 2018
- Page Count
- 224 pages
- Publisher
- Little, Brown and Company
- ISBN-13
- 9780316230889
Newsletter Signup
By clicking ‘Sign Up,’ I acknowledge that I have read and agree to Hachette Book Group’s Privacy Policy and Terms of Use