Promotion
Free shipping on $45+ Shop Now!
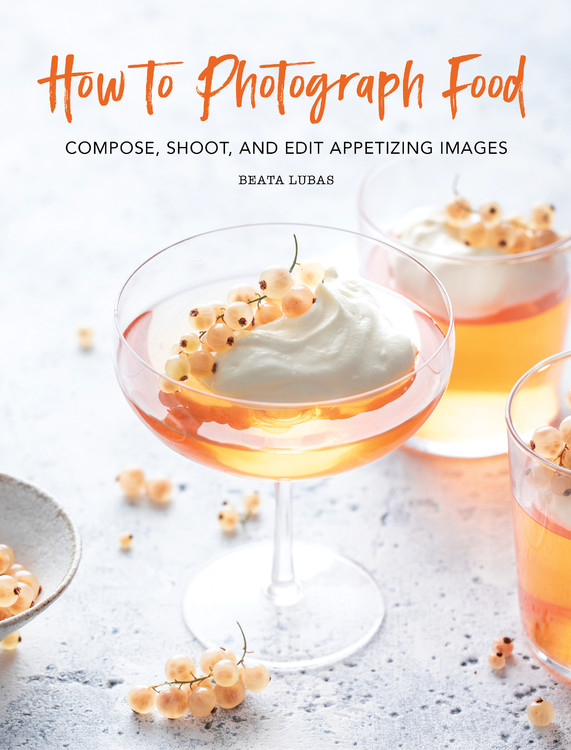
How to Photograph Food
Compose, Shoot, and Edit Appetizing Images
Contributors
By Beata Lubas
Formats and Prices
Price
$25.00Price
$31.00 CADFormat
Format:
- Hardcover $25.00 $31.00 CAD
- ebook $13.99 $17.99 CAD
This item is a preorder. Your payment method will be charged immediately, and the product is expected to ship on or around September 29, 2020. This date is subject to change due to shipping delays beyond our control.
Also available from:
- Gear
- Lighting
- Frame and Balance
- Food Styling
- Photo Editing
- Thinking like a Pro
Excerpt
Welcome note
I believe that creating beautiful images is a skill everyone can master. Not convinced?
Below is one of my very first “artistic” food photos. Oh—did you think I had a natural knack for photography?
The truth is, photography didn’t come easily to me, and I took a lot of bad photos along the way. But I’ve always been stubborn, and I believe that being stubborn in honing your craft is far more important than “natural talent.” Sure, talent might help, but it won’t take you as far as your creative ambition will.
I want you to know that I am SO excited that you’ve picked up this book and I can’t wait for you to dive deeper into it. You really don’t need a massive studio, a ton of expensive equipment, or to be an expert in camera-club jargon to take appetizing pictures of food. All you need is to let your imagination off the leash, learn a few simple techniques, and take the time to put them into practice.
If you are hungry to learn more about food photography, then this book is for you.
Here, I spill my photography secrets—things that I’ve learned from years of troubleshooting—so that you can learn from my mistakes. If you feel that food photography is complicated and overwhelming, that’s exactly how I felt when I first started out. There are a lot of decisions to make when you create a food image from scratch. Over the years, I’ve found my own process and I want to share it with you in this book, so that you can put my favorite tricks into practice too.
In the following chapters, I’ll take you behind the scenes and show you, step-by-step, how I compose my images. And I wouldn’t be me if I didn’t invite some of my favorite people to talk about their unique approaches to food photography too; I am a huge believer that learning from more than one person makes you a better photographer.
Your creativity is at the heart of this book, so you won’t find any strict rules in here. You can dip in for ideas and tools that will strengthen your frame, take and try what you find inspiring and helpful, and leave what doesn’t work for you. Follow your own path, at your own pace, and make your own discoveries along the way. We all work in different ways and that should be something we celebrate.
It all begins with the decision to show up, roll up your sleeves, and work on your craft. And don’t forget to give your skills some space to grow. Taking great images doesn’t happen overnight. It happens when every day you get a little bit better than the day before. It happens when you fail but don’t lose your enthusiasm. It happens when you persist.
I believe that great photography involves a combination of technical knowledge and personal vision. Technical know-how is important to empower your creative vision: it adds quality to your work, gives you confidence, and speeds up your working process. Without vision, however, technical skills won’t take you far. It’s your imagination that makes your work stand out from the crowd.
But when I studied great photographers closely, I noticed there is one more thing they all have in common—something that often gets overlooked, and what I want to bring to the table in this book—a strong mindset.
Creative technique + your vision + a strong, confident mindset = a great recipe for some breathtaking photos of food.
1
Tame Your Gear
“Allow yourself to be a beginner. No one starts off being excellent.”
—Wendy Flynn
Don’t wait until you feel ready
A beginner’s camera, a kit lens, a few old wooden pallet boards nailed together as a background, an untrained eye, and a heart full of passion—that’s how I started. I didn’t feel ready, but I also didn’t wait until I had better equipment, a bigger space, more props, or I had learned every photography rule under the sun. The secret is just to start, and then figure things out along the way.
Start with what you have
I often hear from photographers that they don’t have time, dedicated space to shoot, or good-enough gear. But guess what? No one does when they first start out. You’ve got to find time in the cracks of your busy life and work with what you’ve got. If Steve Jobs and Steve Wozniak started Apple in a garage, then you can start taking amazing food images in your kitchen.
There are a few behind-the-scenes images in this book, as well as food images, that were shot in a studio, but that doesn’t mean a big studio space is necessary to take great food pictures. Some of my favorite images were taken in the corner of my living room in between a drying rack, a television stand, and a sleeping dog.
You also don’t need to have a DSLR when you start your photography journey. In recent years, camera phones have revolutionized the photography world. They’re small, fit in your pocket, take good-quality images, and are accessible with a swipe of a finger, making taking pictures easier than ever before. And why not take advantage of that? A DSLR will give you more creative freedom of course, but you can always upgrade when and if you want to. A lot of the tips and tricks you’ll find in this book apply as much to camera phones as they do to DSLRs.
Your job as a photographer is to create a photograph. No matter where. No matter how. No matter what with.
All you need is a passion for creating.
Exercise your seeing skills
“You can’t depend on your eyes when your imagination is out of focus.”
—Mark Twain
Your eyes are your most powerful piece of photography equipment, so in order to be a better photographer, you need to master the art of observation. It might seem like a hard task at first, as it requires strong awareness, and we are usually too busy or deep in thoughts to notice what’s around us. But slowing down, feeding your curiosity, and devoting a few minutes each day to just observing what’s around you will help your photographic eye to develop. Seeing is a skill—the more you train it, the better it gets.
Switch on your imagination (below)
What do you see in the image below? An orange? If you look closer, you might unlock a world of possibilities. I’m talking about a world of highlights, shadows, colors, textures and shapes.
At first, I saw an orange too, but when I cut into it, it wasn’t just a piece of fruit anymore. I saw circles and triangles, rich colors in different shades, and a shiny texture that was brought to life by the light. This was what I wanted to capture. The way we see is very personal—something ordinary to one person might be fascinating to someone else. This is part of what makes photography so exciting!
See past the plan (below)
This photo would have never existed if I hadn’t had my seeing skills switched on. I was supposed to shoot these cookies baked for a client, but when I saw the pastry rolled out and the heart shapes cut out, inspiration hit me like a lightning bolt. The textures, colors, shapes, and the softness of light were all perfect. This became one of my favorite pictures before it was even taken.
We often get so caught up in the end result that we forget about the incredible moments in between. Pay attention to every step along the way. An opportunity for a great photo might be right there in front of you.
It’s all in the details (below)
I had no prior plan on how to shoot this cake, decorated with white currants from the garden. When I picked the stems up, looked closer and put them against the window so that they gleamed in the light, I saw magic! Immediately, I knew that I had to use backlighting to replicate that amazing effect.
Switch off your thoughts and notice what’s around you. Nothing is ordinary if you look closer. Learn to look for interesting qualities, not only in the dish or scene overall, but also in the details. “Details. Look for details,” is what I constantly repeat to myself when I photograph.
Your camera doesn’t take pictures: you do
Don’t shoot on autopilot
Sometimes when we grab a camera too quickly, we risk missing something. On my first visit to India a few years ago, the friends (also photographers) who picked me up from the airport couldn’t believe that I didn’t take a single picture on my 40-minute journey to the hotel. I didn’t even take a camera out of my bag. “Don’t you like India?” they asked. I replied, “Of course I do, and I am taking pictures, you know. But with my eyes.”
India was so different from what I’d known and had ever seen. I was overwhelmed. It bombarded all of my senses and I wanted to get a feeling of what this place was like to me. I wanted to really see it. If I had put a camera in front of my face straight away, I might have missed something important.
Taking in my surroundings gave me a better understanding of what pictures I wanted to capture during my visit. When I went out with my camera later that day, rather than shooting on autopilot, I knew exactly what pictures I wanted to take. These pictures were all deeply intentional—and to this day, they remain very special to me.
I approach photographing still lifes of food in the same way. Having my subject in mind, or observing it, I spend some time thinking about what I see and how I want to capture it before I ever even look through the viewfinder.
Knowledge before gear
The desire to buy new gear is always strong, but taking great pictures is not about owning the most expensive equipment. It’s about understanding your camera, knowing the fundamentals of photography, mastering your eyes, and stretching your imagination. If you don’t believe me, take a look at the below images. The second image is much stronger than the first, but I used exactly the same equipment for both. The difference between the photos comes down to nothing more than a few years of developing my photographic skills.
Invest in your skill set, not just your equipment! Learn everything you can about the camera and lens that you already have, research photography topics, go to photography events, read about techniques, sign up for online courses, shadow other photographers, experiment with editing, and hone your eye. And most importantly, just shoot as much as you can. We often blame our camera for not taking better pictures, when it’s our skills that need to be improved.
Learn how your camera sees
The art of photography is a constant compromise between a photographer and their tool—the way you see and the way the camera translates your vision. It’s important to learn what elements your camera picks up, what it finds attractive, and what looks good photographed and then edited. Think about what your dish or a food scene will look like within a rectangular frame. What about if you blurred some of the elements? Or if you moved a little closer? Or looked at it from a different angle?
Same tool, improved skills. It’s not the tool that makes you an artist. It’s how you use your tool, combined with your own unique vision.
Who’s the boss: you or your camera?
I am not completely against Auto mode. The truth is that there is a huge number of decisions to make when you take a picture. Shooting in Auto can take some of the pressure off while you are first learning to navigate the world of photography. And if you pay attention and study the settings your camera picks, Auto can teach you a thing or two.
However, there will be a moment in your photography journey when you will notice that when you shoot in Auto, it’s not you but your camera that makes the decisions about what the image ends up looking like. And there will be a moment when you realize that the camera doesn’t think the same way you do, and that to be creatively free, you need to come to grips with the settings and take the scary leap into Manual mode. It will be daunting and exciting, and I promise this moment will change everything for you.
Master your manuals: exposure
Exposure is a term that you will be hearing a lot during your photography journey. When you begin to learn about Manual mode, it can seem like you have to memorize a daunting number of camera settings and strange-sounding numbers to get it right, but exposure is really nothing to be afraid of.
Light is everything in photography, and exposure is simply the amount of light that you let into your camera. Too much light and your photo will be too bright (overexposed). Not enough light and your photo will be too dark (underexposed). You have to find the right balance with the three tools your camera uses to control the exposure: aperture, shutter speed, and ISO. The aperture is an opening in the lens that can be made wider or narrower to let more or less light in. Slower shutter speeds allow more light in while faster shutter speeds let in less. ISO controls your camera’s sensitivity to light. A low ISO is used in bright conditions. A higher ISO can be helpful in low-light situations as it makes your image brighter, but it comes with “grain” or “noise” as a side effect.
Balancing these three elements takes some practice—so let’s get to it. Switch on your camera, go to your Manual mode (M), and see where your aperture, shutter speed, and ISO are. Before you continue, make sure you know which buttons on your camera to press to change those settings (your camera manual or an internet search should help if you get stuck).
When viewing your aperture, shutter speed, and ISO settings, you will see numbers that are called “stops” appear on the screen. Move any of these settings by only one stop and this will double or halve the amount of light that enters your camera.
Light meter: −1
Light meter: +2
Light meter: 0
Measuring the light
Your camera’s light meter is a tool you can use to check if the light in your setup is correctly balanced. Look through your viewfinder, press the shutter button halfway and you will see it appear at the very bottom of the frame. The light meter also shows up on your Live View display. On my camera, it shows figures like this:
−3 −2 −1 0 +1 +2 +3
The numbers here are also stops. You might see a little triangle or a mark appearing on the top or bottom of these numbers when you adjust your camera. When the indicator is right in the middle (at 0), it shows that your exposure is correct, according to your camera. This is a good starting point.
It’s all about finding the right balance (above)
In the first example, my light meter shows me that my exposure is −1. In theory, that means my photo is one stop underexposed, and if I want the exposure in my photo to be correct, I need to increase it by one stop. So to brighten my photo, I can make my aperture one stop wider, my shutter speed one stop slower, or increase the ISO by one stop.
In the second example, my light meter shows me that my exposure is +2. This means that my photo is overexposed and I need to bring the light down by two stops if I want to get the details in my photo back. I could change one setting by two stops or I could also choose to change two of the settings by one stop each. So many possibilities!
Now, you might be wondering why on earth would you learn Manual if Auto mode can choose the correct exposure for you. That’s because “correct” is a matter of opinion. And apart from controlling the exposure, aperture and shutter speed offer other interesting effects of their own, and if you don’t want to let your camera make all the creative decisions for you, you need to learn to control them yourself.
Aperture
Light control
The aperture is the round opening in your camera lens that you can make narrower or wider to control how much light you want to enter your camera. Make it wider and you’ll let more light in, making your image brighter. Make it narrower and you’ll let less light in, making your image darker.
The size of the aperture is measured with f-numbers (or f-stops); different lenses will have different ranges of f-numbers available. Confusingly, the higher the f-number, the narrower the opening in your lens, and the lower the f-number, the wider the opening of your lens.
Creative control
The aperture also affects how much of your image is in focus. This is known as depth of field. When photographers talk about a deep depth of field, it means that a greater amount of scene is in focus—things that are close to the camera as well as things that are farther away. Shallow depth of field, on the other hand, is when only part of your photograph is in focus—backgrounds and often foregrounds appear as a soft blur.
Knowing how different apertures affect the depth of field—or your area of focus—in your photo opens up a world of creative possibilities.
The beauty of blur (above)
Lens: 85mm, aperture: f/3.2
By choosing a low f-number (a wide aperture), you can focus on one element in your frame and creatively blur the rest. It’s a powerful tool with which to separate your subject from the background and make it pop. Despite this being known as a “shallow” depth of field, using one actually creates a great sense of depth, bringing your images to life.
The blur that comes with using a wide aperture can create a beautifully soft and dreamy image. It also helps make the noise and clutter that might be around the frame less distracting, and draws your audience’s attention straight to the area you want them to look at: your tasty dish.
The power of detail (above)
Lens: 50mm, aperture: f/11
By choosing a high f-number (a narrow aperture), you will keep more details in your image in focus, which is known as deep depth of field. This is very effective if every element in your frame has an important role, or if you want to put the focus on a whole scene, not just a singular subject or detail.
Blur for depth (below)
Lens: 50mm, aperture: f/5.6
It’s always worth experimenting with your aperture. You can create an image where a large part is in focus but there is still some blur to give depth. In this photo, all the props on the table are as important as the food, so everything is in focus, but by blurring the floor, I was still able to create depth in my image.
Depth of field & distance
We’ve seen how depth of field is affected by the size of the aperture, but it’s also affected by distance. Photograph closer to your subject and more details in your scene will be out of focus; take a step back from your subject and photograph with the same aperture, and more details will be in focus.
Think about the distance between the elements in your frame too. How close or how far do you want supporting elements to be in relation to your subject? If you focus on your main dish, you can move other elements closer to it to make them a little less blurry, and by moving them away, you can make them more blurry. Think about how close or how far you are going to place your background too. Great photography is all in the details!
Creative depth of field
When you understand the different factors that affect depth of field, you can use it to make a stronger image, drawing attention to the important parts of the frame and making the supporting elements less distracting.
Choose your focus (below)
What’s in focus is what draws the eye first, so make sure it’s the most important part of the image. What’s blurry directs your viewer’s eye to the sharp area.
Same aperture (f/5), different distance. See how the background is more blurred in the closer shot?
Hide & seek (above)
A technique I often use is hiding elements behind the hero and blurring them out. This way, I can include supporting elements in the scene but the main subject is still the first thing you notice. Always make sure the hero is in sharp focus.
Challenge your favorite aperture settings
If a shallow depth of field makes you uncomfortable, great: make yourself uncomfortable and experiment with it. If you never shoot with a deep depth of field, try to use it creatively in your photos. Don’t be afraid to break the rules and get out of your comfort zone—that’s how you’ll develop your skills and your confidence.
Shutter speed
Light control
Directly in front of your camera’s sensor is a small flap called the shutter. When you take a picture, the shutter opens, lets light in, and closes. The length of time the shutter is open for is called the shutter speed.
Genre:
- On Sale
- Sep 29, 2020
- Page Count
- 192 pages
- Publisher
- Running Press
- ISBN-13
- 9780762499625
Newsletter Signup
By clicking ‘Sign Up,’ I acknowledge that I have read and agree to Hachette Book Group’s Privacy Policy and Terms of Use