The Baker Creek Vegan Cookbook

Traditional Ways to Cook, Preserve, and Eat the Harvest
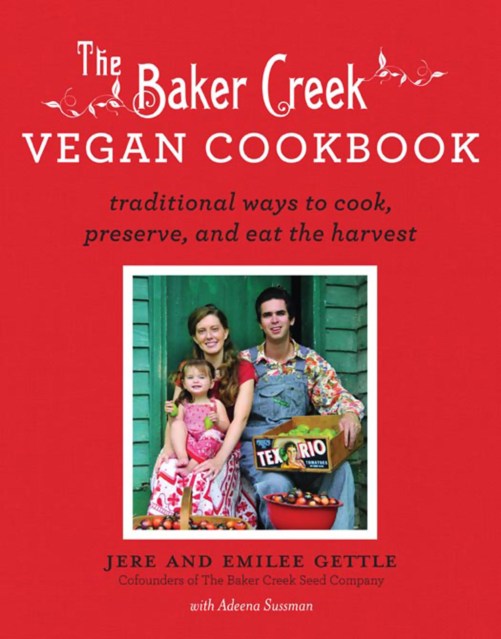
Contributors

By Jere and Emilee Gettle

With Adeena Sussman

Formats and Prices

Price

$12.99

Price

$16.99 CAD

Format

Format:

  1. ebook $12.99 $16.99 CAD
  2. Trade Paperback $19.99 $25.99 CAD

This item is a preorder. Your payment method will be charged immediately, and the product is expected to ship on or around September 4, 2012. This date is subject to change due to shipping delays beyond our control.

Tired of genetically modified food, but unsure of what to make and how to cook it? Jere and Emilee Gettle, cofounders of the Baker Creek Seed Company and coauthors of The Heirloom Life Gardener, bring you all the delicious answers in The Baker Creek Vegan Cookbook. With a friendly voice, the Gettles take you through 125-plus vegan recipes that are healthy, easy to make, and appealing to vegetarians, meat-eaters, seasoned heirloom gardeners, and novice heirloom-eaters alike. The dishes are diverse in origin — with several plucked from the family’s own fabulous restaurant — and will leave you satisfied at breakfast, lunch, dinner, and dessert. They also share their tips and tricks on canning and preserving, as well as the staples that you need in your kitchen. Replete with beautiful line drawings, this cookbook is a must-have for anyone interested in growing or eating heirloom vegetables and fruits. Some of the recipes you’ll love . . . Pink Pearl Applesauce, Blueberry Pancakes, Cambodian Yellow Cucumber Salad with Crispy Shallots, Vegetable Tempura with Thai Basil, Heirloom Spaghetti Squash with Heirloom Tomato Spaghetti Sauce, Edamame Hummus, Melon Sorbet, and Heirloom Apple Pie

Excerpt

Introduction

I live with my wife, Emilee, and our young daughter, Sasha, on a 176-acre parcel of property in Mansfield, Missouri, we call Baker Creek. All around us, on land that was passed down to us from my parents, we grow organic, heirloom produce on a patchwork of fields. Rarely a day goes by when I don’t find myself in the field marveling at a new shape, color, or texture I’ve never encountered before. I don’t think it would be an overstatement to say that vegetables are my life … and during harvest season, Emilee would certainly agree!

Through our company, the Baker Creek Heirloom Seed Company, we have an ongoing relationship with hundreds of thousands of gardeners and farmers who are passionate about growing and eating things that they can feel good about. It’s hard, exciting work, and we love it.

As far as I’m concerned, the kitchen is a natural extension of the field. My love of good food dates back nearly as far as my knowledge of farming and gardening. Being from a family of homesteaders based around the Idaho-Oregon border, I have memories of everyone taking an active role in raising produce, either as a hobby or as a career. We all had mud on our shoes, dirt under our nails, and freckles on our noses—and it suited us just fine.

We moved around a few times when I was young, but farming and gardening were our constants, with the roots we planted in the ground providing the roots we needed to settle down and get comfortable. It just wasn’t home unless things were sprouting in the garden and in our fields, and until we were turning the fruits of our labor into soul-satisfying meals.

Naturally, all of this planting and growing meant a lot of good eating. My mom, Debbie, was—and is—a great cook, who always kept things simple and delicious. My parents almost never went out to eat, because it was expensive, but also because it didn’t fit our chosen, stick-to-the-farm lifestyle.

That meant homemade biscuits for breakfast, with jam in any number of flavors; casseroles made with different kinds of beans, potatoes, and tomatoes; burgers ground from meat that my dad hunted, topped with sauerkraut pickled from our very own cabbages; and double-crusted apple pies dusted with sanding sugar. Add to the equation two grandmothers—Opal and Bertha—and a slew of other kitchen-comfortable relatives, and the result was one well-fed little boy.

From an early age I took for granted something that, until recently, was becoming forgotten to many Americans: that the connection between the land under our feet and the food on our table is one of the greatest stories of American history.

My childhood was marked by long, sunny afternoons foraging wild asparagus along the creek banks near our homestead, the green pointy tips pushing up through the dirt. Mom steamed them before we ate them hot from the pot with our fingers, trying not to burn our hands or our tongues. We also spent hours plucking huckleberries in the hills, then would gorge ourselves before surrendering some of the inky berries for pancakes that we’d make either on an open fire while camping or in our farm kitchen.

I also really enjoyed foraging in the wild for food. We’d often find meadow mushrooms in the fields, which my mom would sauté for dinner. In the Ozarks, I searched the leaf-covered grounds in the woods near our home for treasured morels.

The end of the summer also brought epic sessions of preserving and “putting up,” an all-hands-on-deck affair that would result in hundreds of cans, jars, and frozen ziplock bags of garden-raised produce that we then feasted on all winter long. And come colder weather, our root cellar, where we kept yams, potatoes of all kinds, apples, rutabagas, turnips, and parsnips, became our go-to larder for delicious staples.

I can still feel the sun on my neck as I went out into the summer garden with my dad to find more watermelons than any one family could ever eat. Sunshine-hued Orangelos, red-fleshed Crimson Sweets, and yellow-centered Tender Sweets—we would crack them open right there in the field and eat the sweet hearts straight out of their green rinds, sugary juice running down our faces and making our hands sticky.

At that point, people—myself included—really weren’t aware of the potential of heirloom produce. The significance of historic varieties was something we either took for granted or just let slip by. Some of our seeds came from grandparents or neighbors, which we would in turn save and pass along to our friends. Through the passage of years, I started to notice my favorite varieties disappearing from seed catalogs, and it was at that point I grasped the importance of preserving our agricultural heritage by saving and passing on heirloom seed varieties to keep them from becoming extinct.

I was three years old when I planted my first heirloom seeds—they were scallop squash selected by my dad. He helped me put them in the ground, and I eagerly awaited the day when the tiny green squash plants pushed through our rich soil.

A few months later, when I found a bumpy, wavy-edged vegetable lying under the shade of the giant squash vine, I was hooked. Every year my dad would take me into the field to help plant and harvest our crops—and to get my own seed selections into the soil.

When I first picked up a knife and started cooking for myself, at the age of twelve, things just came naturally. I guess I had a head start, since practically every meal I’d eaten up to that point was eaten at home, or at least had been made by someone I knew. I enjoyed coming up with new recipes—or adjusting old family favorites to my personal taste—all the while experimenting with techniques I’d read about in my favorite cooking magazines.

Ever since I can remember, I’ve been fascinated by how people live—and what they eat—in different parts of the world. I pored over the pages of National Geographic and other travel magazines to learn about far-flung places, dreaming of traveling overseas and tasting the local specialties. Whenever we were at a new or larger supermarket, I’d lose track of time studying the kumquats, star fruits, and other things I’d never seen before, then I’d go home and read anything I could get my hands on that would explain what I had been feasting my eyes on.

It was around this time that I also started collecting heirloom seeds as a hobby, and joined the Seed Savers Exchange, where I learned about the threat to our seeds from multinational corporations using biotechnology to manipulate crops, plants, and seeds. I printed my first heirloom seed catalog in 1998 as a teenager’s hobby, and pretty soon business was booming. I suppose it was partly timing, but I just followed my passion for the seeds I loved and the rest unfolded, as they say, organically.

Today, our Baker Creek Heirloom Seed catalog has a circulation of 300,000 households, people who look to us to learn about recently reintroduced heirloom varieties and the ways that maintaining diversity through farming and gardening is a win-win proposition in terms of nutrition, taste, and social responsibility. (You can learn more about heirloom gardening and our company in our first book, The Heirloom Life Gardener.)

We sell upward of 2 million seed packets a year, and I know from our very active Web followers that people are using what they grow in the kitchen. Things simply taste better when they come from your own garden, and that’s also the only way you can guarantee that your produce is being grown to your moral, ethical, and culinary standards.

Until recently, it seemed that Americans were suffering from the Incredible Shrinking Garden. Standard supermarkets offered the same rotation of lifeless, colorless vegetables year-round, and people had lost touch with what is exciting about growing and gardening: its endless variety. Thankfully, many changes are afoot. Farmers’ markets, farm-to-table restaurants, community-supported agriculture (CSAs), and just a return to a more vegetable-based diet make us feel like we’re doing something right. I think that’s the real reason what we’re doing at Baker Creek is taking off—it’s simply the right thing to do. And sometimes, it really is true that the best food in the world can be as straightforward as a tomato slice on a thick slab of home-baked bread, the whole juicy lot sprinkled with salt.

Although I love an unadorned crispy apple or crunchy carrot as much as the next person, this book is about how to take that bounty and transform it into delicious meals. We’d like to get people to start forming lasting connections between heirloom produce and heirloom recipes—making both into treasured family property that gets passed down from generation to generation.

Here in Missouri, we always plant more than we can use. This year, for instance, I’ve got nearly seventy varieties of eggplant growing, from sweet Malaysian Dark Reds to globe-like Italians.

Growing more than we needed led us to open a pay-as-you-can restaurant at Baker Creek in 2009 that is rapidly becoming a gathering place for like-minded people from the neighborhood and beyond, as well as a place to feed the expanding Baker Creek staff.

It’s ironic, but the area around our farm is dotted with fast-food restaurants and strip malls. If it doesn’t involve a deep-fryer, it can be hard to find. Since there aren’t a lot of healthy food options, we decided to take matters into our own hands and use the restaurant as a way to share our passion for heirlooms.

As more and more people visit our village (in addition to our seed store, we’ve got a blacksmith shop, a seed museum, and a bakery), they want to taste the fruits of our labor. We prepare one or two main dishes a day, often inspired by our love of Asian food and the way certain cultures make healthy, seasonal eating so simple and seductive. I’ve had the privilege of traveling in Cambodia, Thailand, and Burma, and there the vegetables aren’t the supporting players—they’re usually the stars.

On one of my first dates with Emilee we ate pad thai, and we have a tasty version that we serve at the restaurant. But our recipes aren’t limited to Southeast Asian cuisine. We’ll serve Emilee’s sweet potato casserole or surprisingly moist eggplant cake, my mom’s sundried tomato bread—it really depends on our whim, what’s in the garden, and what we think would taste best, based on availability and our cravings. We’re still working out the kinks, but we’re proud of the work we’re doing at the restaurant.

The recipes in this book have been adapted and developed from a variety of sources, but with one common purpose: to share with people just how diverse heirloom produce can be.

My family has a long history of vegetarianism, and since my early teens, I have been vegan. So throughout the book, you will learn about the clever substitutes we keep in our pantry to ensure that our food not only tastes great, but also aspires to a healthy lifestyle. I have included recipes that have been passed down through generations of vegetarians, with each new generation perfecting the recipes and making them their own. By making vegetarian meals starring heirloom produce, you’ll be eating whole foods, all the while introducing healthy new ingredients into your diet. You’ll also be writing your own personal page in American food history; here’s hoping it’s a tasty journey.


At all three of our stores—in Missouri, California, and Connecticut—we’ve been getting more and more requests for information and advice about canning and preserving, and we can’t say we’re surprised. As gardeners learn to love their many varieties of homegrown heirlooms, it only makes sense to find ways to make them last year-round. I come from a family of canners, as well, but for more detailed information and instructions, I’m handing over the reins to my wife, Emilee, whose family has been canning for generations, and who herself has a passion for “putting up” fruits and vegetables.

One of the things I look forward to most come winter is reaching into my pantry to find row upon row of gleaming jars filled with juicy, peak-ripe tomatoes, crisp beans, garlicky pickles, and other examples of summer’s bounty, captured behind glass and waiting to be enjoyed by family and friends.

There’s something great about how this process completes the early gardening cycle—and keeps the promise of summer alive as the wind whispers through the walls of our old farmhouse and the snow gently falls outside.

After all the work is done, and everything is sealed and labeled for the winter, I sit back, breathe a sweet sigh of accomplishment, and reflect on all that we gained in a season.

During canning season at my house, the kitchen is filled with bubbling pots and the sound of clinking and clanking glass jars, all waiting to be filled with our homegrown treasures: the veggies plucked from our own gardens. The yearly ritual of preserving the garden’s abundance brings back warm memories for me. I’ll never forget learning this timeless kitchen skill from my grandmother, Nellie, and my mother, Lyn, who began teaching me how to can and preserve when I was quite young. Our laughter during preserving days echoed from row to row in the field and joyously kept time with the click-clack of the pressure canner.

This chapter will cover the basics of canning, freezing, and drying, the way that I do it in my home. There is much to learn about preserving, and this chapter is just a primer—a springboard to get you excited as you embark on this wonderful pastime.

When I was a teenager in northern Missouri, I spent the early summer mornings in the gardens with my mother, picking tomatoes, green beans, and okra, while our lazy cat, Sassy, supervised the proceedings. Once we had a few bushel baskets or wheelbarrows filled, we’d wheel them back up to the house, park the bounty outside the back door to the kitchen, and the assembly line would begin. Being in a 4-H club, I entered my own canned concoctions in the county fair—and was always surprised and thrilled when they were occasionally decorated with a blue ribbon.


The History of Canning

Ever since Napoleon struggled to feed his hungry army, there’s been a record of people canning to preserve their food. “An army marches on its stomach,” said Napoleon, whose creative solution to a dire food shortage was to offer a reward of 12,000 francs to the first clever individual to devise an inexpensive way to preserve food. A brewer and confectioner named Nicolas Appert came up with the answer. He’d discovered that food didn’t spoil when tightly sealed in jars. He didn’t know why, exactly—it took Louis Pasteur to solve the mystery some fifty years later—but this was one of the most significant developments in food history before the advent of refrigeration. Merci, Napoleon!


Canning


Canning destroys microorganisms that cause food spoilage by heating sterilized jars and creating a vacuum seal. There are two main types of canning: Water-bath and pressure. Water-bath canning is ideal for foods with a high level of acidity (specifically, a pH of 4.6 or less), such as berries, peaches, and nectarines. Pressure canning, which we don’t use for this book, is typically for starchy foods with a low acid content (pH of 4.7 or higher).

If processed correctly, home-canned foods can maintain the same level of food safety as commercially manufactured products. When you’re just getting started canning and preserving, it’s important not to stray too far from a time-tested recipe, so you can maintain an environment that prevents bacterial growth and reduces changes in appearance such as discoloration and texture. Don’t take shortcuts: Follow each step in the canning process from start to finish, cutting no corners, so you end up with food products you can be proud of.

The main point I want to convey is that canning is something everyone can enjoy. Whether you live in the city or the country, whether you have access to a grocery store, an expanse of crop fields, or a farmers’ market—it doesn’t matter. Canning empowers us to preserve food at its peak for use at a later time. It connects us with a time-honored ritual and allows us to carry on this tradition with our own loved ones.

At first glance, the process might seem complicated, but don’t be intimidated. Over time, the process becomes familiar, kind of like making your favorite recipe for dinner.

Equipment

The most important step when canning is organization. Have all your equipment ready before you begin the process and things will go much more smoothly.

Here’s what you’ll need:

WATER-BATH CANNER

Many companies sell pots that are specifically labeled as “water-bath canners,” but any large pot with a tight-fitting lid will do the trick. I prefer to work with a 21-quart pot, which has a dual purpose: to both sterilize your jars and create a water-bath environment. You can buy the canner new, but oftentimes they are available at secondhand stores. Just make sure the one you buy has a tight-fitting lid.

JARS AND LIDS

Only use jars designed specifically for home canning. New jars come with lids and bands; the jars and bands are reusable, but the lids aren’t; lids help create the airtight seal essential to well-preserved fruits and vegetables, and they can be used only once.

Before using, carefully inspect the lid and lip of each jar for dents, nicks or chips (or, in older jars, bubbles). Discard any damaged lids, as even a small imperfection could prevent your jar from sealing properly, which can make food dangerous. The metal can become damaged, rusty, or sharp, so watch carefully for that as well.

CANNING RACK

I’ve burned my hands one too many times by not using one of these handy racks, which can be inserted into your canner or pot. If you buy a new canner, definitely buy one with a rack. In a pinch, my grandmother Nellie taught me to put a dish towel on the bottom of the canner, which is a great buffer for glass jars and minimizes the clanking during the boiling phase.

FUNNEL, TONGS, AND MAGNETIC LID LIFTER

I call these the “three musketeers” of canning. A wide-mouthed funnel prevents splatters and splashing while you fill your jars with produce and brine. Special tongs designed to grip jars by their necks save your hands from burns while allowing you to handle the piping-hot jars after they’ve been boiling. A magnetic lid lifter, essentially a stick with a magnet affixed to the end, is a cool invention; I had one and always used it growing up. You’ll use it to remove lids from hot water after you sterilize them.

DISH TOWELS

Dish towels are the workhorses of the canning kitchen. If food residue is on the rim when you put the lid on, your jar will not seal properly. Use a clean, damp dish towel to wipe off the rim of the jar after you fill it up. When you take your jars out of the canner, use towels to alleviate the dramatic change in temperature while they rest. You’ll need a few: Place the jars on top of a towel when you remove them, and cover them with another towel to release heat gradually and provide for an optimal seal.

TIMER

Lots can happen when you’re canning—who knows? You might even be preserving multiple items at once. Put a timer to good use, as a friendly reminder to achieve the proper processing time.

Water-Bath Canning
STEP 1: PREP

Cleanliness, organization, and careful preparation are key here. Your workspace, hands, and anything that is near the food you’re working with must be very clean. Wash hands thoroughly. Sanitize all countertops. Gather all equipment and organize. Make sure you have all ingredients needed before you get started, and take into account that canning and preserving require multiple steps, such as blanching or peeling tomatoes and stone fruits, or salting vegetables such as cabbage for preservation.

STEP 2: STERILIZE JARS

To sterilize your jars, place a canning rack into the water-bath canner, fill halfway with water and bring to a low boil. Insert jars, one by one, into the water-filled canner. Cover and return to a low boil, making sure jars are filled with water. The jars must boil for at least ten minutes to be sterilized. Keep jars in water until you are ready to use them to maintain sterilization.

STEP 3: STERILIZE LIDS

While your jars are simmering, fill a skillet halfway with boiling water. Add lids and let simmer over medium heat at least ten minutes. Do not allow the water for the lids to boil too vigorously; this could harm the gasket and jeopardize the seal of your jar.

STEP 4: PREP RECIPE

Mix whatever ingredients you’re using as directed by the recipe.

STEP 5: FILL JARS

Finally—the fun part! To fill the jars, remove one at a time from the canner with tongs, pour any water out of each jar, and place on individual saucers covered with a clean, dry washcloth (this prevents temperature shock as the hot jar is transferred to a surface in preparation for filling). Place your wide-mouthed funnel in the sterilized jar and fill it up by the spoonful or just pour it in there, depending on the contents.


If you do a lot of canning, you’ll eventually find out that jars drop, slip, and break. They even explode in some circumstances. A cold enamel table, for example, is not a good place to put a piping hot glass jar. Pop! Glass and food goes everywhere. Use a dry cloth-lined saucer to help jars acclimate after they are lifted from the boiling water.


STEP 6: LEAVE THE PROPER AMOUNT OF HEADSPACE

The contents of the jar will expand during the canning process, so leave some headspace between the lid and the food that is being prepared. The rule is a half inch of headspace for whole vegetables and sauces, and a quarter inch of headspace for spreads and juices. This step is very important, because if too little headspace is left, food will seep through the lid and destroy the seal. Likewise, if there’s too much headspace, too much oxygen will be left in the jar, which might lead to discoloration, bacterial growth, or an insufficient vacuum.


High-Altitude Canning

If you are canning at a high altitude, your processing times need to be adjusted. For water baths, give it one extra minute per thousand feet for recipes with processing times less than twenty minutes and provide two extra minutes per thousand feet for processing times exceeding twenty minutes.


STEP 7: ELIMINATE AIR BUBBLES

When working with pickles or whole vegetables, you often will get air bubbles after you pour the hot brine into the jar. To remove them, poke a dull dinner knife, small offset spatula, or the handle of a wooden spoon all the way to the base of the jar several times. This may cause the liquid level to go down as air bubbles are popped, and you may need to add more liquid to maintain adequate headspace.

STEP 8: PUT A LID ON IT

Using a clean, damp cloth, wipe any food residue from the rim of the jar. Remove lids from simmering water. Place a lid on each jar, then seal with a band. Make sure the band is sealed securely but not too securely; there needs to be some slack to allow jars to process properly.

STEP 9: BOIL

Remove, fill, and place jars back into the hot water canner, repeating the process one at a time until the canner is filled with jars, still allowing for two inches of water to cover the jars.

Add water to the canner as needed to cover jars, then bring to a boil and cover pot. You will need to maintain a rolling boil for your recipe’s specified time to ensure a proper seal. Start the timer as soon as you have reached a rolling boil. You might need to add more hot water during the process, so keep an eye on the pot as the water evaporates.

STEP 10: SEAL IT

Once the timer goes off, turn off the burner and let your pot rest, uncovered, for about five minutes. Using jar-lifting tongs, remove each jar and transport it to the towel-covered table or countertop using a washcloth-covered saucer. Allow a little space between jars for airflow and cover with another clean towel. Don’t be tempted to fiddle with the bands, as this can disturb the seal. As tempting as it is to touch them, let the jars rest for about twelve hours. It’s music to my ears to hear each lid give that distinctive ping! sound as I clean up the kitchen.


Canning Basics: Jars

Genre:

On Sale
Sep 4, 2012
Page Count
208 pages
Publisher
Hachette Books
ISBN-13
9781401304751

Jere and Emilee Gettle

About the Author

Jere Gettle’s passion for farming developed early, and by the age of seventeen he was in business, selling seeds from his bedroom in Mansfield, Missouri. He didn’t set out to start an empire, but to save heritage plant varietals from being lost to genetically modified mega plants and to wave the banner for a way of life he saw rapidly disappearing. He began traveling to far off places, Asia, South America anywhere he could find and swap rare and unusual seeds, and started a seed catalog that now has 350,000 devoted customers. His seed company employs over 200 full time staff and includes a store, vegan restaurant, and pioneer village in his home town of Mansfield, Mo., as well as two other retail operations–the Seed Bank in Petaluma, California, and Comstock in Westerfield, Connecticut.

Learn more about this author