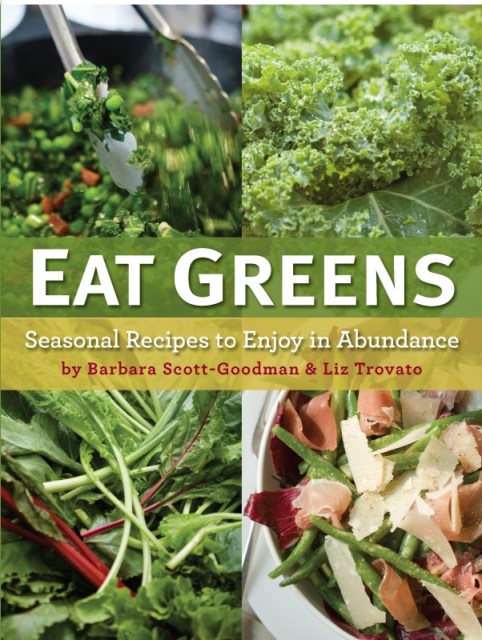
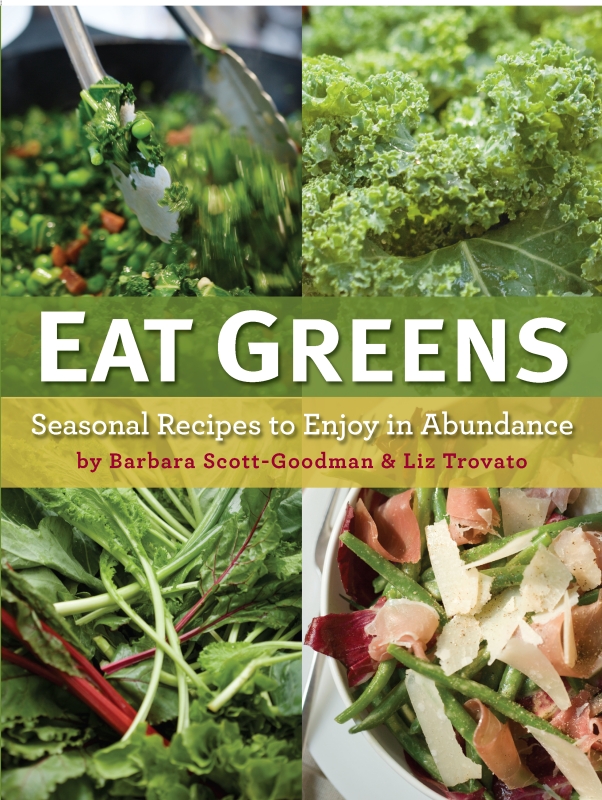
Eat Greens

Seasonal Recipes to Enjoy in Abundance

Contributors

By Barbara Scott-Goodman

By Liz Trovato

Formats and Prices

Price

$16.99

Price

$21.99 CAD

Format

Format:

  1. ebook $16.99 $21.99 CAD
  2. Hardcover $24.95 $29.00 CAD

This item is a preorder. Your payment method will be charged immediately, and the product is expected to ship on or around May 3, 2011. This date is subject to change due to shipping delays beyond our control.

Eat Greens includes more than 120 delicious recipes for a wide variety of dishes that use green vegetables from artichokes to zucchini to prepare healthy appetizers, soups, salads, main courses, and side dishes. More than vegetarian, the recipes include Ricotta with Broccoli Rabe, Brussels Sprouts with Bacon & Walnuts, Baby Leeks Braised in Red Wine, and Zucchini Caponata. With more than 50 stunning photographs and a bright and airy design, Eat Greens is as easy to read as it is to cook from. It includes useful tips on growing, buying, and storing each green vegetable.

Excerpt

To the farmers and the gardeners all over the country, who grow the good stuff and get it to our tables.
BS-G


To the memory of my aunt, Cissy Trumbull, who grew the best Swiss chard on earth.
LT


introduction
There may be a few good reasons why you are reading this book. Perhaps you have your own garden and want to explore new ways to prepare all the wonderful, plentiful green vegetables that you grow. Or you may be a novice to greens and are curious about how to expand your cooking repertoire and prepare the lovely produce that you see when shopping at your local farmers' market. Or maybe you are someone who wants to eat healthier foods and incorporate more greens into your diet as well as your family's. These are all excellent reasons to read and enjoy this book.
 
We love the pure and simple pleasure of growing, cooking, and eating greens. And fortunately, greens of all varieties are increasingly available at produce stands, farmers' markets, and supermarkets all around the country. People's eyes have been opened to the greatness of greens, and they are ready and willing to try new recipes and experiment with fresh produce that they are not necessarily familiar with. The popularity of greens is part of a general rediscovery of the joys of the real, earthy flavors and visual beauty found in fresh, seasonal produce.
Our approach to cooking greens is, "Get in the garden or go to the market, then decide what to cook." We seek out the best-quality, freshest produce that we can find in the garden, at farmers' markets, and in grocery stores. When we developed the recipes for this book we didn't consider these vegetables to be merely side dishes or afterthoughts to the main event. We cooked up a range of fantastic appetizers, soups, salads, and main dishes as well. We steamed, sautéed, stir-fried, braised, roasted, and blanched all manner of greens with delicious results. Of course, we cooked them with the usual suspects—olive oil, garlic, and lemon—but we also experimented with a range of other ingredients, such as ginger, chiles, anchovies, flavored oils, nuts, and sausages, and found that they work beautifully with and enhance the flavors of greens.
 
Not only do greens have wonderful and intriguing flavors, they are also very good for you and should be incorporated into everyone's diet. Fresh greens contain high amounts of vitamins C and E and beta-carotene, which are antioxidants that may possibly prevent
cancer. They also have high amounts of essential minerals, particularly iron and calcium, and they improve immunity function. So it turns out that your mom was right when she said, "Eat your greens."
 
Another great asset of greens is that they are so versatile and flexible to cook with. Whatever greens are used in a given recipe, you should always feel free to substitute and adapt according to what is available and to your own taste. Herbed Leek and Watercress Soup is just fine with another green if there is no watercress to be found at the market or if you've just picked some fresh chard from the garden and want to add that instead. The same goes for Mixed Greens Gumbo, Kale, Sweet Potato, and Orzo Soup, or Swiss Chard Frittata. There are no hard and fast rules for cooking greens; you just need to use the freshest and best tasting ones you can find.
 
We hope that you use and enjoy this book and cook everything in it from artichokes to zucchini. May all of our tables be abundant with fresh, gorgeous greens!


liz's garden notes on growing greens
If you are lucky enough to have a nice sunny spot in your yard, patio, or deck, put up a raised bed and fill it with greens. I am a lazy gardener, so I prefer my beds right close to my back door so I can observe the daily changes, and so I don't have to stray too far from my kitchen. They not only provide a lovely contrast to other flowering plants with the many different shades of green, but they are surprisingly easy to grow. I lived in New York City for forty years, and I killed many a houseplant there. People who know me can't believe that I can get anything to stay alive, much less grow. If I can do it, you can do it. I kid you not.
 
Arugula flourishes in planters, as does basil, parsley, and lemon balm; and if you don't want that pesky mint to take over your garden, a planter is the perfect home for it. Use your porch trellis for growing pole beans, and plant zucchini where it can spread out its super-sized leaves and bright yellow blossoms to make a perfect ground cover. You will be greatly rewarded when you plant flats of mixed salad greens. If you have never eaten a salad made with just-picked greens, you will truly be amazed that you can really taste their freshness. Your local garden nursery will have flats of seeded plants that you can just put right in, so it couldn't be easier.
 
The best part of growing greens is harvesting, and the more you pick, the more they grow. There is nothing better than an early evening stroll in the garden and gathering up a couple of zucchini and peppers and adding them to whatever is on the grill. Slice them and toss with olive oil, salt, and a splash of balsamic vinegar and use as a bed for your grilled meat or fish. Dinner done! I can't think of anything more delicious—or healthier. Growing greens is not only a summer pleasure. Here in the Northeast Swiss chard, Brussels sprouts, and kale will still be producing right up until mid-November. Lucky me.
Find out what Heat Zone you live in to determine the number of days over 86 degrees your region experiences. Plants vary in their ability to withstand heat as well as frost. The U.S. Department of Agriculture's map (www.usna.usda.gov/Hardzone/ushzmap.html) will help you know the approximate length of time between the last and first frost for your area. You can add to this time by using a cold frame, which is basically a box with a transparent top that will trap radiant heat, which protects your plants from freezing, so that you can start plants sooner and harvest them later than otherwise.
 
I use raised beds, which are basically just a four-sided frame about a foot high resting on the ground. I fill them with about half earth and half composted manure. It gives you more control over your soil mix, and makes your garden easier to tend to. One of my friends has her beds raised on "legs" about three feet off the ground, which eliminates bending and protects her plants from creatures like rabbits and ground hogs. If you put your beds on legs, you can even store your garden tools and supplies underneath. My years of apartment living in New York have made me aware of using every inch of space. If you have the room, as I do, plant a thick hedge around your beds, like Mr. McGregor (Peter Rabbit's nemesis—or maybe that's vice versa). It is not foolproof, but it looks better than a fence, and it helps to steer critters in a different direction. You can add a
little more protection by putting chicken wire along the inside perimeter. The great thing about leafy greens is that they are prolific growers, so a little sacrifice for hungry animals is not such a bad thing, albeit annoying. They'll grow back, and when they do, sometimes I sprinkle cayenne pepper over everything, even along the bottom of the hedge and along the pathways. If you are bothered by deer, I'm sorry. You may have to pick up your greens at the local farmers' market. When considering your soil, it is good to determine the pH levels. Typically, you can have your soil tested at a local agricultural extension center. You can also find out the percent of organic matter, which is an indicator of the naturally available nitrogen that is released as the organic matter breaks down. This is about all you have to know to fertilize your garden soil properly. A nominal fee is charged for these services. After you receive the results of your soil, you will know which type of potting soil mixture to buy. The proportions of nitrogen, phosphorus, and potassium are typically designated by numbers such as 5-10-5, 12-12-12, or 6-24-24.
 
Phosphorus is the most important fertilizer for starting new plants and should be set where roots develop. Ammonium nitrate is important for asparagus, cabbage, broccoli, cucumber, peas, beans, peppers, spinach, kale, and mustard and turnip greens. Nitrogen comes from breaking down organic matter, yearly maintenance, and side dressings for particular circumstances. Leafy vegetables need it earlier than fruit-bearing plants, which do better if nitrogen is added when they start to flower.
 
Soils are either more sand or more clay. Organic matter is the third constituent and is very controllable and should be from 2 to 4 percent. This is achieved by adding animal manures and green manures, which are legumes that are folded under while still in the green stage. You can also use peat moss, leaf mold, and compost. Manure should be well rotted, applied in the fall, and folded under. Compost is made by gathering waste material, such as grass, leaves, and plant refuse in layers six to eight inches deep. The pile should not be more than five feet wide and five feet high. Add a little soil and a handful of fertilizer to each layer as you build it up. Keep the pile moist. It takes six months to a year to mature.
 
Spread the seeds of greens on the soil and keep them well watered. Kale, cabbage, and lettuce are more difficult to grow from seed, so pick up sprouted plants at your nursery. If you want to start seeds inside, you will need to put them under grow lights. Alternating rows of greens with onions and or marigolds will diminish your loss to insects. Be on the lookout for aphids and other tiny bugs that your guests may not appreciate.
My really big secret to gardening is: "Don't forget to water!" Watering in the morning is best so that rot and fungus are avoided. Nobody likes to go to bed with their feet wet, so avoid late evening watering. Check your soil—if it feels dry below two inches, it needs water. Moisture should extend downwards at least five inches. Look at your plants—if they look dry and stressed, water them immediately, and give them a real good soaking.
 
Check your plants regularly for pests of both the bug and disease varieties. A bit of discoloration is acceptable, but totally engulfed plants should be pulled and discarded. When you have questions, my best advice is to ask the nursery where you purchase your plants. Most are growing local, so they can give you the best information about growing in your area.
 
It's also a good idea to have a real gardener, or, at least, your friends, look at your plants for both fun and productivity. My idea of a garden party is a stroll along the garden beds with a glass of wine and a good friend. Pick up a couple of peppers and head for the grill.
 
There is truly nothing more rewarding or more delicious than growing your own greens, and I urge everyone to plant them, nourish them, and enjoy.


artichokes
Artichokes are edible thistles with Mediterranean origins.
They were introduced to this country by Spanish settlers in California in the 1600s but didn't become widely grown until the 1920s. Today almost all commercially grown artichokes in the country come from Castroville, California, where Marilyn Monroe was crowned Artichoke Queen in 1948.
Their growing season is a long one, usually from October to June, and artichokes are at their peak and most plentiful from March to May. Look for fresh ones that are deep green, compact, and heavy with tightly packed leaves. Avoid those with leaves that are yellow and dry, or spread out. They can be stored, unwashed, in a plastic bag in the refrigerator for up to four days. Artichokes are usually served as a first course, boiled or steamed, with melted butter, aioli, or hollandaise sauce for dipping. They are also excellent in soups, salads, and savory side dishes.

Stuffed Artichokes

Stuffed artichokes are a fabulous first course, and the broth that you get from slowly baking them is delicious. Be sure to serve these with lots of crusty bread to savor every last drop.
makes 6 servings
6 large artichokes
2 lemons, halved
6 garlic cloves, chopped, divided
1 cup chopped fresh flat-leaf parsley
1 tablespoon kosher salt
2 cups fine dry breadcrumbs
1 cup freshly grated Parmesan cheese
4 tablespoons (½ stick) butter, melted
1 cup dry white wine
3 cups chicken or vegetable broth
2 tablespoons olive oil


1. Preheat the oven to 300°F.
2. Cut off the artichoke stems, cutting them flush with the bottom. Do not discard the stems. With a sharp knife, cut an X into the base of each artichoke. Slice off about 1 inch from the top of each artichoke and discard. Rub the cut ends with the lemon halves to prevent discoloring. With kitchen shears, snip the tops of each leaf to remove the thorny tips.
3. In the bowl of a food processor or blender, add 4 cloves of the chopped garlic, parsley, and salt and pulse until very fine. Transfer to a mixing bowl and mix with the breadcrumbs and Parmesan cheese. Pour the melted butter over all and mix well.
4. Gently pry open the artichoke leaves just to loosen a bit. Holding the stem end in the palm of your hand, pile on the stuffing, tapping lightly to fill between the leaves. Arrange the artichokes in a roasting pan stem side down so that they fit snugly in the pan. Pour in the wine, broth, the remaining 2 tablespoons chopped garlic, and enough water to reach about 1 inch up the side of the roasting pan.
5. Peel the reserved stems with a vegetable peeler and cut them into ½-inch slices; add to the roasting pan. Drizzle the olive oil over all and cover the pan with a lid or aluminum foil. Put the pan in the oven and bake the artichokes for about 3 hours, or until a knife easily penetrates the stem end.
6. Remove from the oven, spoon a bit of the broth and some stem slices into six soup plates and top with the artichokes. The artichokes can be served hot or at room temperature, but the broth, which can be reheated, must be hot.

Steamed Artichokes with Dipping Sauces

This is another good way to serve artichokes: Prepare them as you would the stuffed artichokes, but omit the stuffing. Fill a roasting pan with three parts water and one part broth. Cover and bake for about three hours.
Here are three different dipping sauces for steamed artichokes. They are fantastic for serving with artichokes, individually or together.

Hollandaise Sauce

The trick to this sauce is cooking it very slowly so the yolks don't cook too quickly; otherwise the mixture will become lumpy.
makes 4 to 6 servings
2 tablespoons fresh lemon juice
4 egg yolks
2 sticks (½ pound) unsalted butter, divided
Whisk together the lemon juice and egg yolks in a small saucepan. Add 1 stick of the butter and cook over medium heat, stirring until the butter is completely melted. Add the remaining stick of butter and stir constantly until the butter has melted and the sauce is thick. Serve in individual dipping bowls.
Artichokes are an excellent source of vitamin C, folate, and a significant source of magnesium and potassium.
A medium boiled artichoke provides:
calories64
protein3.5g
carbohydrate14.3g
fiber6.9g
fat0.19g
vitamin C15%
vitamin K22%
folate27%
niacin7%
magnesium13%
manganese13%
potassium10%
phosphorous9%

Avocado-Lime Butter

Try this smooth and creamy dip with steamed artichokes as well as other steamed or raw vegetables.
makes 4 to 6 servings
2 avocados, peeled, pitted, and cut into chunks
1 stick (¼ pound) salted butter, softened
Juice of ½ lime
Dash of green Tabasco sauce
Put the avocados, butter, lime juice, and Tabasco sauce in a blender and process until creamy. Serve in individual dipping bowls.

Bagna Cauda

Bagna cauda originated from the Piedmont region of Northern Italy. The deep flavor of anchovies, garlic, and good olive oil make a perfect warm dipping sauce for steamed artichokes and crusty bread.
makes 4 to 6 servings
6 to 8 flat anchovies packed in oil
½ cup extra-virgin olive oil, divided
4 garlic cloves, finely minced
Hot pepper flakes
1 stick (¼ pound) unsalted butter
½ cup chopped fresh flat-leaf parsley
In a medium saucepan, heat the anchovies with 2 tablespoons of the olive oil until very hot, smashing the anchovies with the back of a wooden spoon until they have dissolved into the oil. Add the garlic and hot pepper flakes to taste and cook until the garlic begins to simmer but not brown. Add the butter, the remaining 6 tablespoons olive oil, and the parsley and cook until the butter has melted. Serve immediately in individual dipping bowls.

Sautéed Baby Artichokes and Potatoes

You will find baby artichokes at their peak in the springtime. Although it's a labor of love to slice and remove the choke, it's well worth the effort. This is a fantastic side dish for roasted leg of lamb or pork loin. Mmmmmm.
makes 4 to 6 servings
1 lemon, cut in half crosswise
1½ pounds small red potatoes
16 baby artichokes
¼ cup olive oil
3 or 4 garlic cloves, minced
¼ teaspoon red pepper flakes
1 to 2 cups vegetable broth
Kosher salt
1. Fill a large bowl with cold water and squeeze half the lemon into it.
2. Rinse the potatoes, cut into quarters, and set aside.
3. Remove and discard the tough outer leaves of the artichokes down to the light green leaves. Trim the bottoms and the sides where the outer leaves were removed and slice the artichokes in half lengthwise. If they seem large, cut them into quarters. (They should be about the same size as the quartered potatoes.) Remove any purple leaves with a small paring knife. Rinse the chokes in cold water, rub each cut side with the remaining lemon half, and transfer them to the bowl of lemon water.
4. Heat the oil over medium heat in a large pot. Add the garlic and red pepper flakes and sauté for 1 minute. Drain the artichokes. Add the artichokes and potatoes to the pot and stir together for about 2 minutes to evenly coat the vegetables with the olive oil. Add 1 cup of the broth and bring to a simmer. Cover and cook over low heat for about 30 minutes, until the potatoes are cooked but not mushy. Check the pot occasionally, adding more broth if necessary. Add salt to taste and transfer to a serving dish. Drizzle with a bit of olive oil and serve at once.


asparagus
What does the word asparagus mean? The word asparg has either Greek or Persian roots and means "sprout," which makes sense because it was one of the world's earliest harvestable fresh vegetables.
Although asparagus now appears in markets year-round, the best asparagus is available from early April until late June. When buying asparagus, the rule is the fresher the better, as with all vegetables. Look for spears with straight firm stalks, uniform green color, and compact pointed tips with a lavender tint. Ideally, asparagus should be prepared and eaten on the same day it is purchased. However, it can be wrapped and stored, unwashed and uncut, in a plastic bag in the refrigerator for three to four days.
Fresh asparagus is so elegant and can be cooked and served in a number of delicious ways. Try it in a salad with shiitake mushrooms or with celery and walnuts; steamed with garden-fresh chives and mint; in a lighter-than-air frittata; or roasted and stirred into a bold-flavored risotto.

Roasted Asparagus and Shiitake Mushroom Salad

When asparagus is roasted it takes on a pungent, almost nutty flavor. And when it's combined with warm shiitake mushrooms the flavor is unbeatable. This salad is delicious as a first course or as a side with grilled pork, lamb, or steak.
makes 6 servings
3 tablespoons extra-virgin olive oil, divided
2 pounds asparagus, ends trimmed
Kosher salt
2 garlic cloves, thinly sliced
2 cups shiitake mushrooms, thinly sliced
1 tablespoon fresh lemon juice
Freshly ground black pepper
4 cups mixed salad greens
1. Preheat the oven to 350°F.
2. Brush a baking sheet with 1 tablespoon of the oil. Put the asparagus on the baking sheet, season to taste with salt, and toss to coat. Spread the asparagus in an even layer and roast until tender and lightly browned, 20 to 30 minutes.
3. Heat the remaining 2 tablespoons oil in a large skillet or sauté pan. Add the garlic and cook over medium heat until softened, about 2 minutes. Add the mushrooms, lemon juice, and salt and pepper to taste and cook until browned, 5 to 7 minutes. Remove from the heat.
4. Just before serving, add the roasted asparagus to the mushrooms and reheat over medium-high heat, tossing constantly, until heated through, 1 to 2 minutes. Taste and adjust the seasonings, if necessary.
5. Arrange the salad greens on a platter and spoon the asparagus mixture over them. Add a bit more lemon juice, if desired, and serve at once.

Asparagus, Tomato, and Pecan Salad

This salad, made with tender asparagus and garden-fresh cherry tomatoes, tastes great with garlicky Mustard-Dill Vinaigrette. We like to make a generous amount of the vinaigrette and keep it on hand to drizzle over grilled vegetables, roasted potatoes, and fresh salad greens.
makes 1 cup vinaigrette, 6 servings salad
mustard-dill vinaigrette:
1 garlic clove, sliced
½ small yellow onion, coarsely chopped
¼ cup chopped fresh dill
1 tablespoon Dijon mustard
¼ cup balsamic vinegar
1/3 cup water
½ cup safflower oil
Kosher salt and freshly ground black pepper
 
salad:
2½ to 3 pounds slender fresh asparagus
6 cups fresh mixed salad greens
1 cup cherry tomatoes, halved
½ cup pecan halves, lightly toasted
1. To make the vinaigrette, put the garlic, onion, dill, mustard, vinegar, water, oil, and salt and pepper to taste in a food processor fitted with a steel blade or a blender and blend until smooth. The vinaigrette will keep, covered, in the refrigerator for up to 1 week.
2. To make the salad, cut or break off the tough ends of the asparagus stalks and discard.
3. In a large saucepan or skillet, bring enough lightly salted water to cover the asparagus to a boil over high heat. Add the asparagus, reduce the heat to a simmer, and cook just until tender, 3 to 5 minutes. Drain well. Chill the asparagus for 1 hour.
4. In a serving bowl, toss the greens and tomatoes together with about ¼ cup of the vinaigrette. Toss the asparagus in a separate bowl with about 2 tablespoons of the vinaigrette, then place over the salad greens. Sprinkle with the toasted pecans and add a bit more vinaigrette, if desired. (You will have about ½ cup of the vinaigrette left over.) Serve at once.

Asparagus, Celery, and Walnut Salad

Walnut oil has a delicate, nutty flavor and tastes wonderful in a salad of fresh asparagus and chopped celery. Be sure to use the freshest, crunchiest celery you can find.
makes 6 servings
salad:
2½ pounds slender fresh asparagus
3 celery ribs, cut into ¼-inch pieces on the diagonal
 
walnut dressing:
6 tablespoons walnut oil
2 tablespoons fresh lemon juice
2 tablespoons finely minced red onion
Kosher salt and freshly ground black pepper
3 tablespoons chopped walnuts
1.

Genre:

On Sale
May 3, 2011
Page Count
240 pages
Publisher
Running Press
ISBN-13
9780762442324

Barbara Scott-Goodman

About the Author

Barbara Scott-Goodman is an author, art director, and book designer who has produced a number of cookbooks including The Ski Country Cookbook, The Beach House Cookbook, and The Diabetes Menu Cookbook, which was nominated for a James Beard Award in 2007. Her most recent book with Running Press was Eat Greens. She lives in Brooklyn, New York.

Learn more about this author